Manual del usuario de anonym.plus
Descripción general
anonym.plus Desktop es una aplicación segura de anonimización de documentos que detecta y elimina información de identificación personal (PII) de documentos e imágenes. Utiliza un motor de detección de PII local (Presidio) y una bóveda cifrada para almacenamiento seguro.
Míralo en acción: Ve nuestros 36 videos demostrativos que cubren todas las características en 4 idiomas.
Beneficios principales
- Motor de detección de PII local — no se requiere nube para el análisis
- Cifrado de grado militar (AES-256-GCM) para datos almacenados
- Cifrado reversible — cifra PII, comparte documentos, descifra después
- Soporte para PDF, DOCX, XLSX, TXT, CSV, JSON, XML e imágenes (PNG, JPG, BMP, TIFF)
- Más de 200 tipos de entidades PII en todas las regiones globales
- 121 preajustes de detección integrados (GDPR, HIPAA, Financiero, Regional, etc.)
- Detección de entidades personalizadas mediante patrones regex
- 48 idiomas soportados
- Procesamiento por lotes con manejo de archivos en paralelo
- Multiplataforma: Windows, macOS, Linux
Requisitos del sistema
| Plataforma | Requisito |
|---|---|
| Windows | Windows 10 o posterior (x64) |
| macOS | macOS 10.15 (Catalina) o posterior |
| Linux | Ubuntu 20.04+, Debian 11+, o equivalente |
| Memoria | 4 GB RAM mínimo, 8 GB recomendado |
| Almacenamiento | 500 MB para la instalación |
Instalación
Windows
| Formato | Instrucciones |
|---|---|
| .exe (NSIS) | Descarga y ejecuta el instalador .exe para instalación estándar |
| .msi | Descarga y ejecuta el instalador .msi para implementación empresarial |
| .zip (Portátil) | Descarga el .zip portátil y extrae — no se requiere instalación |
macOS
Descarga el archivo .dmg, abrelo y arrastra la aplicación a Aplicaciones.
Linux
| Formato | Instrucciones |
|---|---|
| .deb | sudo dpkg -i anonym.plus_*.deb |
| .AppImage | Hazlo ejecutable: chmod +x, luego ejecuta |
Primer lanzamiento
Cuando abres anonym.plus por primera vez, un asistente de configuración guiada te lleva a través de cinco pasos: elegir cómo empezar, crear tu bóveda segura, configurar un PIN, activar tu licencia y seleccionar una carpeta de salida. Cada paso se explica a continuación con capturas de pantalla.
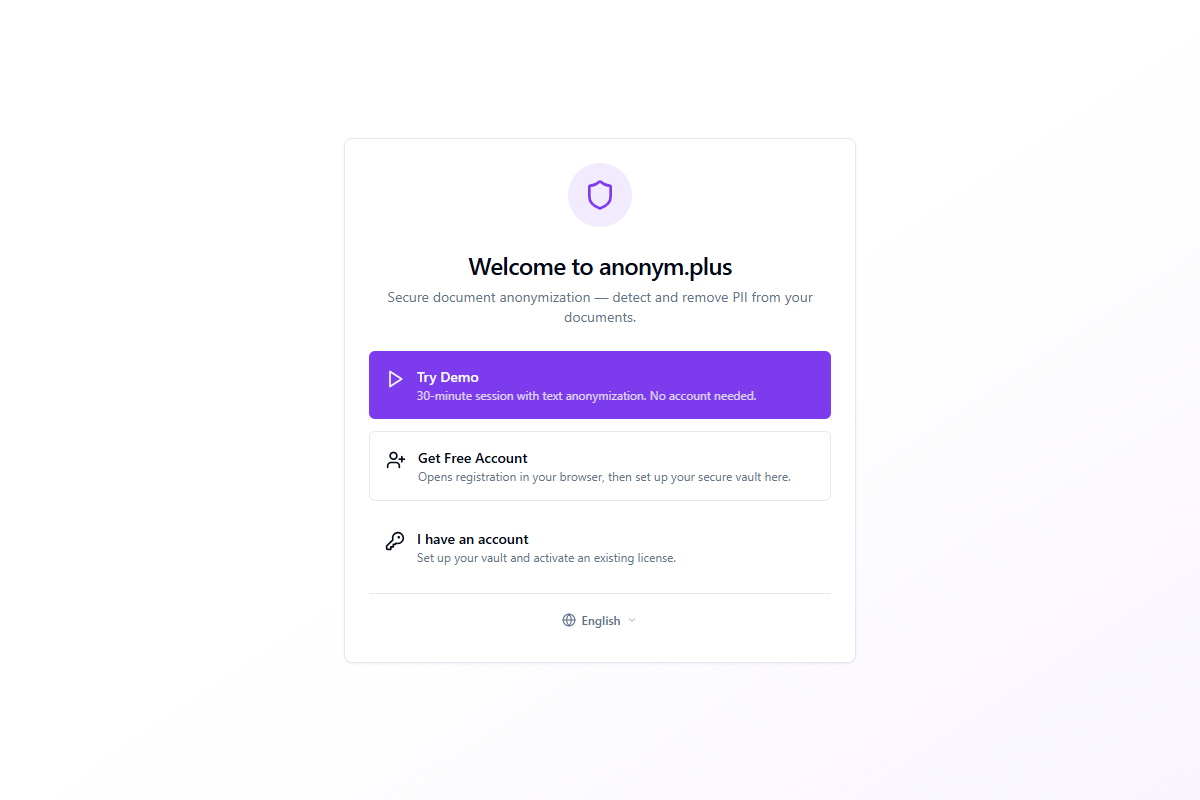
Paso 1: Pantalla de bienvenida
La pantalla de bienvenida presenta tres opciones para empezar:
| Opción | Descripción |
|---|---|
| Probar demostración | Inicia una sesión de demostración de 30 minutos con anonimización de texto. No se requiere cuenta — excelente para una prueba rápida. |
| Obtener cuenta gratuita | Abre el registro en tu navegador, luego regresa para configurar tu bóveda segura. |
| Ya tengo una cuenta | Configura tu bóveda y activa una licencia existente. |
Un selector de idioma en la parte inferior te permite cambiar el idioma de la interfaz antes de continuar. Hay 48 idiomas disponibles.
Paso 2: Frase de recuperación y creación de bóveda
Después de elegir "Obtener cuenta gratuita" o "Ya tengo una cuenta", la aplicación genera una bóveda segura protegida por una frase de recuperación BIP39 de 24 palabras. Esta frase es la clave maestra de tu bóveda.
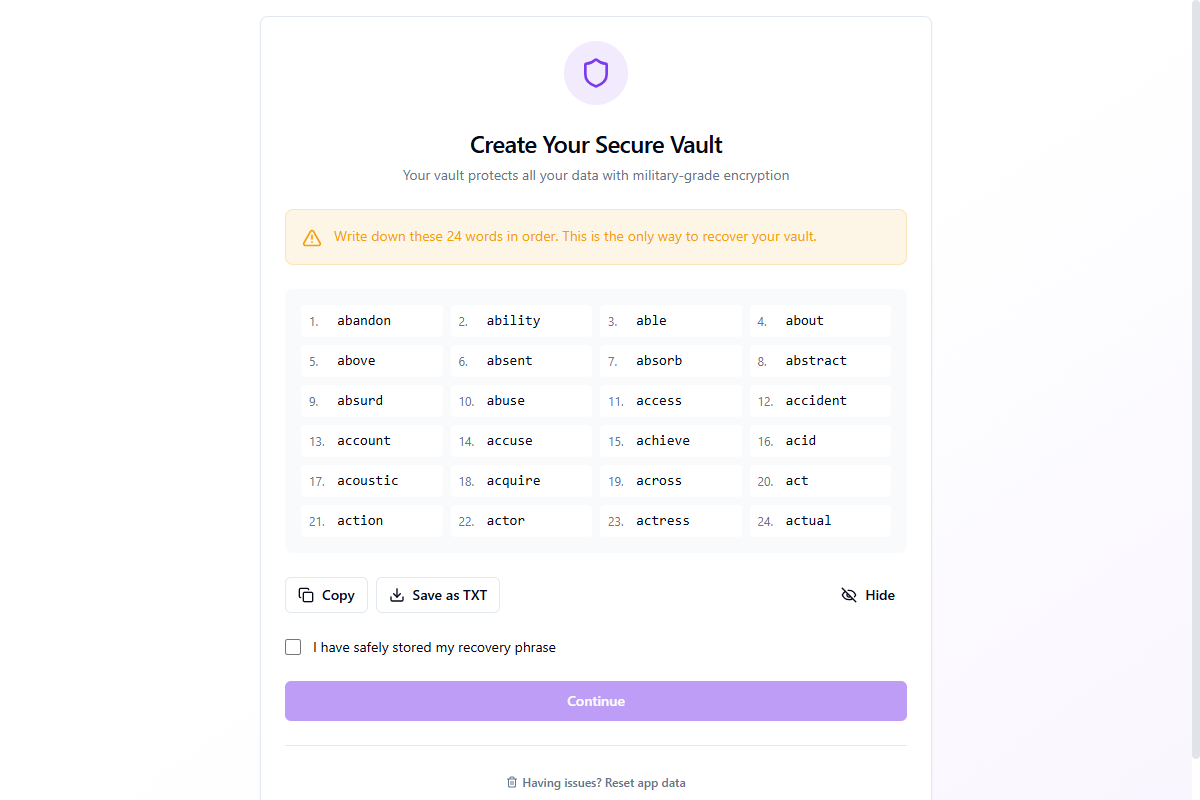
Puedes Copiar la frase al portapapeles (borrado automático después de 30 segundos) o Guardar como TXT en un archivo. Haz clic en Ocultar para ocultar las palabras por privacidad. Debes marcar "He almacenado mi frase de recuperación de forma segura" antes de continuar.
Verifica tu frase
Para confirmar que guardaste la frase correctamente, la aplicación te pide que ingreses 3 palabras seleccionadas al azar por su número de posición.
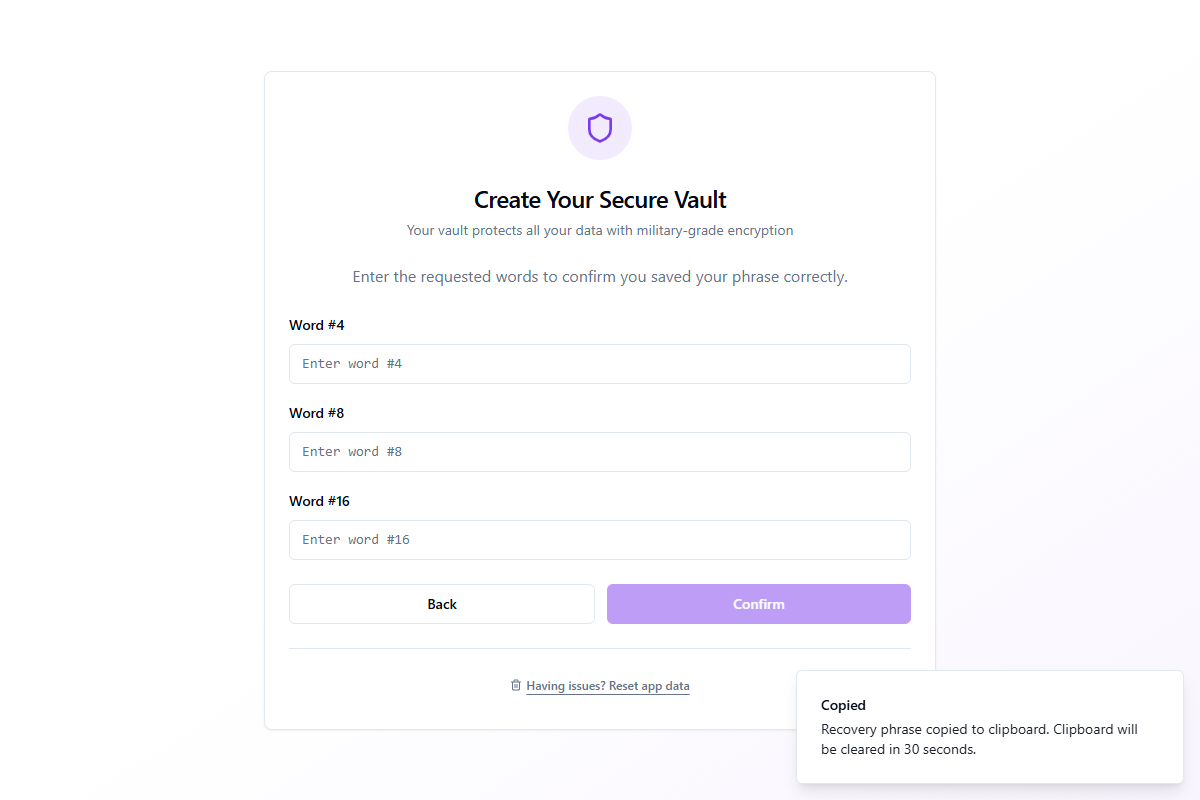
Escribe las palabras correctas y haz clic en Confirmar. Si alguna palabra es incorrecta, se te pedirá que lo intentes de nuevo. Una vez verificado, se crea la bóveda y procedes a la configuración del PIN.
Paso 3: Configuración de PIN
After vault creation, you can set a 4–8 digit PIN for quick daily access. The PIN lets you unlock the app without typing all 24 words each time.
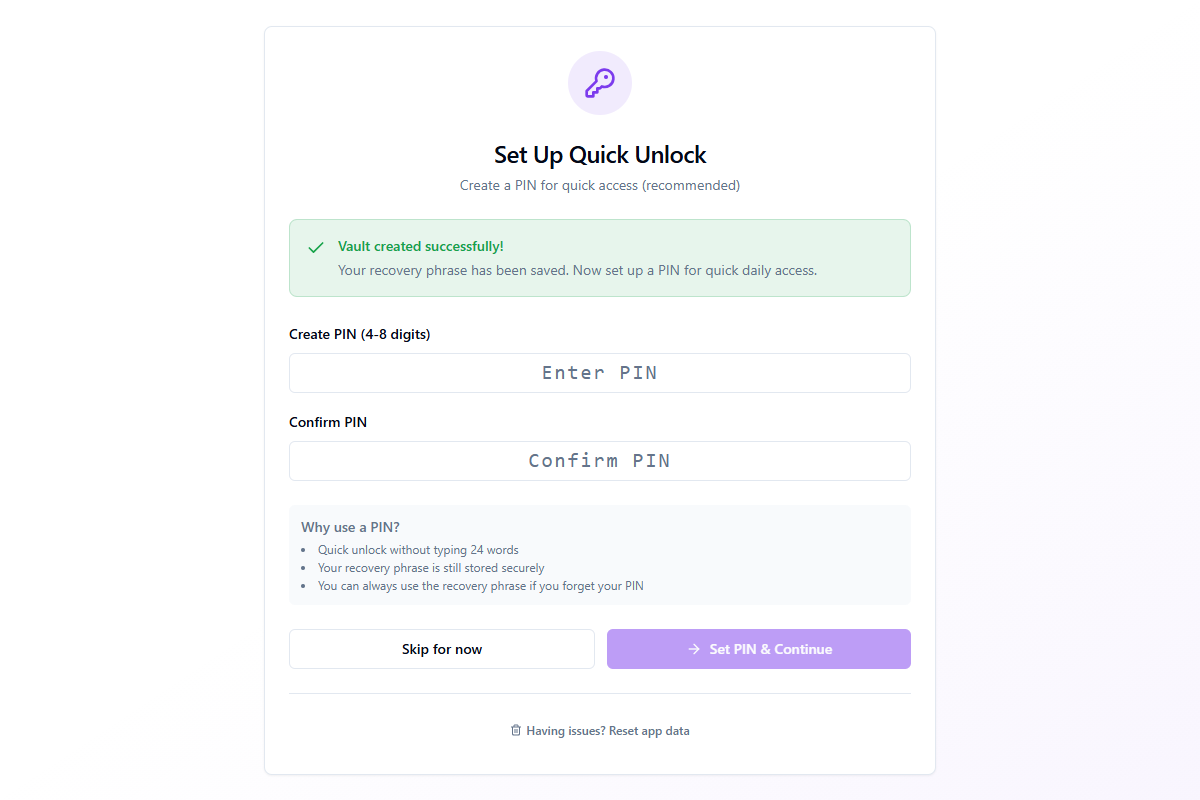
- Quick unlock without typing your full 24-word recovery phrase
- Your recovery phrase remains stored securely in the vault
- You can always use the recovery phrase if you forget your PIN
Enter your PIN in both fields and click Set PIN & Continue. You can also click Skip for now to set a PIN later in Settings → Security.
Paso 4: Activación de licencia
With your vault ready, the final security step is activating your anonym.plus license to unlock all features.
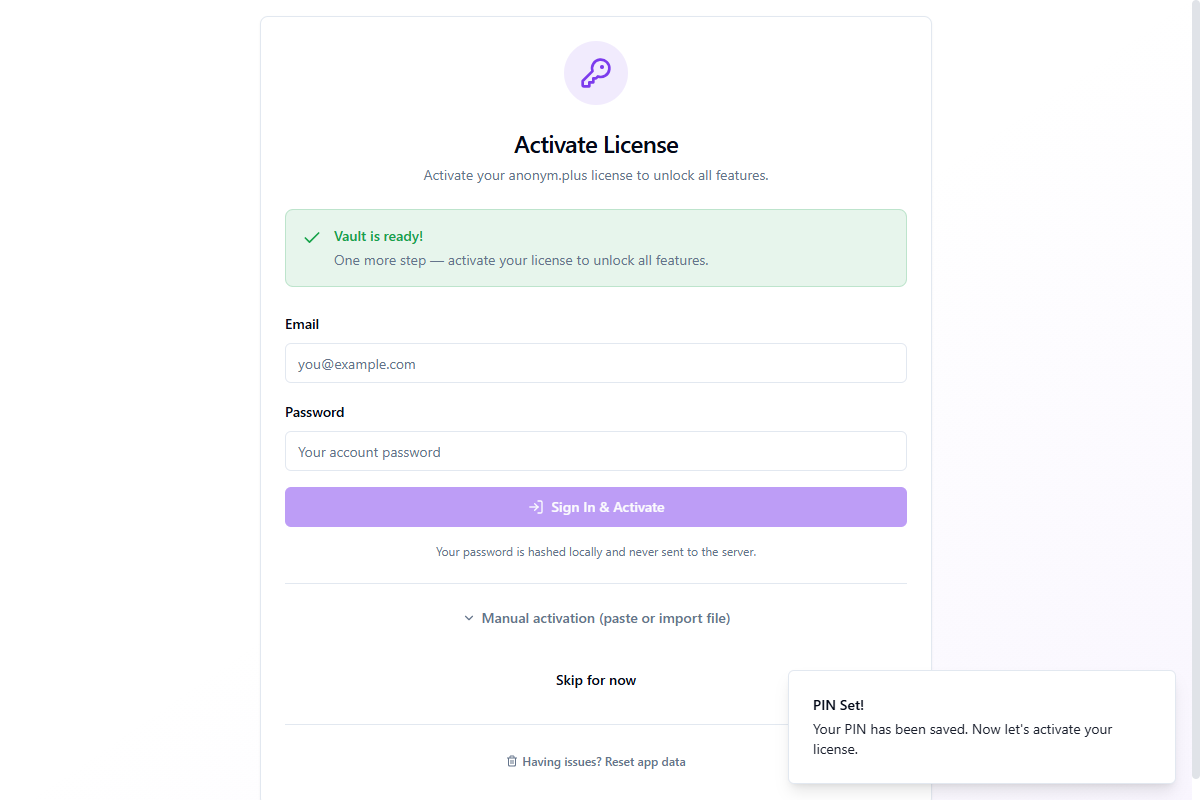
Enter your email and password, then click Sign In & Activate. Your password is hashed locally and never sent to the server in plain text.
Manual Activation
If sign-in doesn't work (e.g., behind a corporate firewall), expand Manual activation (paste or import file) for alternative methods:
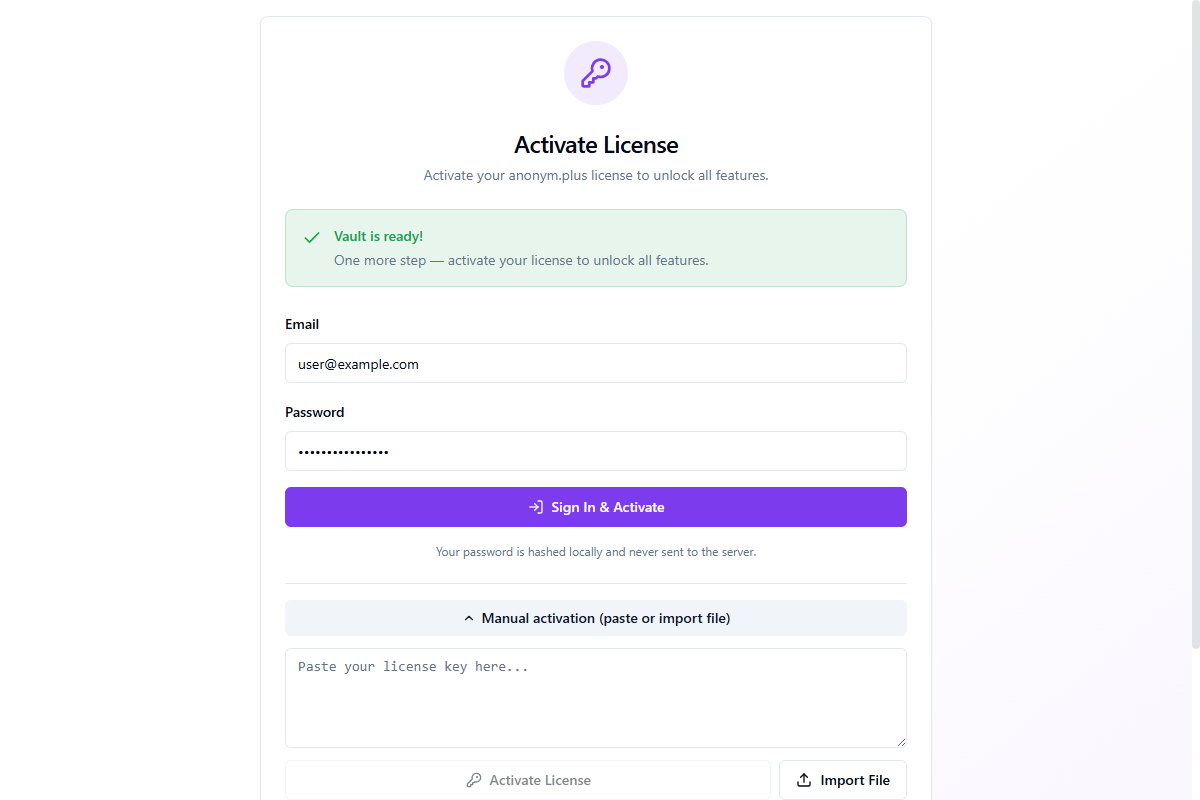
- Pegar license key — paste the JSON license key from your account page
- Import File — import a
.jsonlicense file downloaded from your account
You can also click Skip for now to activate later via Settings → Account.
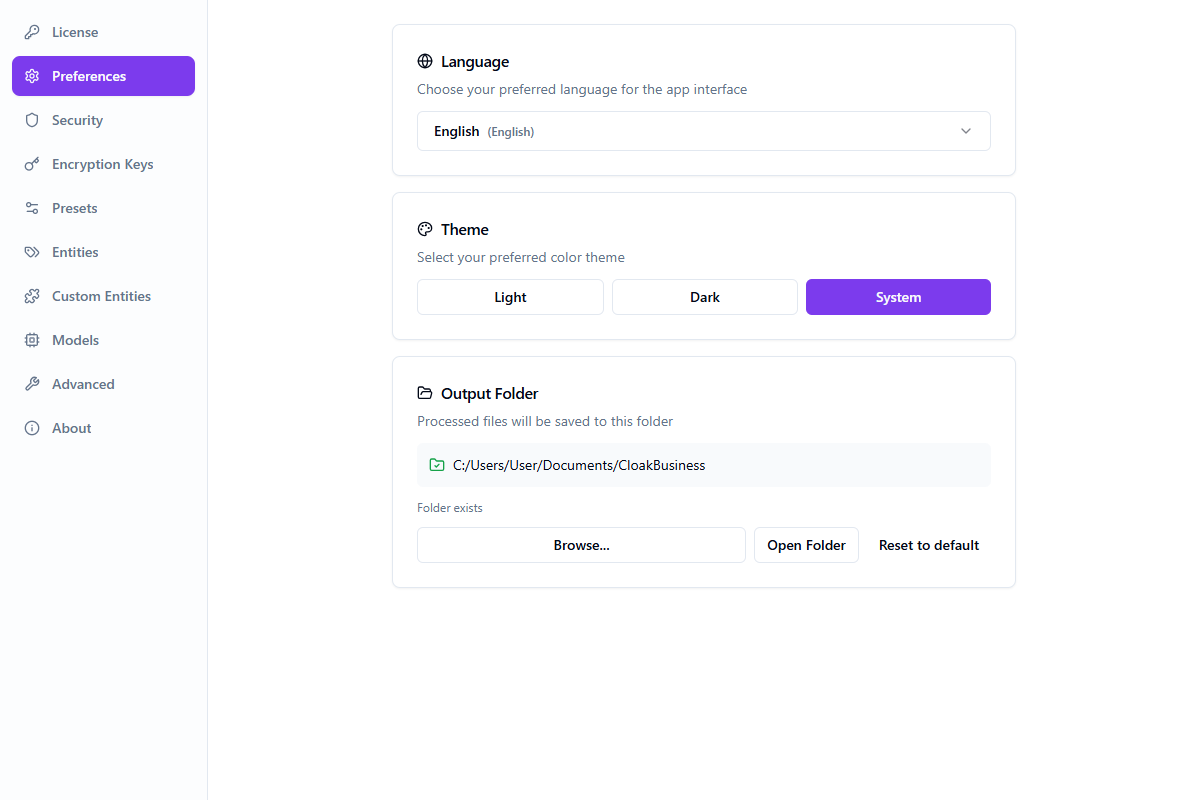
Paso 5: Carpeta de salida
The last step lets you choose where anonymized documents will be saved.

The default folder is Documents/CloakBusiness. Click Browse... to select a different location. You can change this later in Settings → Preferences.
Click Finish Setup to complete the wizard and enter the main application.
Descripción general de la interfaz principal
After setup, the main interface is organized into several key areas:
Barra de encabezado
- Mode Toggle — switch between Anonymize and Deanonymize modes
- Preset Selector — quick-switch between detection presets
- History — open the processing history panel
- Configuración — access app settings (Ctrl + ,)
- Help — open the in-app help panel (F1)
- Bug Report — submit feedback with diagnostic info
Área de procesamiento
- File Dropzone — drag and drop files or click to browse. Supports single files and batch uploads.
- Document / Image Tab — toggle between document text anonymization and image redaction modes
- Results Panel — shows detected entities grouped by type with accept/reject controls
- Output Options — choose output format and save location
Barra de estado
The bottom of the window shows engine status (running/stopped) and the currently active encryption key.
Anonimización de documentos
The core feature — detect and anonymize personal information in documents.
Flujo de trabajo
Drag and drop files onto the dropzone or click to browse
Choose a detection preset that matches your use case (GDPR, HIPAA, Financial, etc.)
Click 'Start Analysis' to extract text and detect entities
Review detected entities grouped by type (names, emails, phones, etc.)
Select output format (same, PDF, DOCX, TXT) and save option
Click 'Save as New File' or 'Replace Original' to complete
Paso a paso: Anonimización de texto con Reemplazo
Anonymize text by replacing personal data with type labels like <PERSON> and <EMAIL_ADDRESS>. The original values are permanently removed.
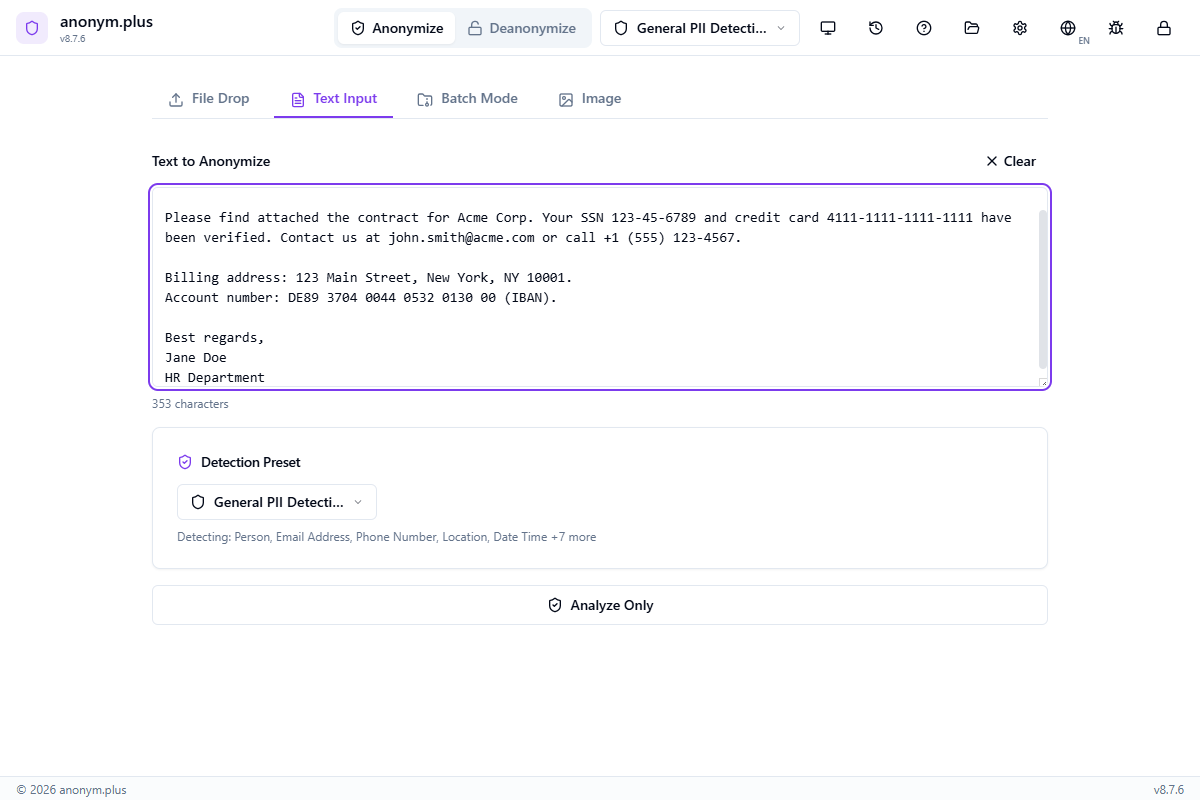
Enter or paste a document containing personal information — names, email addresses, phone numbers, physical addresses, Social Security Numbers, credit card numbers, IBANs, and organization names.
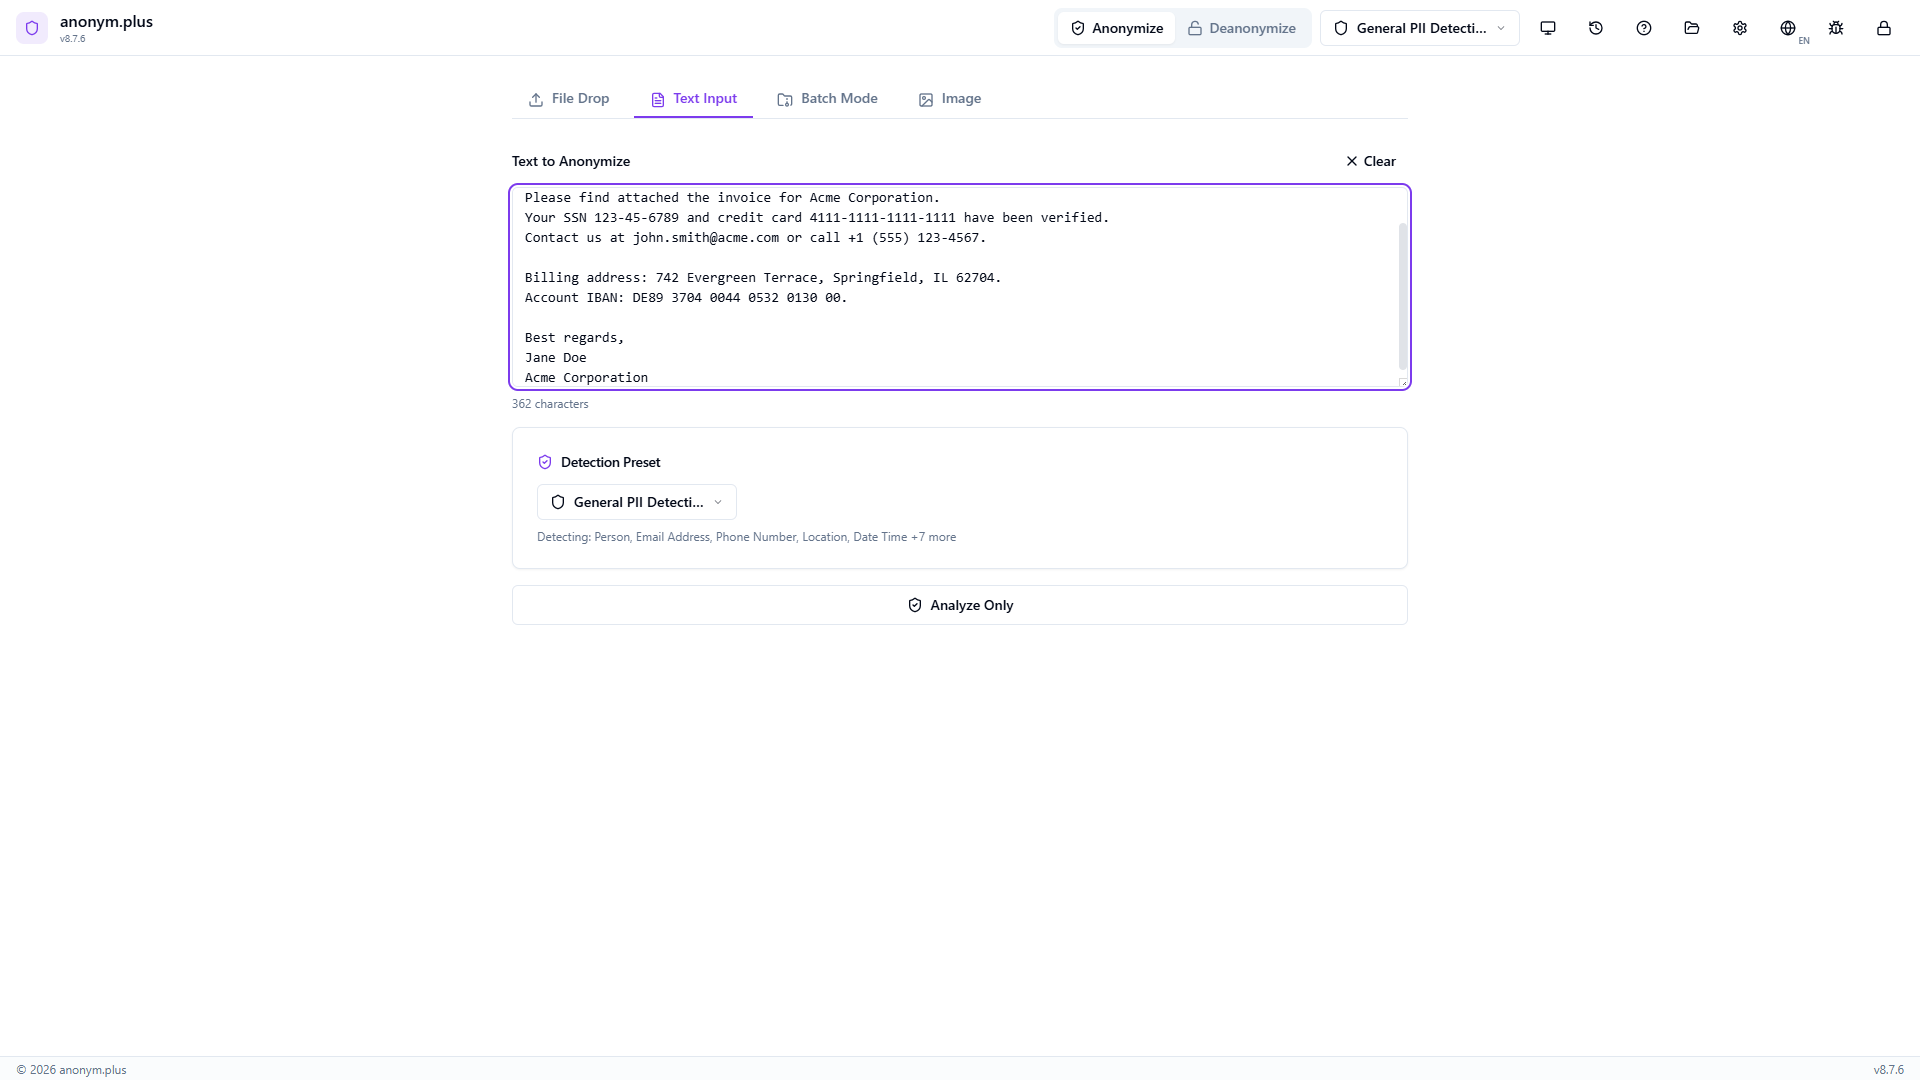
Choose “General PII Detection” from the preset dropdown. This preset detects Person, Email Address, Phone Number, Location, Date Time, and 7 additional entity types using the English NER model.
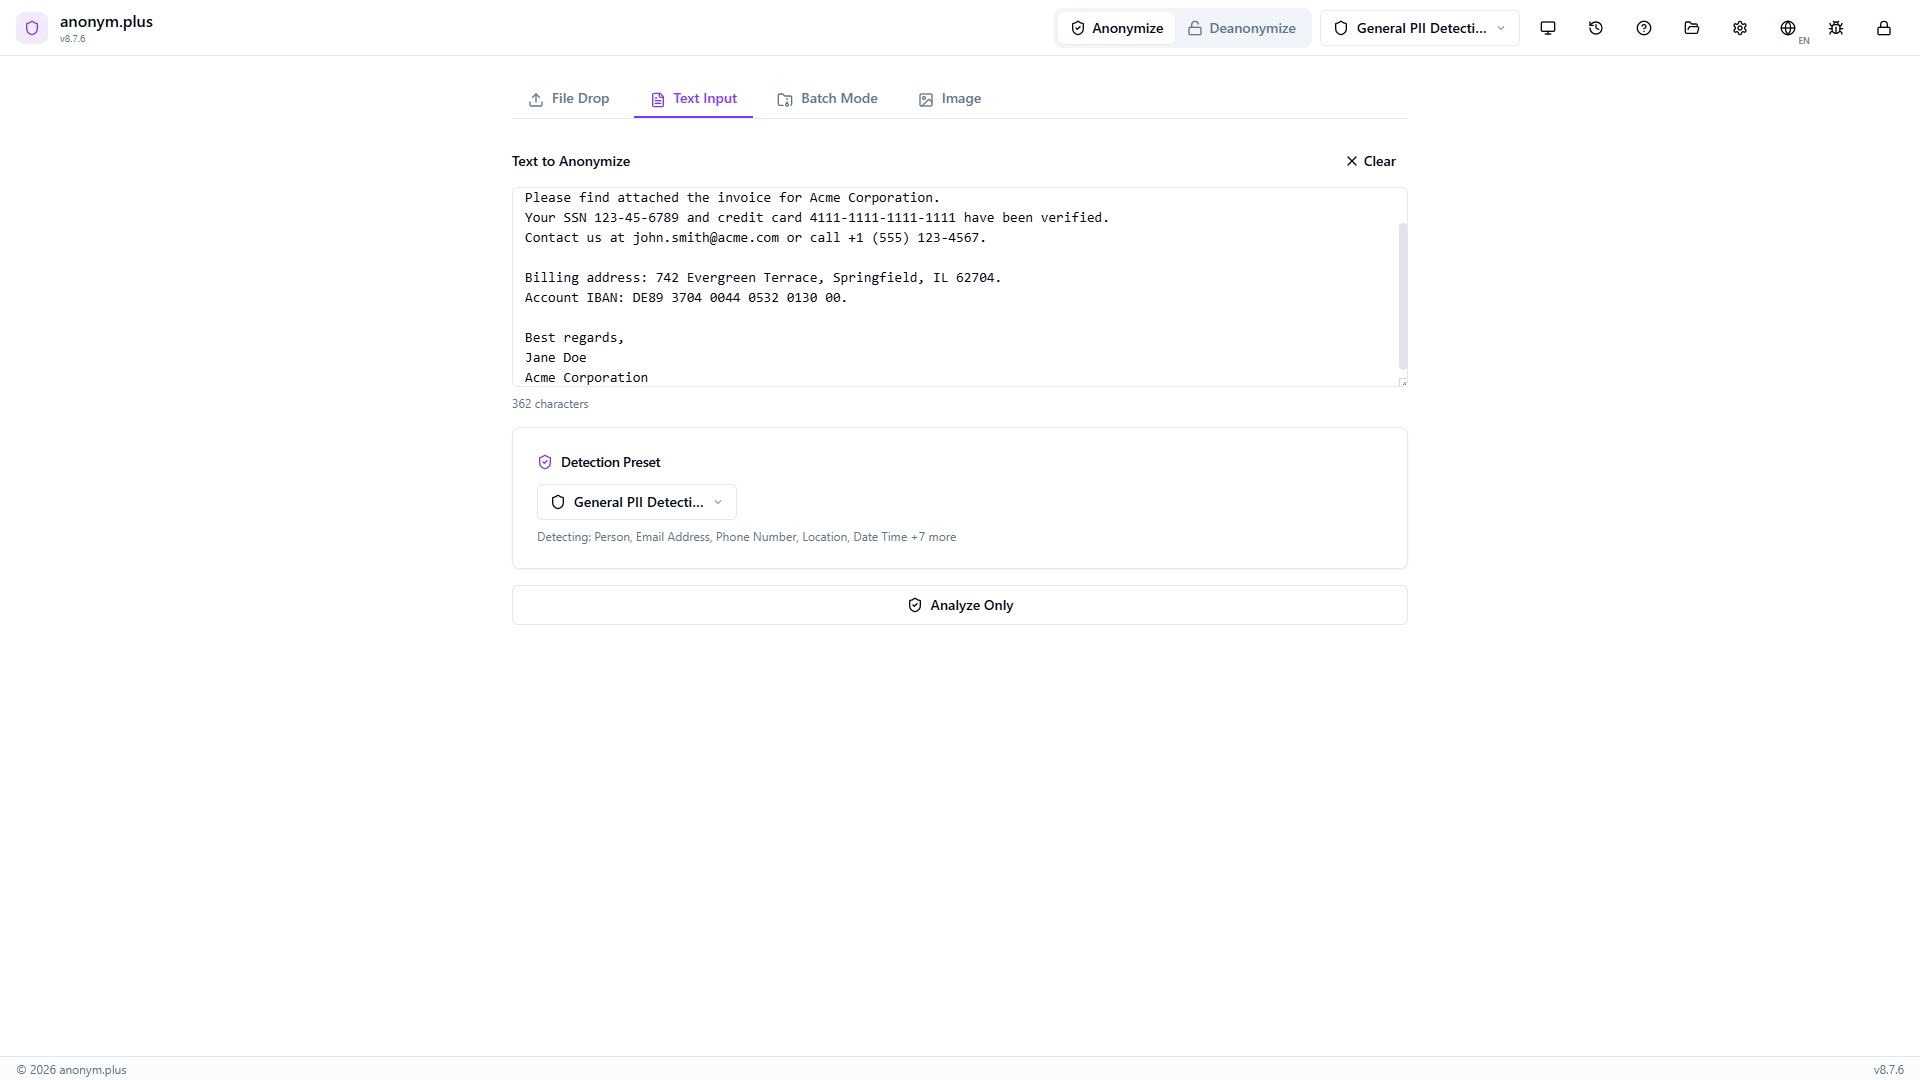
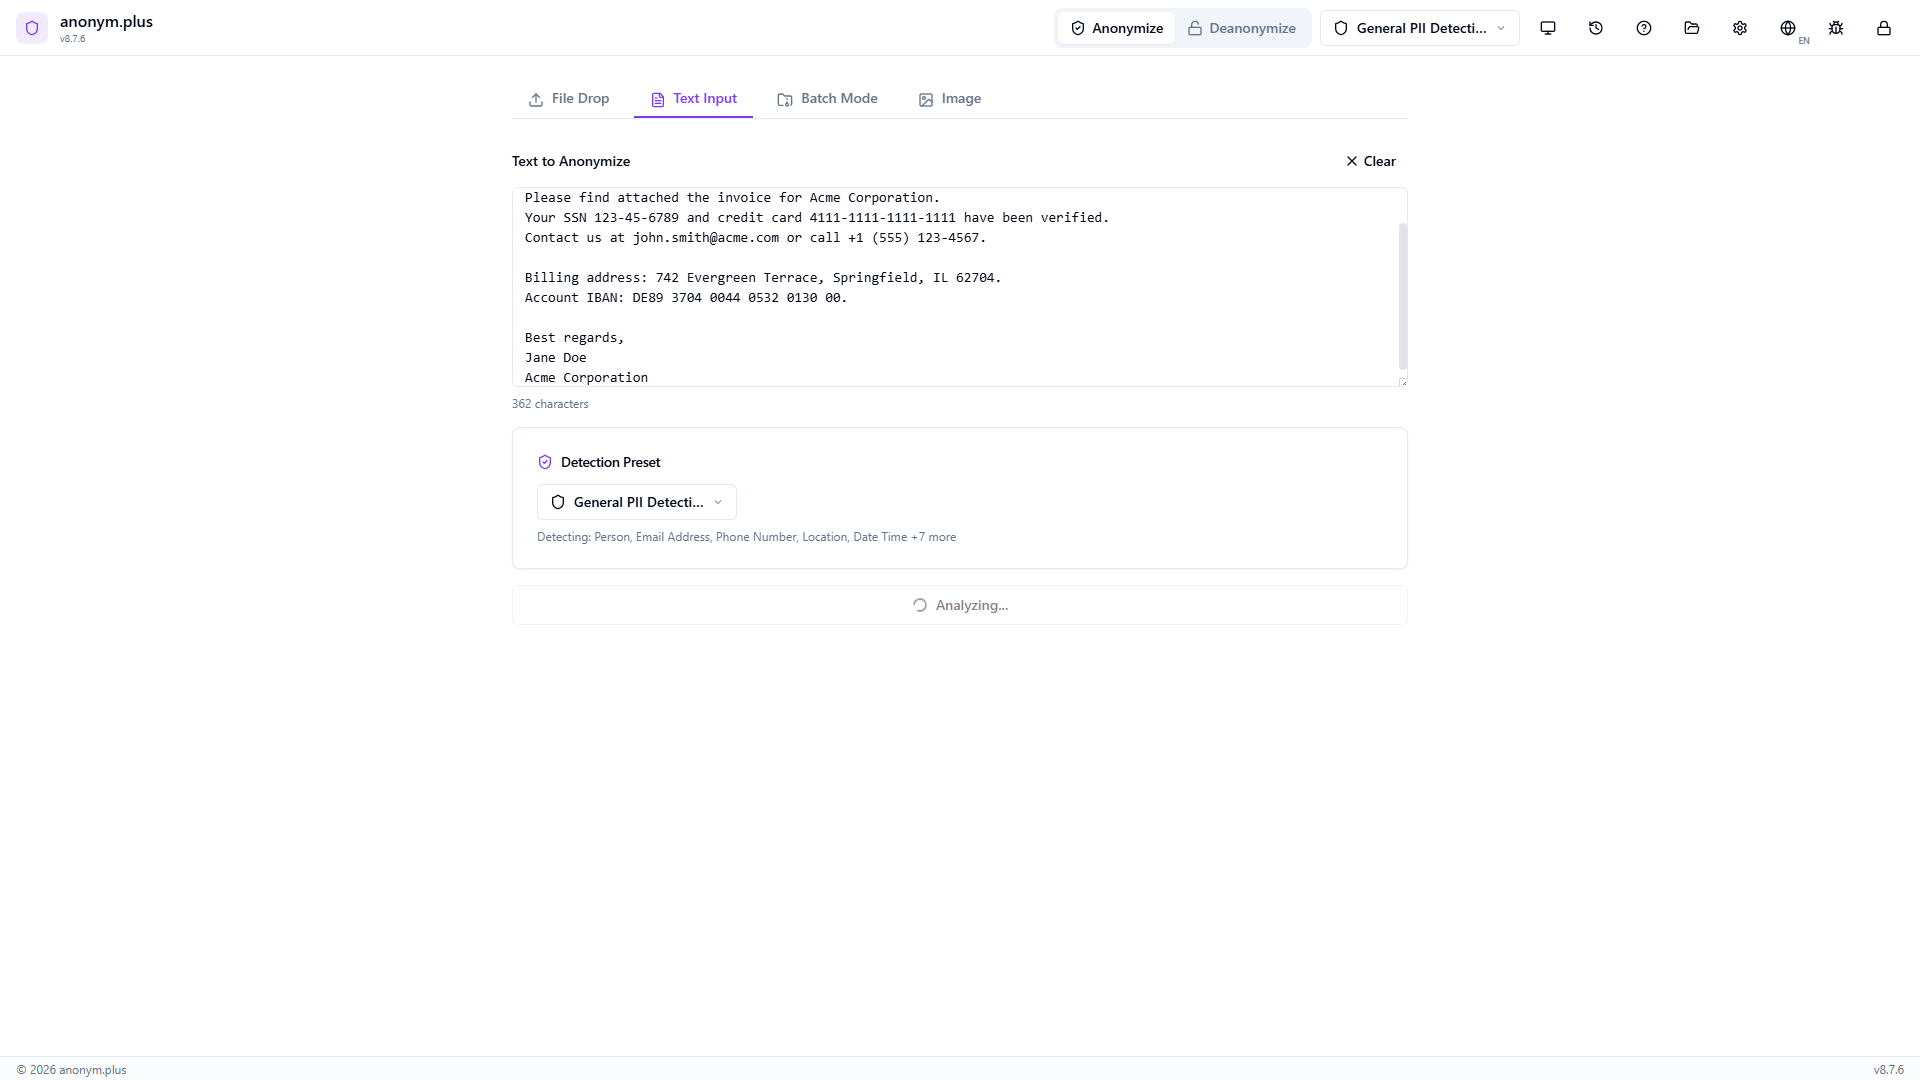
Click “Analyze Only” to run the Named Entity Recognition pipeline. A loading spinner shows while the text is scanned for PII.

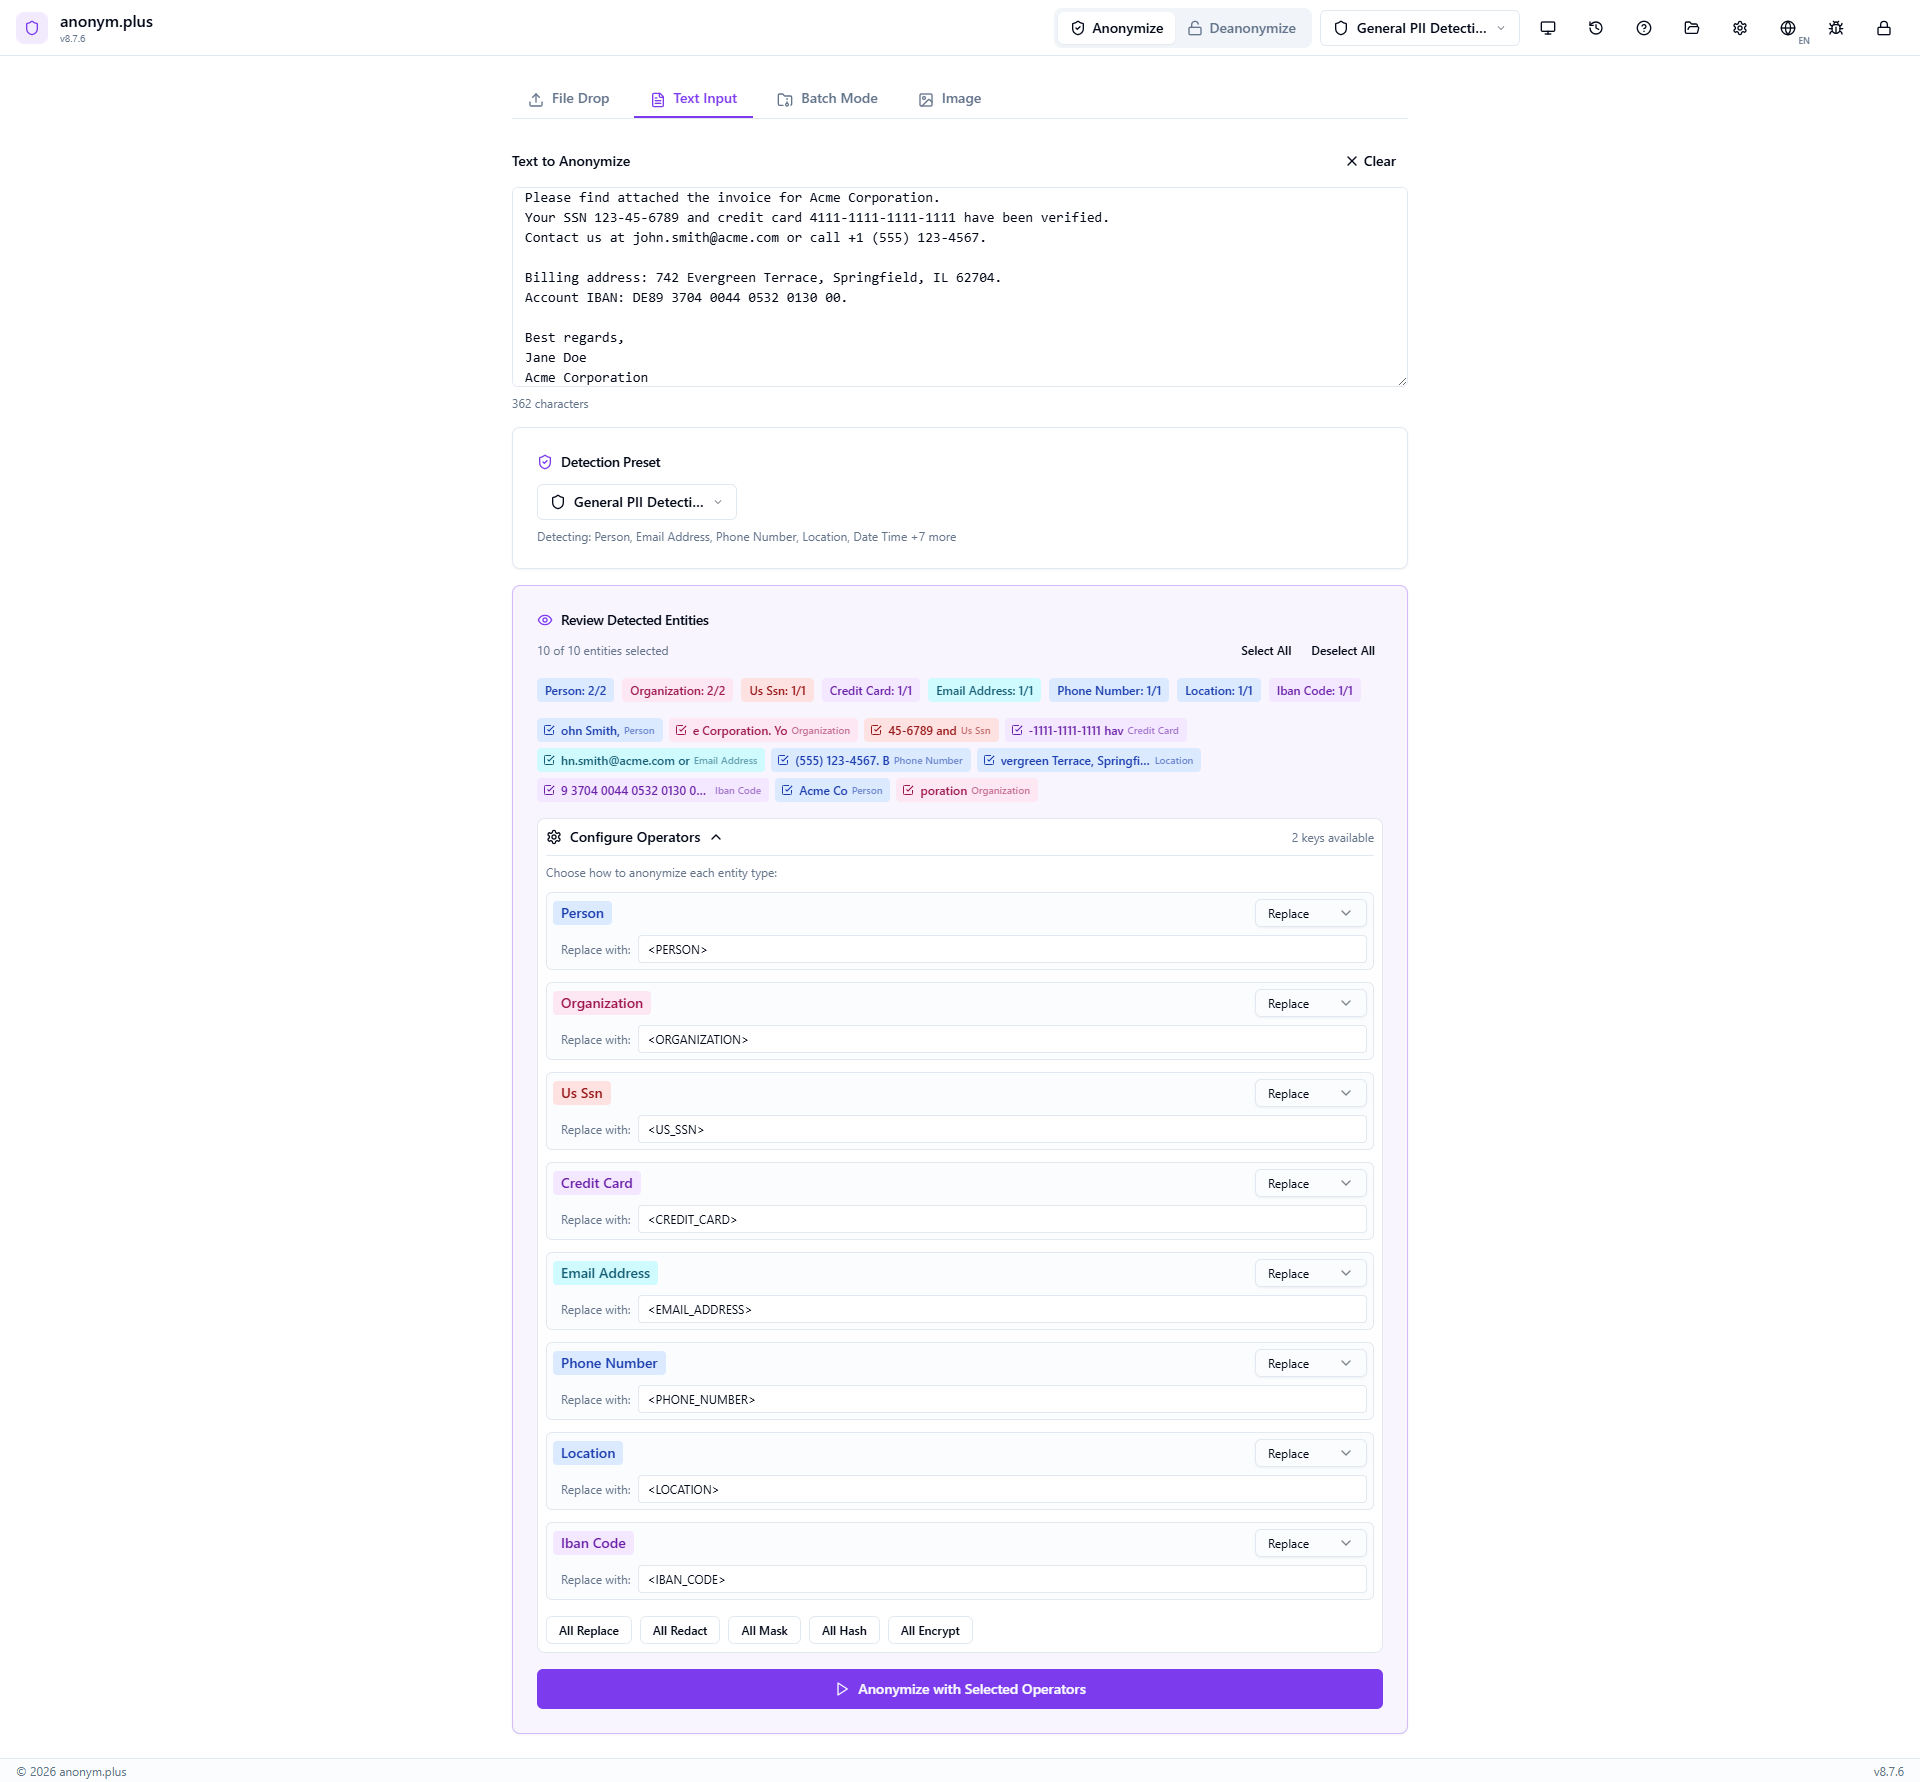
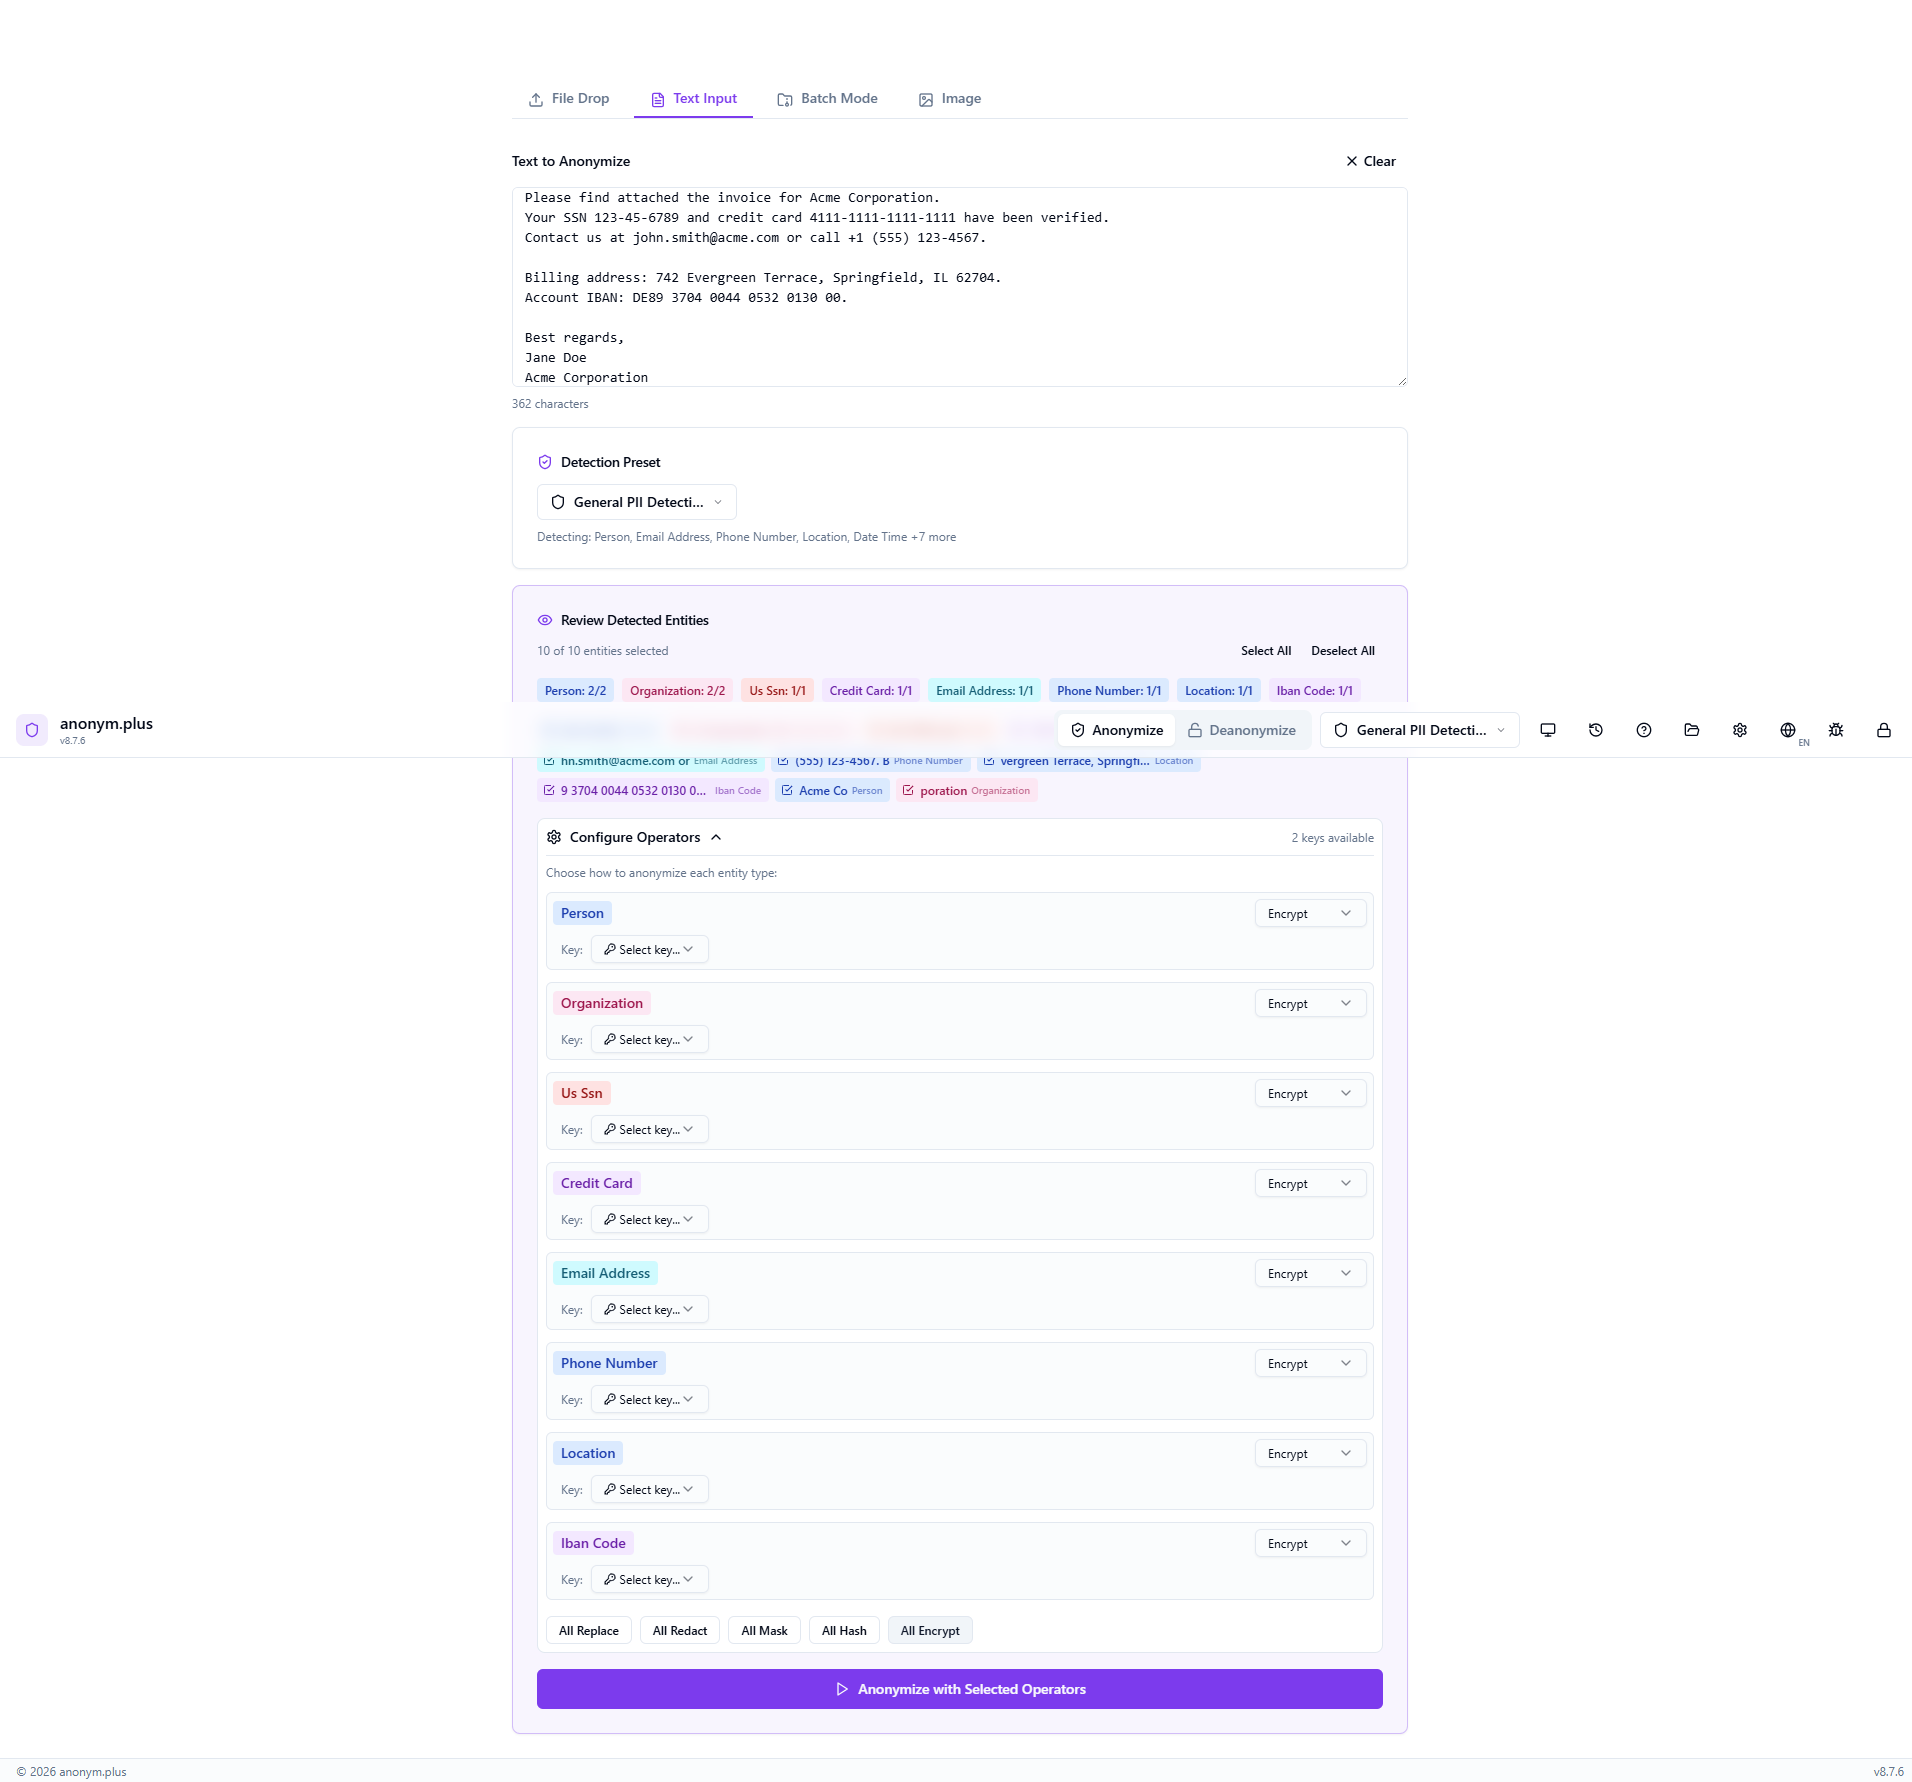
All 10 detected entities appear as color-coded badges: Person (2), Organization (2), US SSN (1), Credit Card (1), Email Address (1), Phone Number (1), Location (1), IBAN Code (1). Toggle individual entities on or off with checkboxes, or use Select All / Deselect All.

The Configure Operators panel shows “Replace” selected for each entity type. Each PII value will be substituted with its type label in angle brackets — e.g., <PERSON>, <EMAIL_ADDRESS>. Quick-action buttons (All Replace, All Redact, All Mask, All Hash, All Encrypt) allow switching all operators at once.
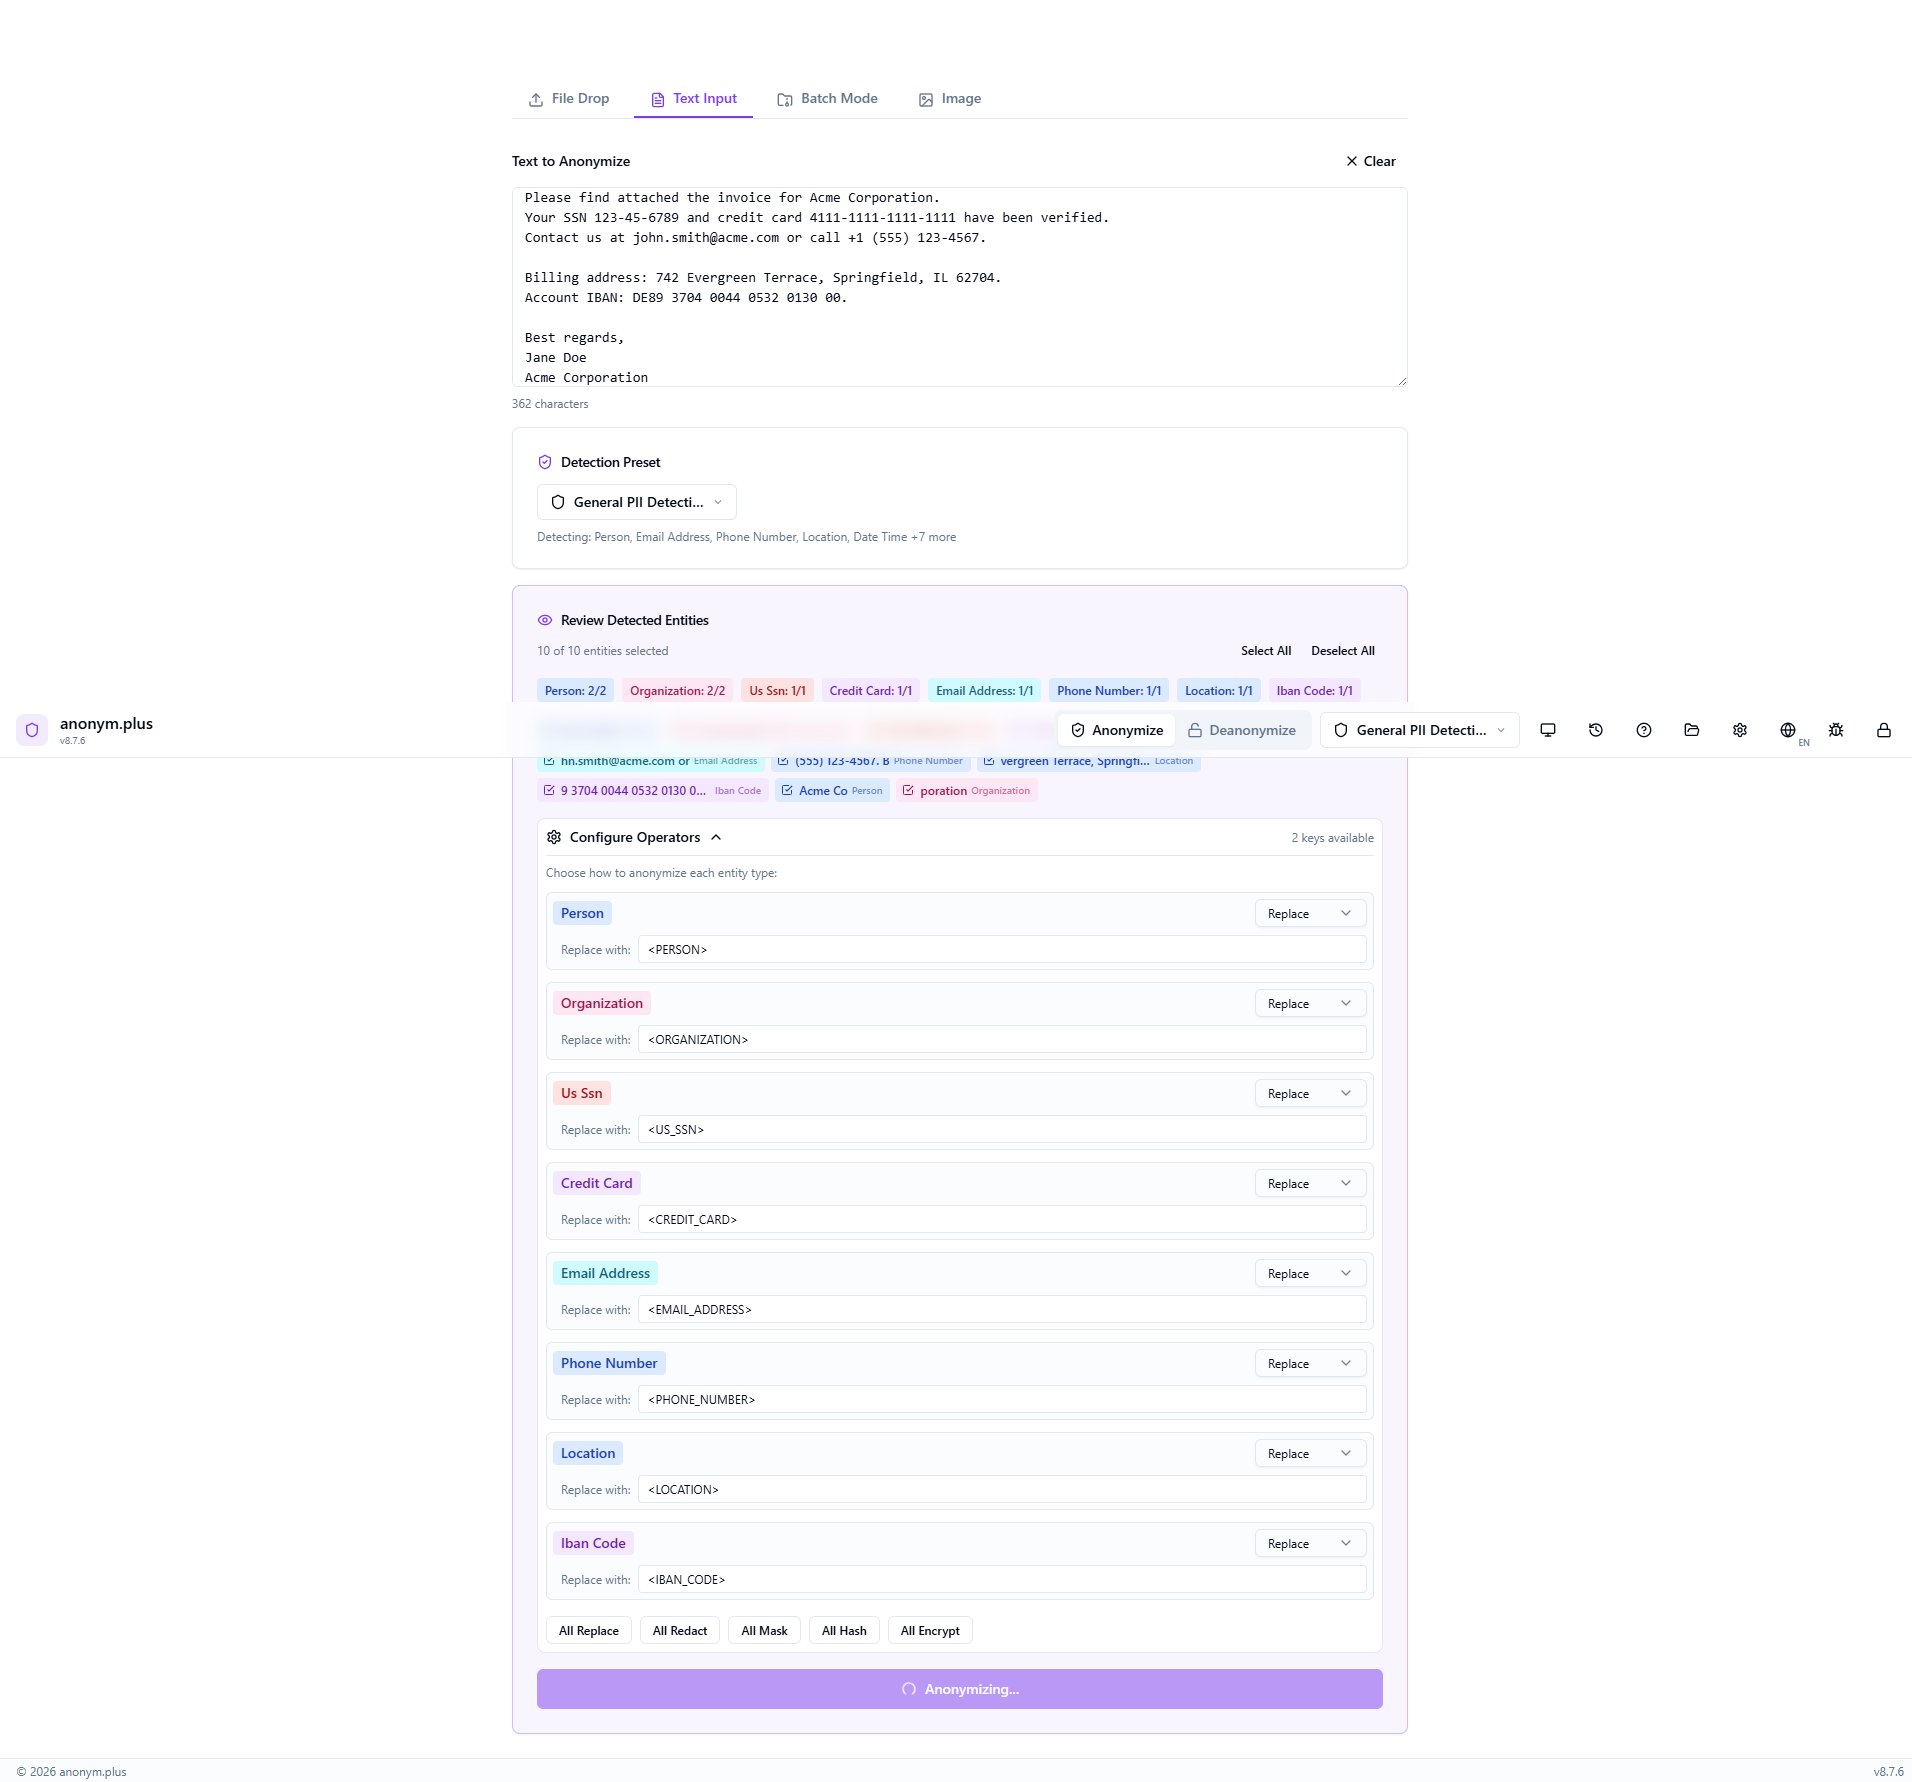
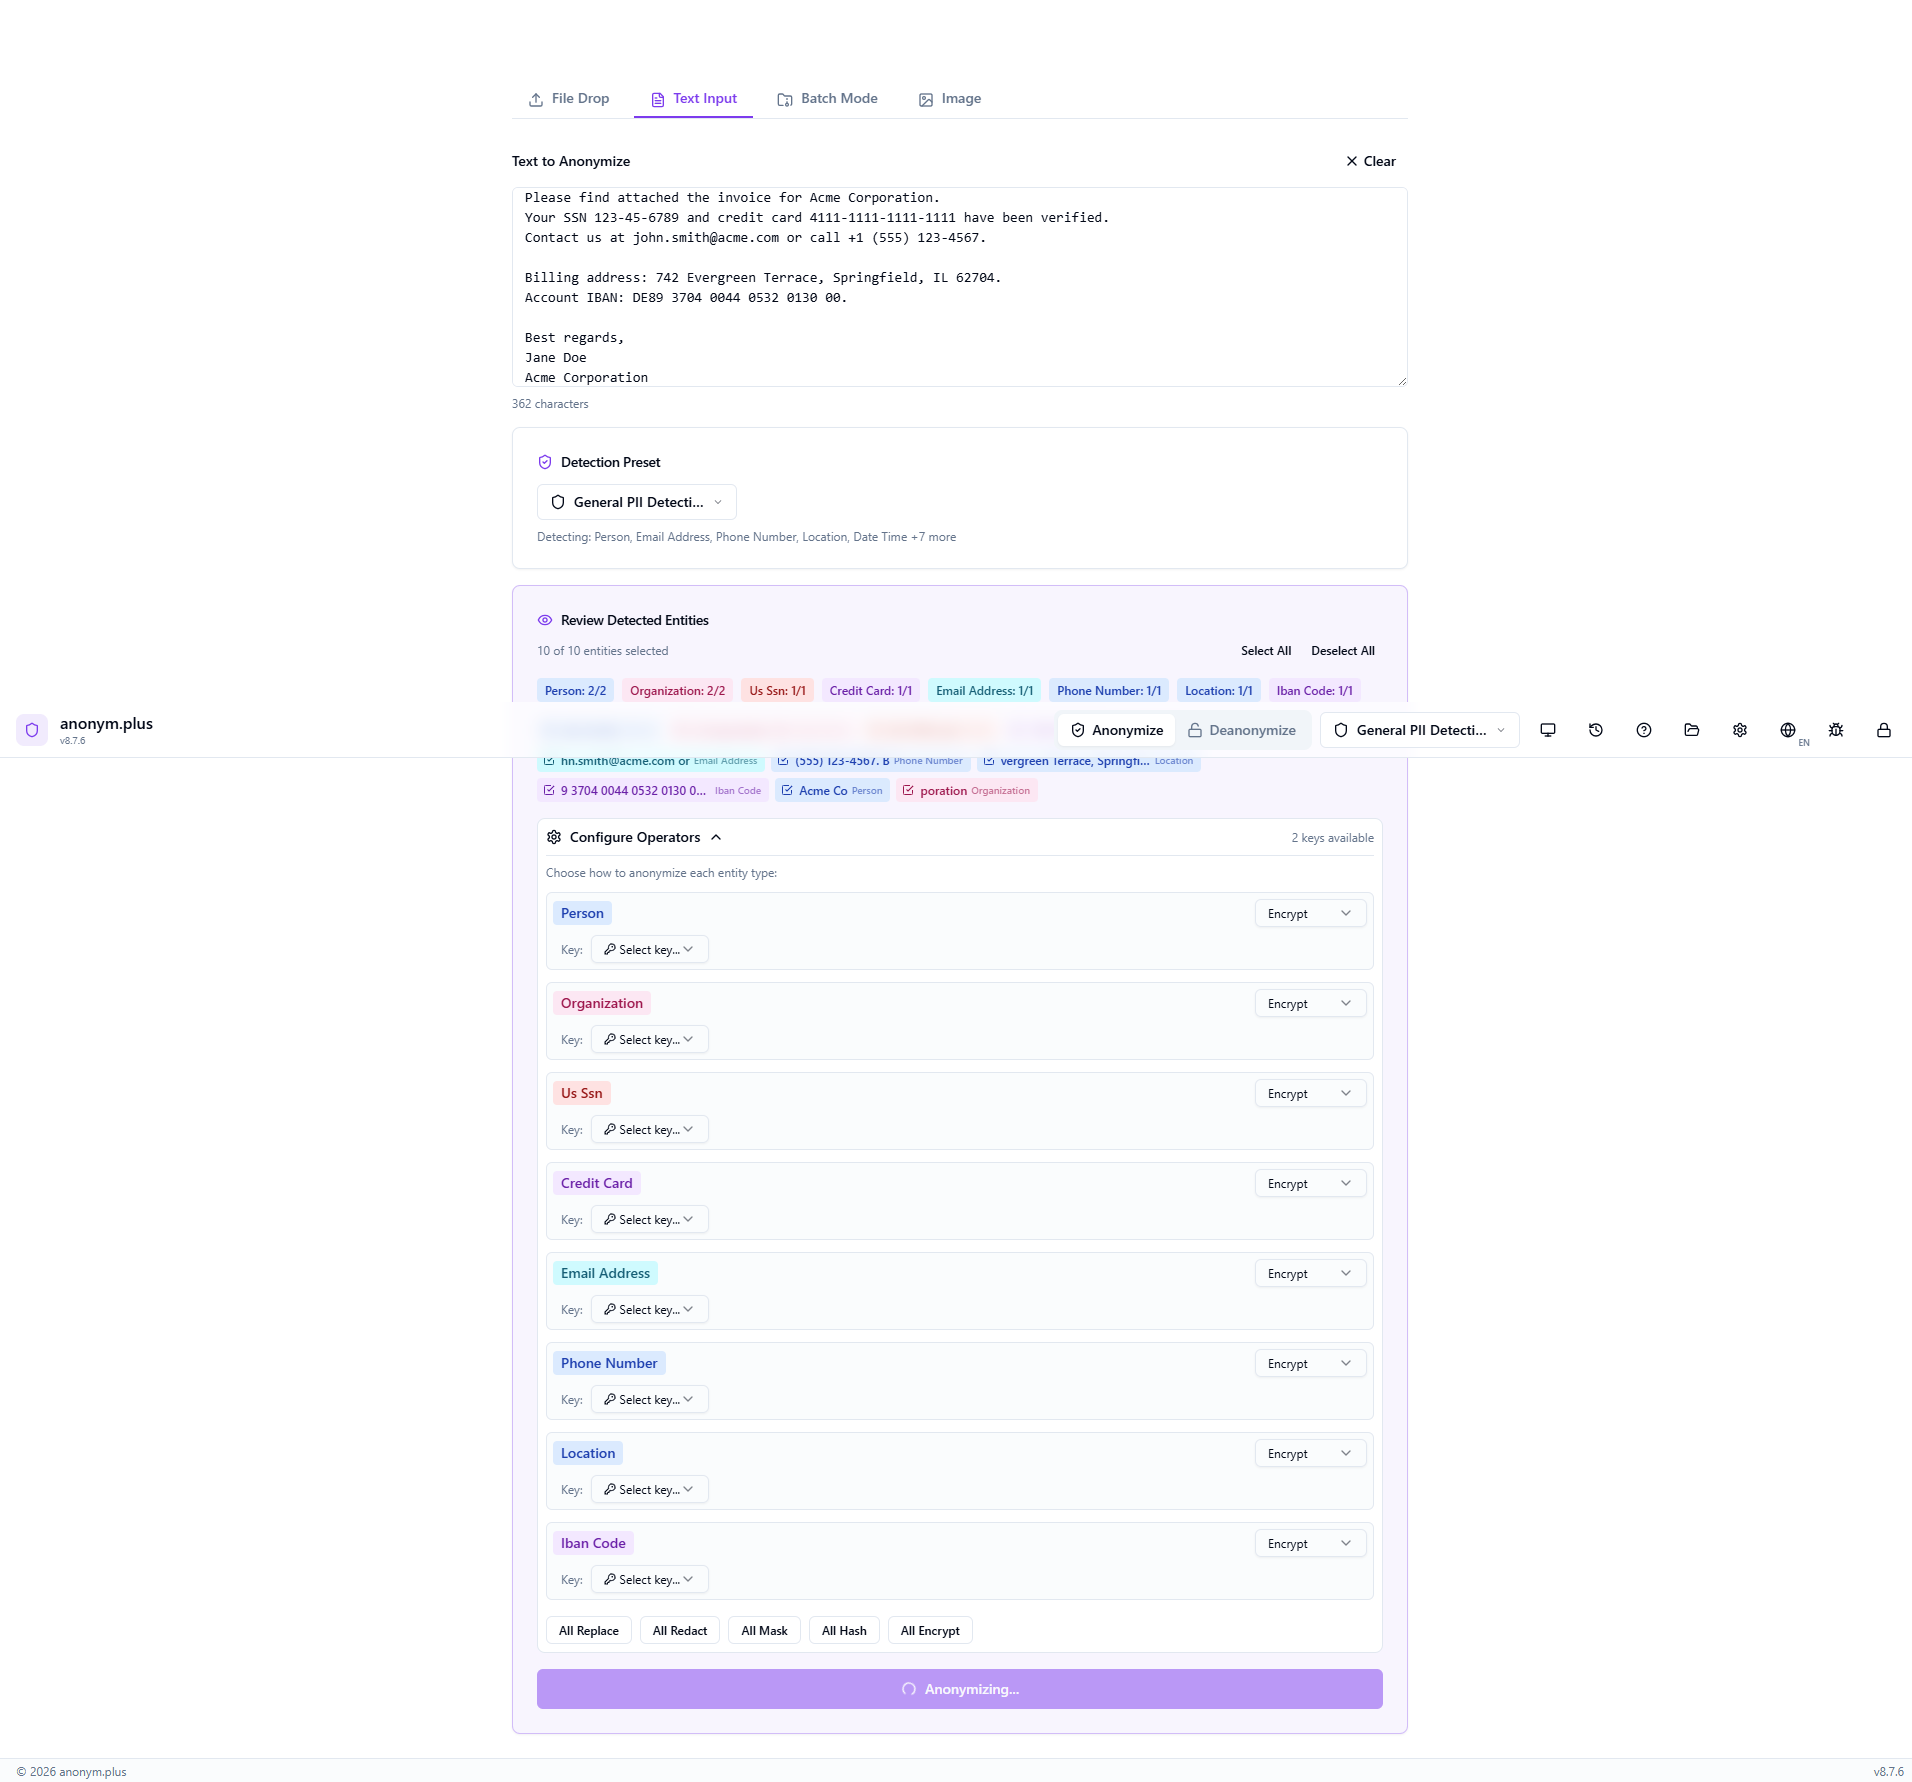
Click “Anonymize with Selected Operators” to process. A brief loading state appears while each entity is replaced.
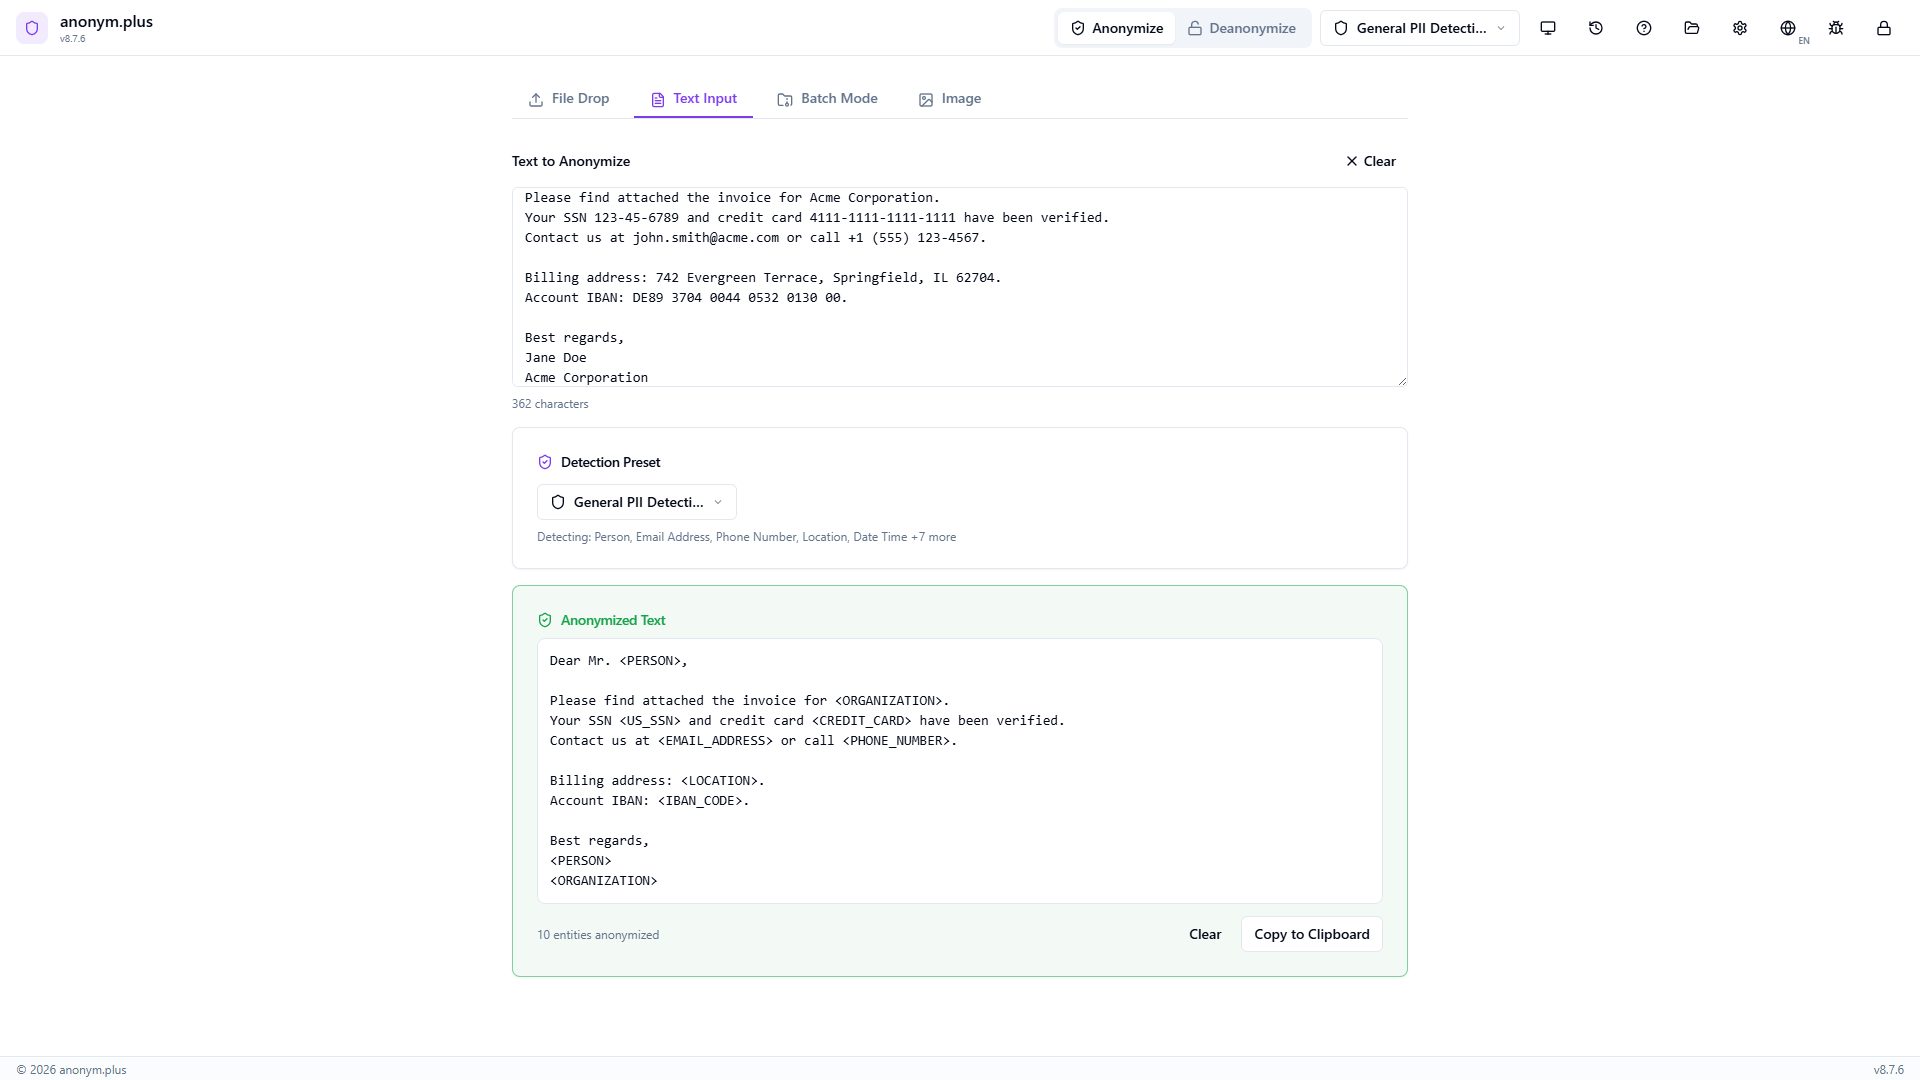
The anonymized text appears with all PII replaced: <PERSON> for names, <ORGANIZATION> for company names, <US_SSN>, <CREDIT_CARD>, <EMAIL_ADDRESS>, <PHONE_NUMBER>, <LOCATION>, <IBAN_CODE>. Use Copiar to Clipboard or Clear to reset.
Paso a paso: Anonimización de texto con Cifrado
Anonymize text using reversible encryption — each PII value is encrypted with your key and can be decrypted later via the Deanonymize feature.
Enter or paste a document containing personal information — same as the replace workflow.

Choose “General PII Detection” to detect a broad range of entity types.

Run the NER pipeline to detect all personal data entities.
Review 10 detected entities with color-coded badges. Same entity types as replace.

Click “All Encrypt” to set every entity type to the encrypt operator. Select “Production Key (256-bit)” from the key dropdown. Unlike Replace, the encrypt operator produces reversible tokens that can be decrypted later.
Click “Anonymize with Selected Operators” to encrypt all PII with the selected key.
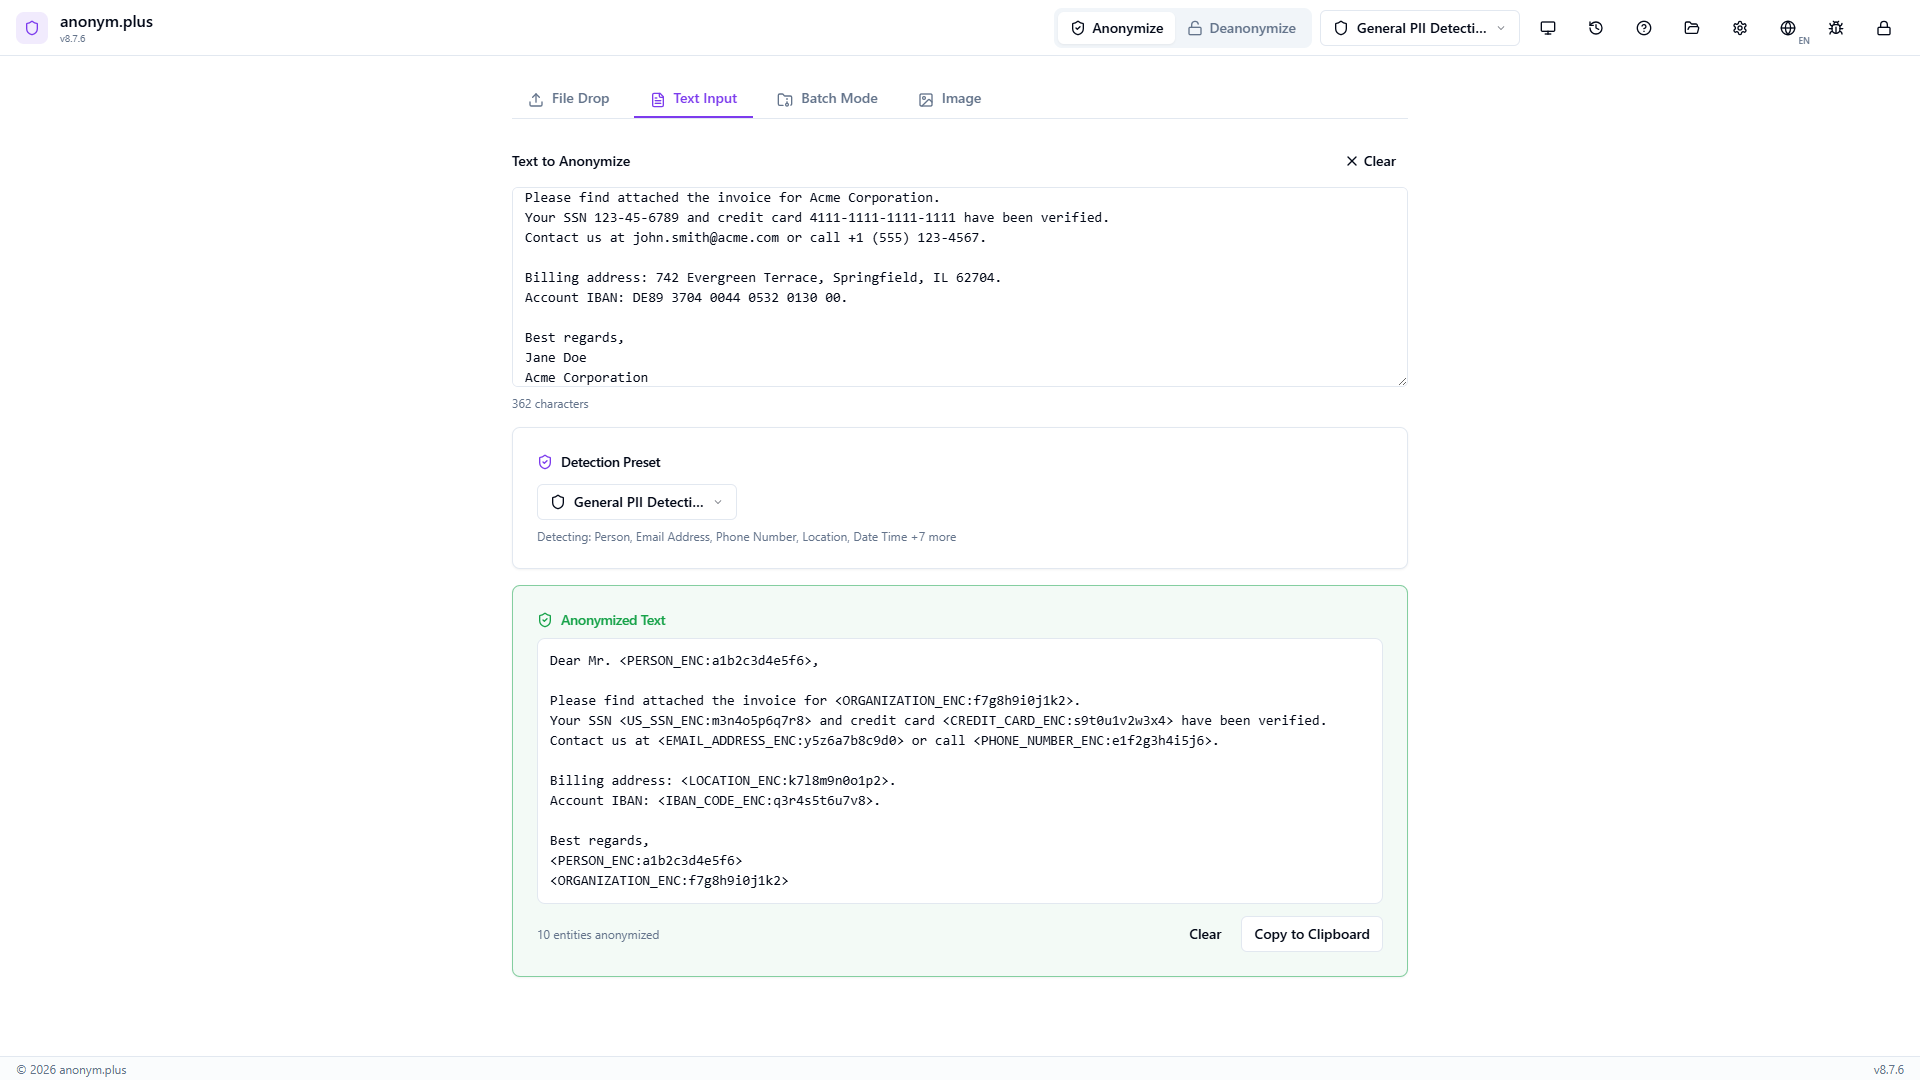
The output contains reversible encrypted tokens: <PERSON_ENC:a1b2c3...>, <EMAIL_ADDRESS_ENC:...>, etc. These tokens can be decrypted back to the original PII using the Deanonymize feature with the same encryption key.
Paso a paso: Anonimización de archivo con Reemplazo
Drop a document file to anonymize — text is extracted, PII detected, and a new anonymized file is saved to your output folder.
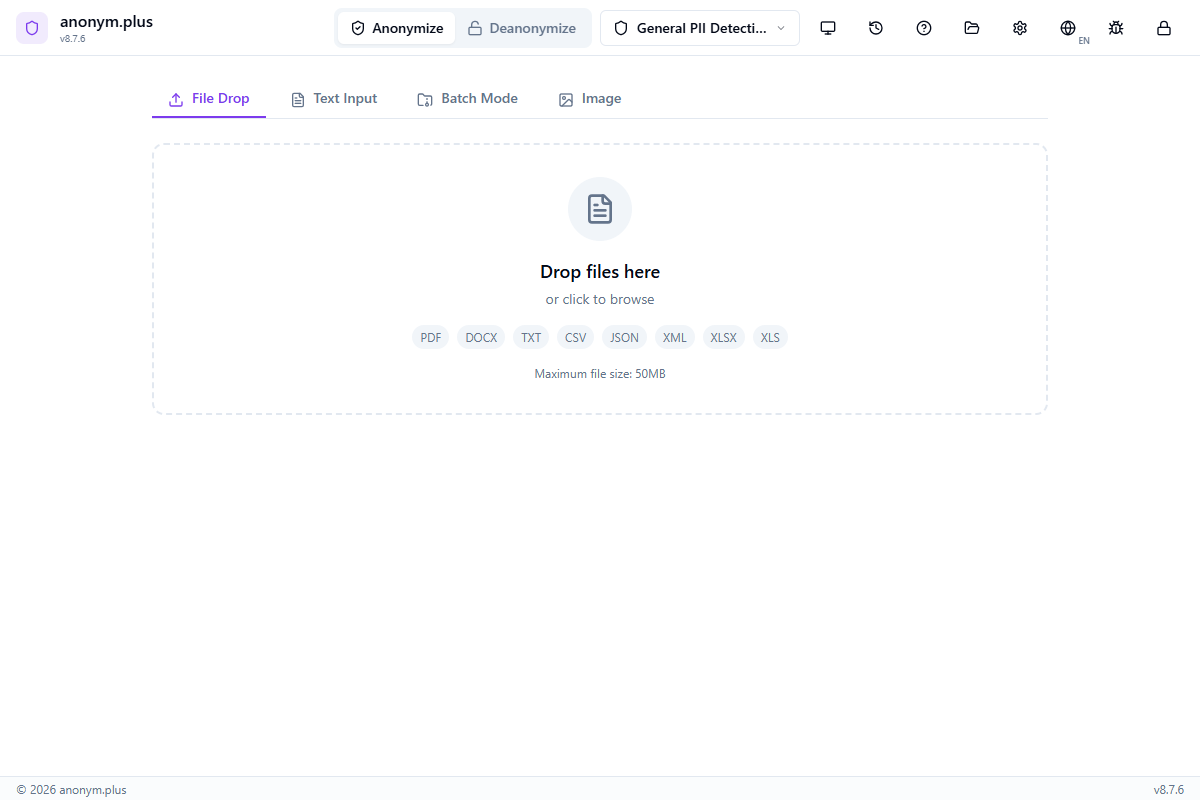
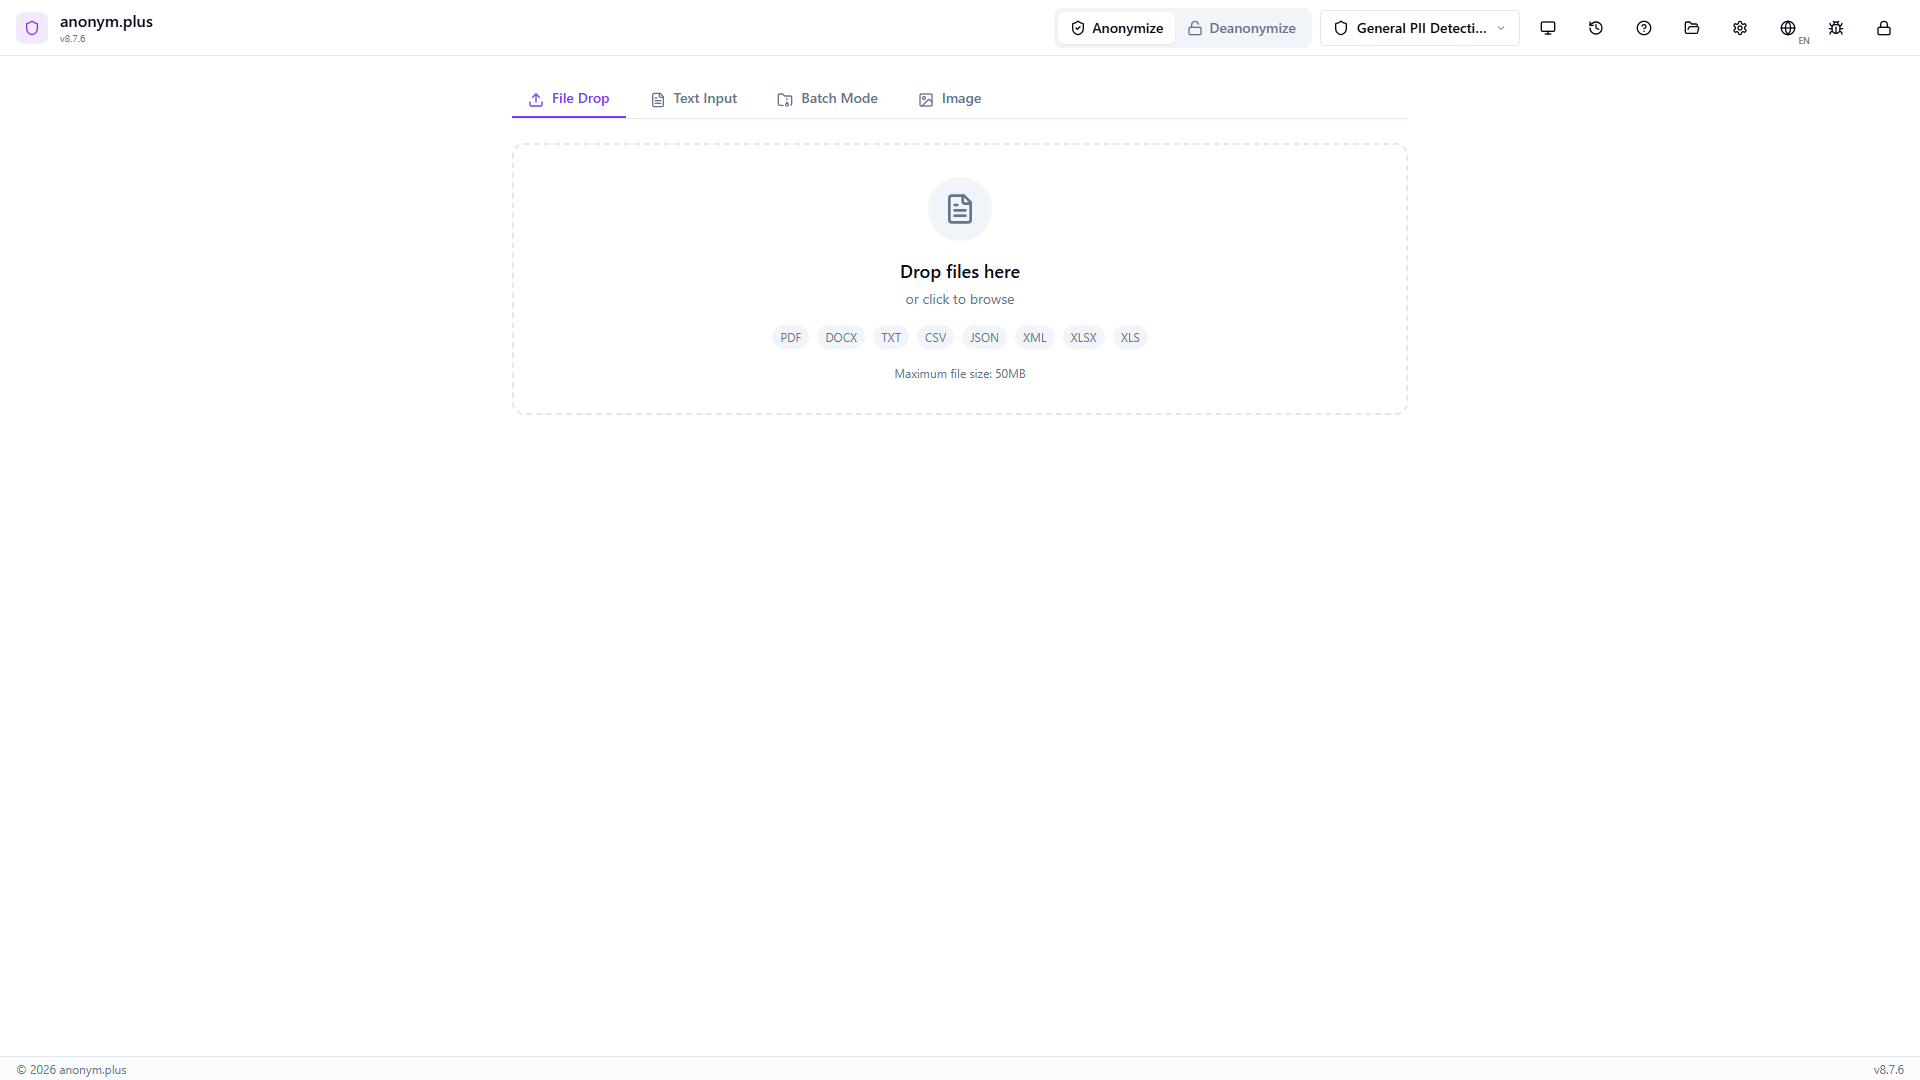
Navigate to the File Drop tab. The dropzone accepts PDF, DOCX, TXT, CSV, JSON, XML, XLSX, and XLS files up to 50MB.

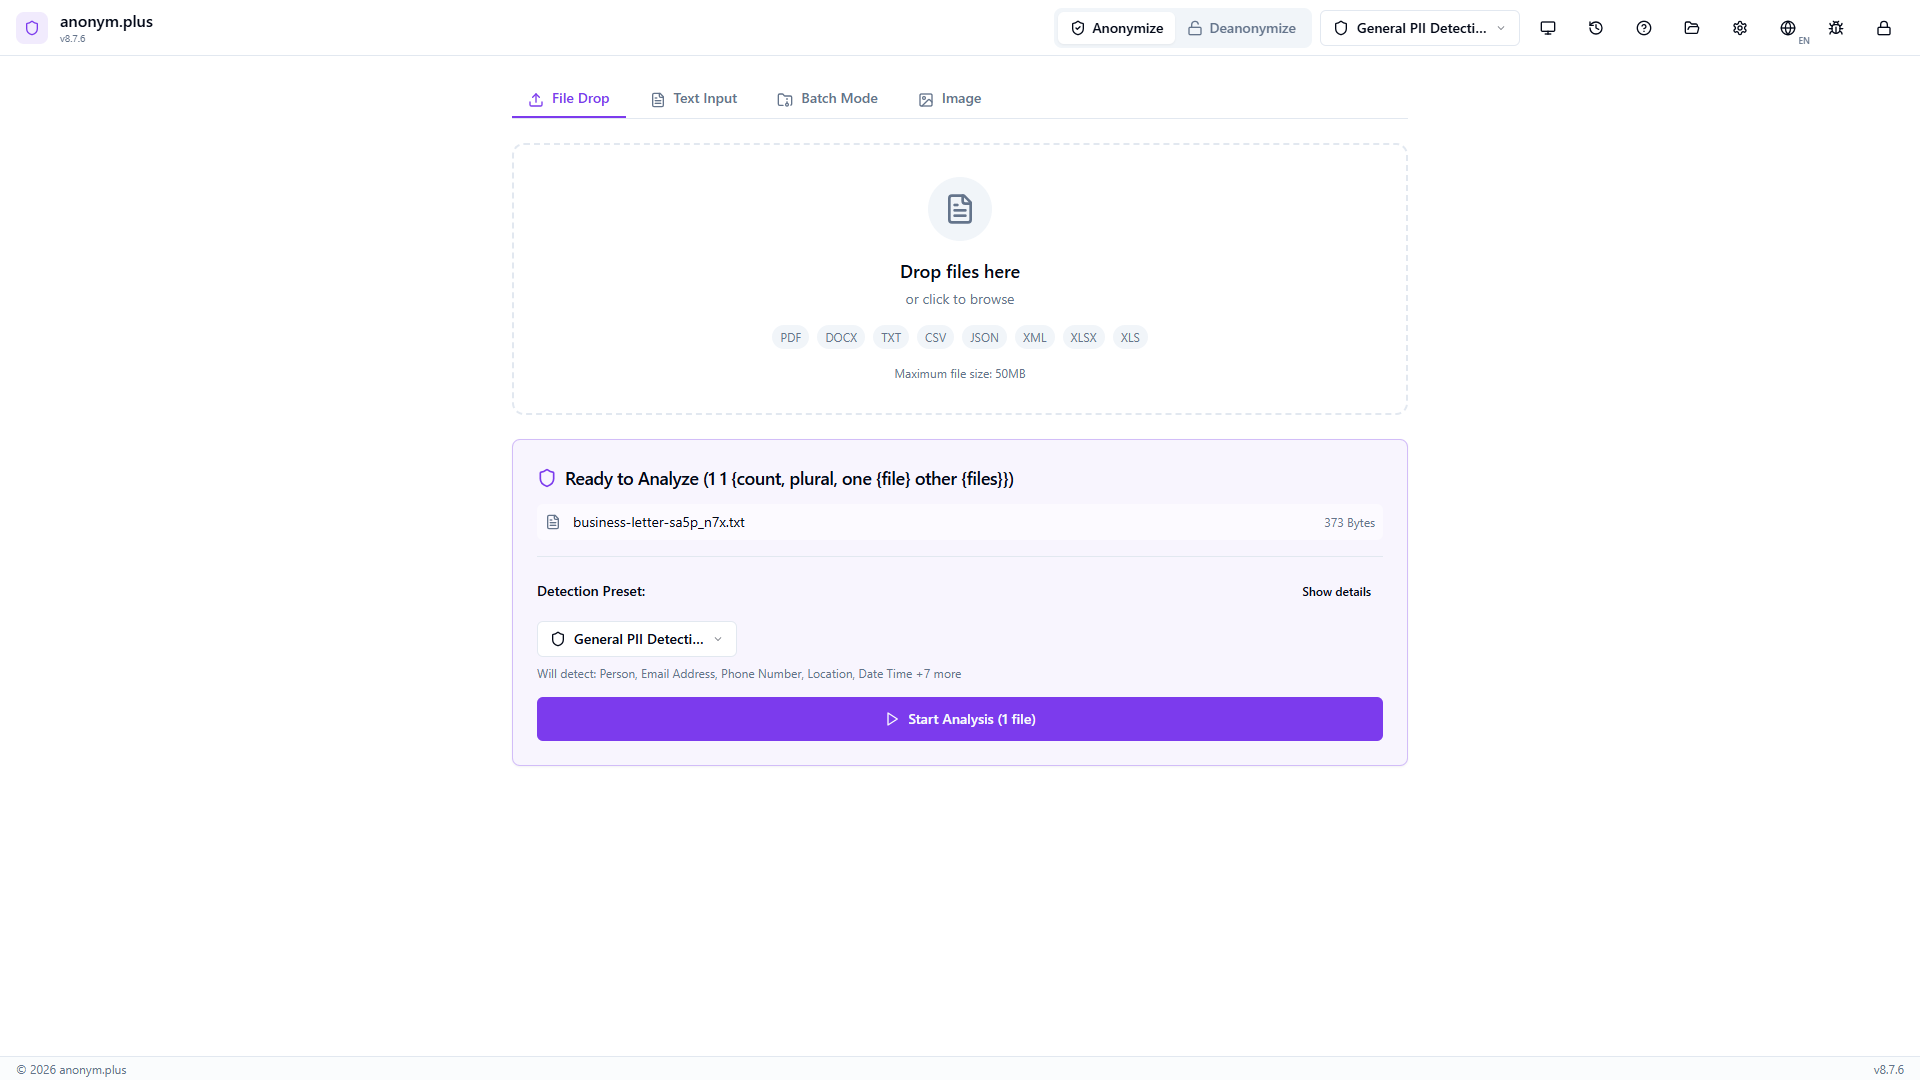
Drop a text file (e.g., business-letter.txt). It appears in a “Ready to Analyze” card with the filename, size, and the “General PII Detection” preset pre-selected. Click “Start Analysis (1 file)”.

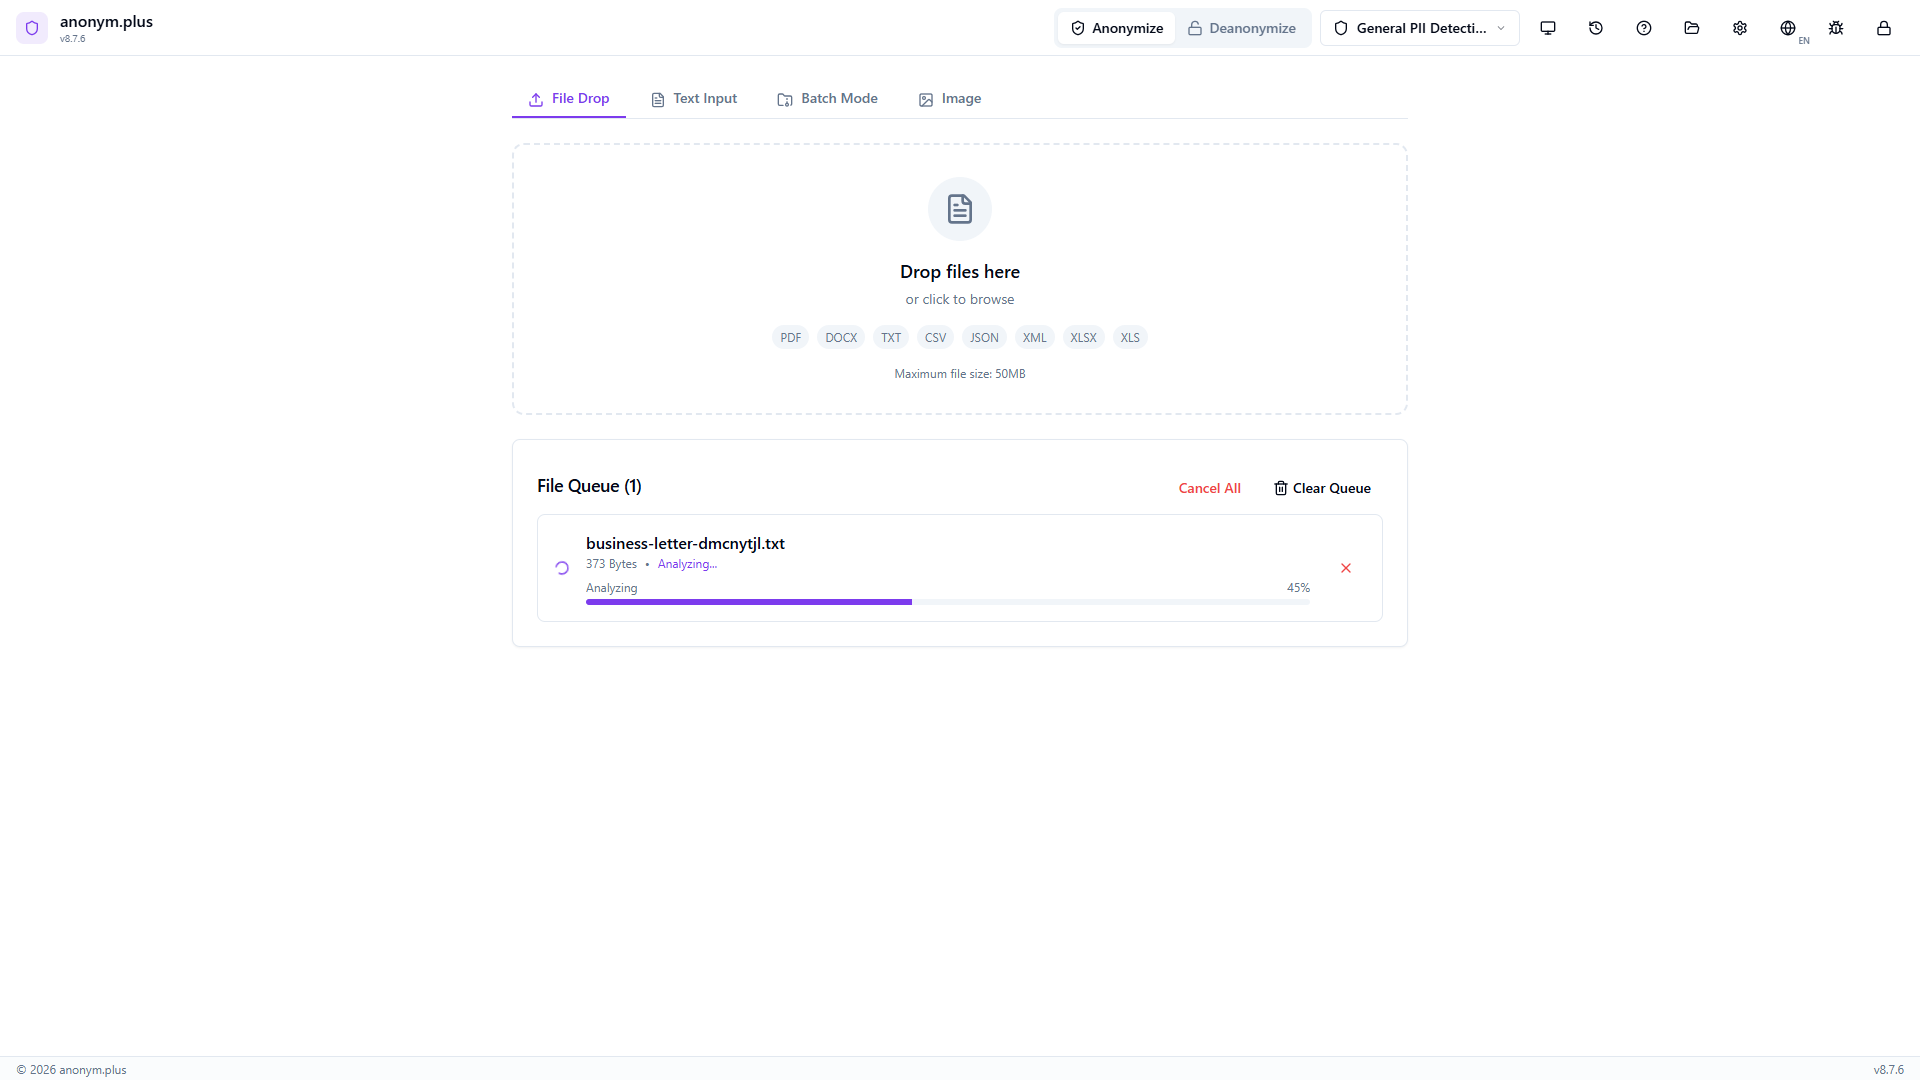
La tarjeta de archivo muestra “Analyzing...” con una barra de progreso al 45%. El texto se extrae y procesa a través del pipeline NER.
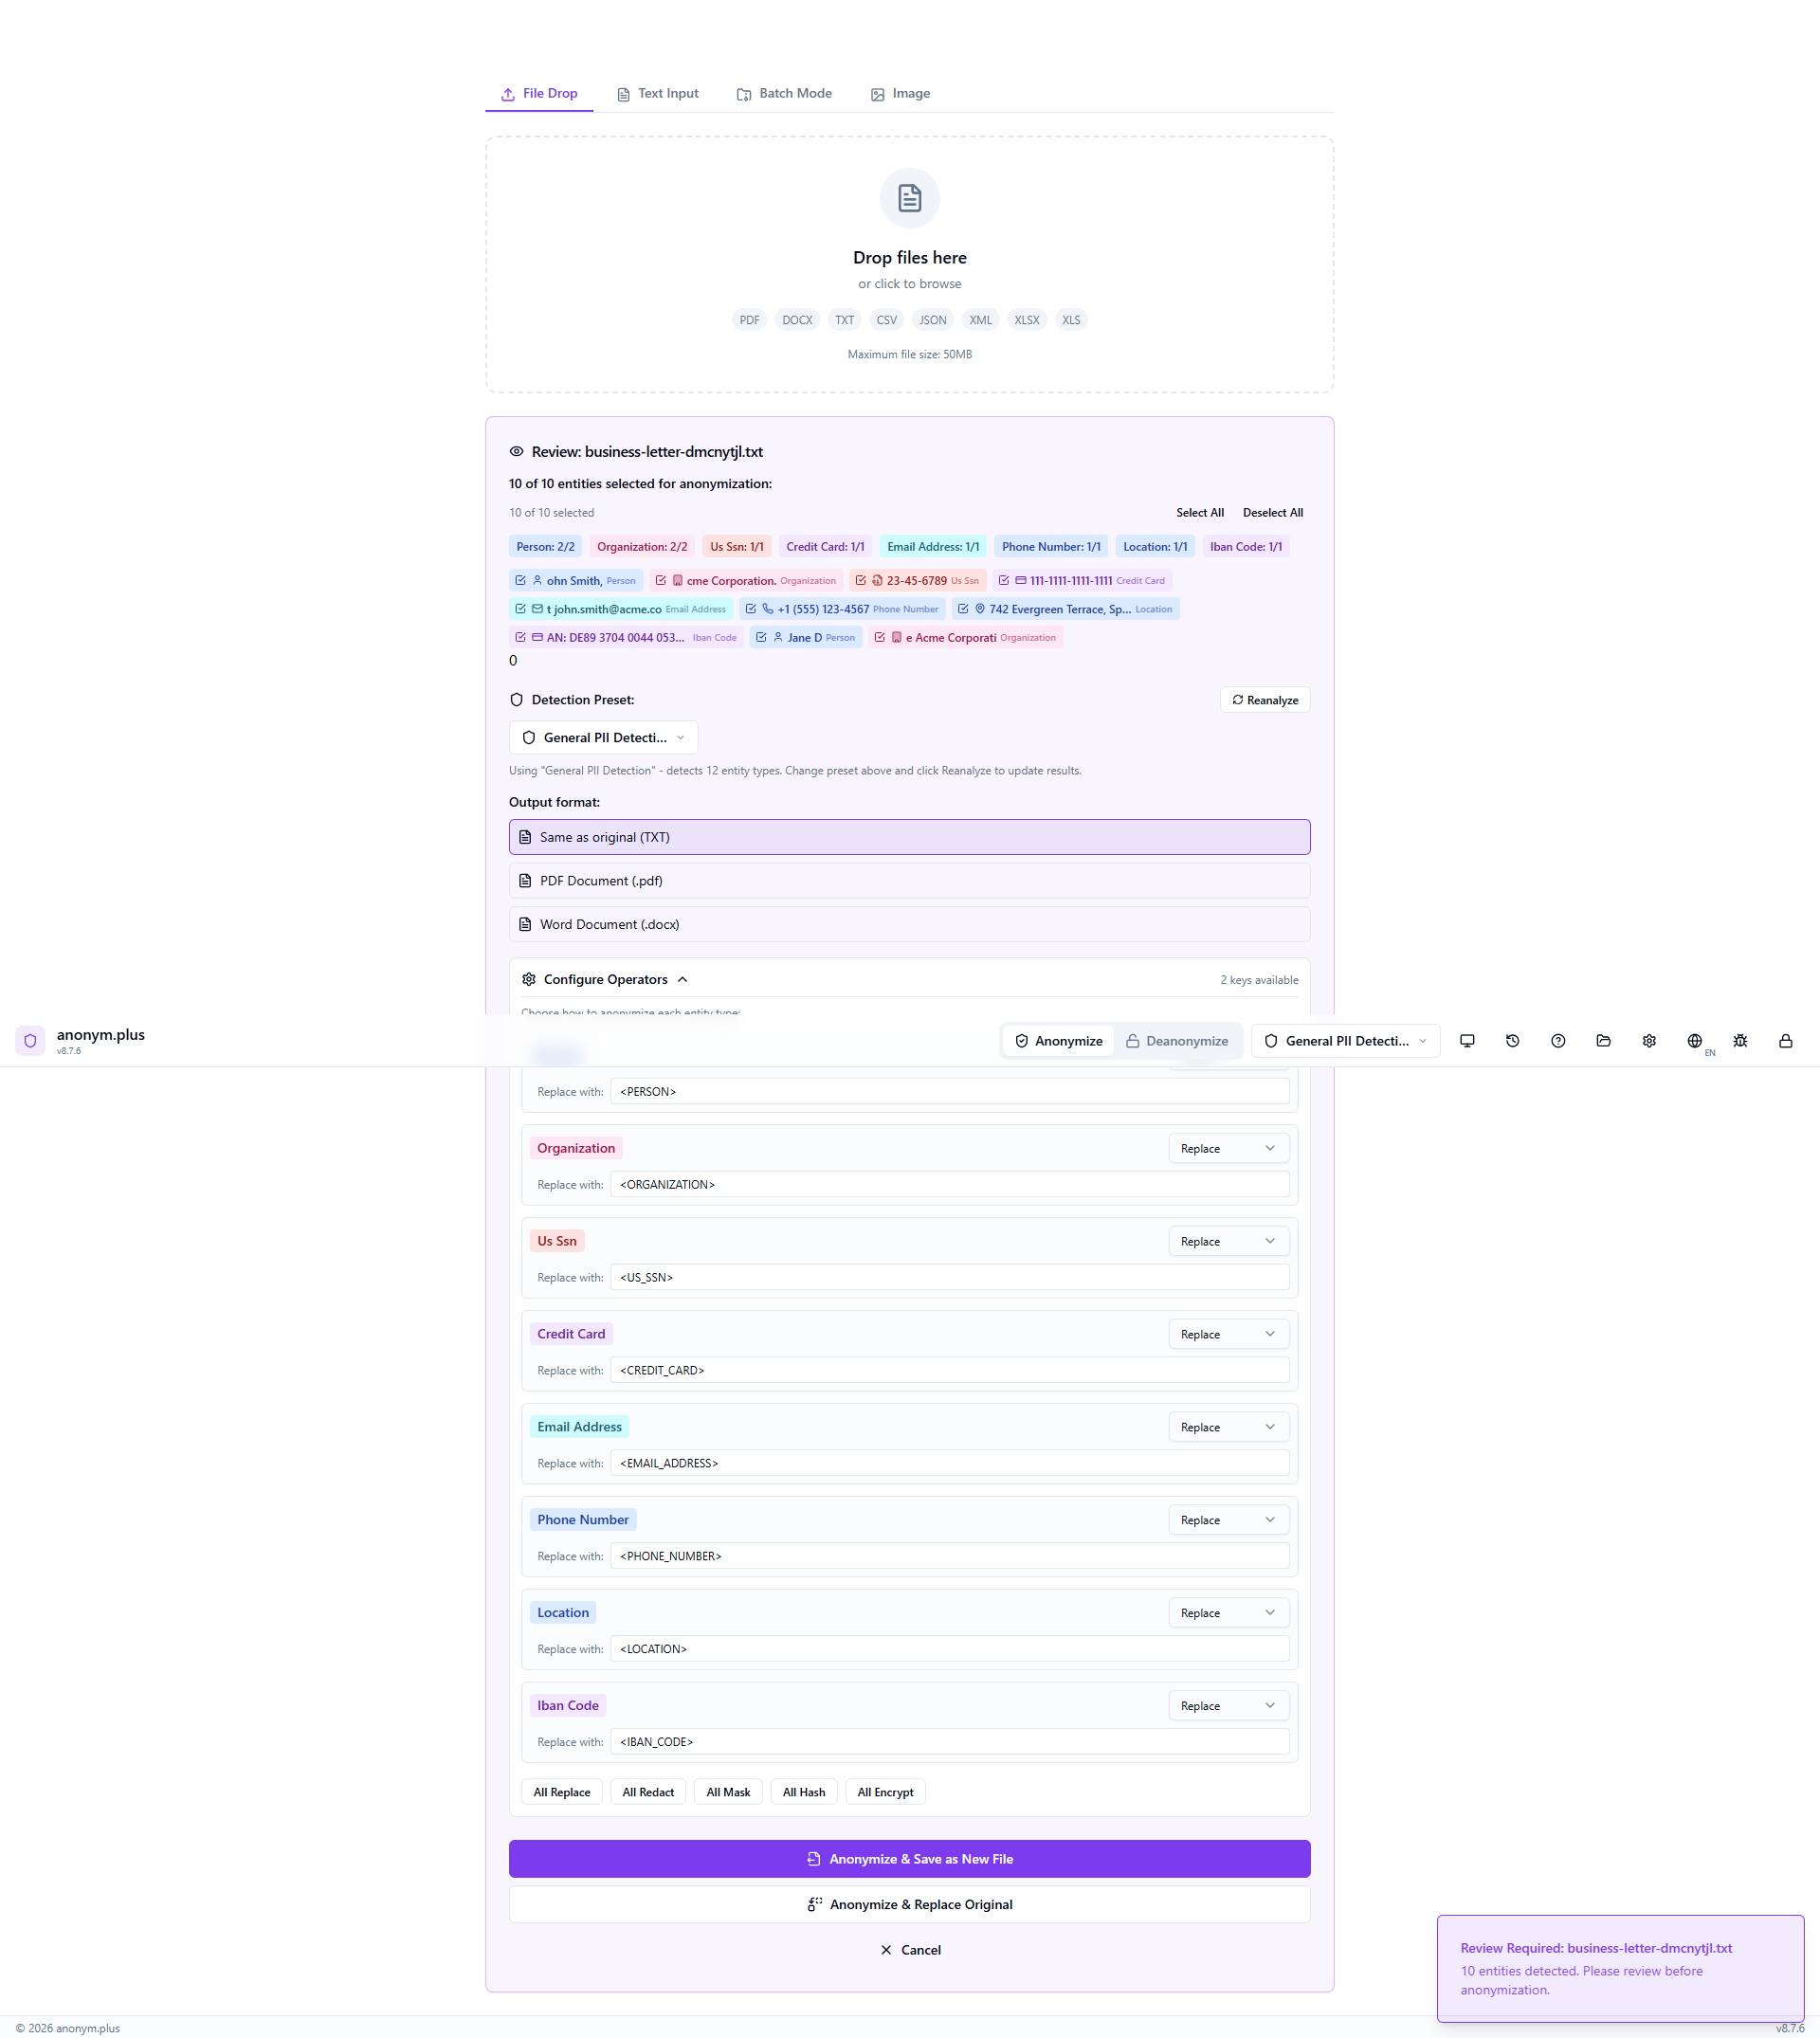
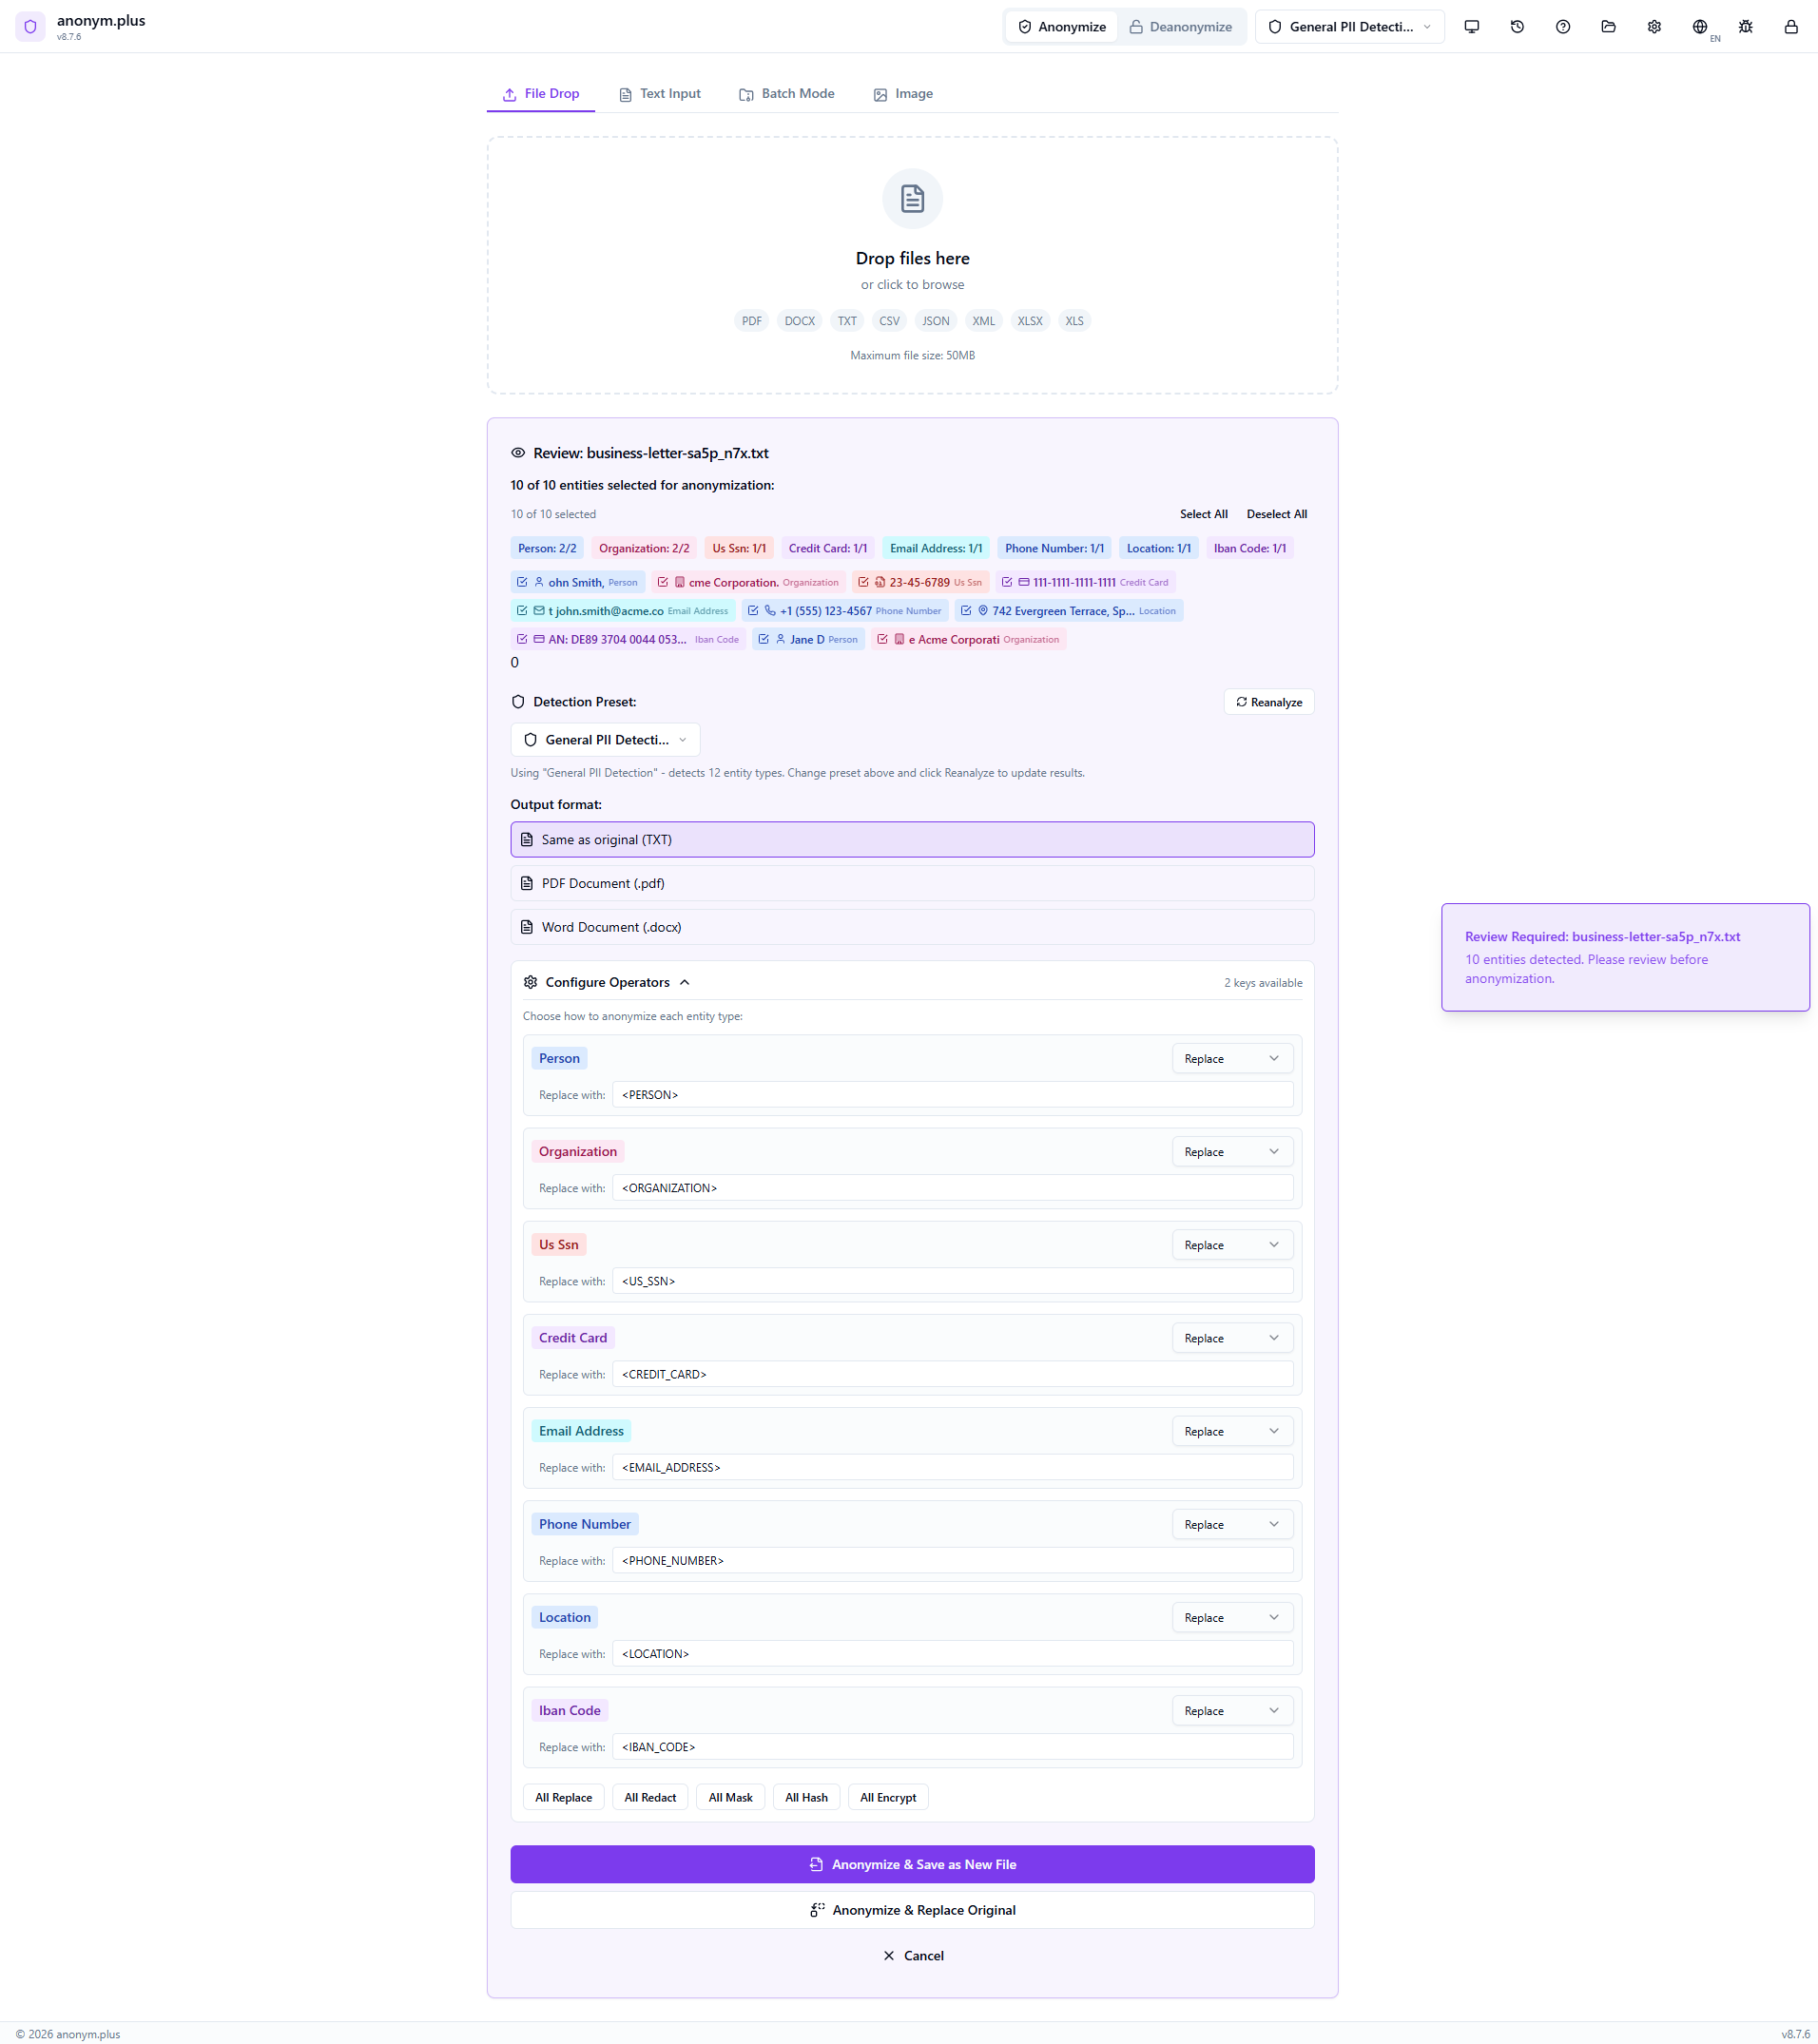
The entity review panel lists all detected PII with color-coded badges and checkboxes. Select All / Deselect All controls are available. The output format selector and operator configuration are visible below.

The Replace operator is configured for all entity types. The output format is set to “Same as original (TXT)”. Other format options include PDF and DOCX. Click “Anonymize & Save as New File” to process.
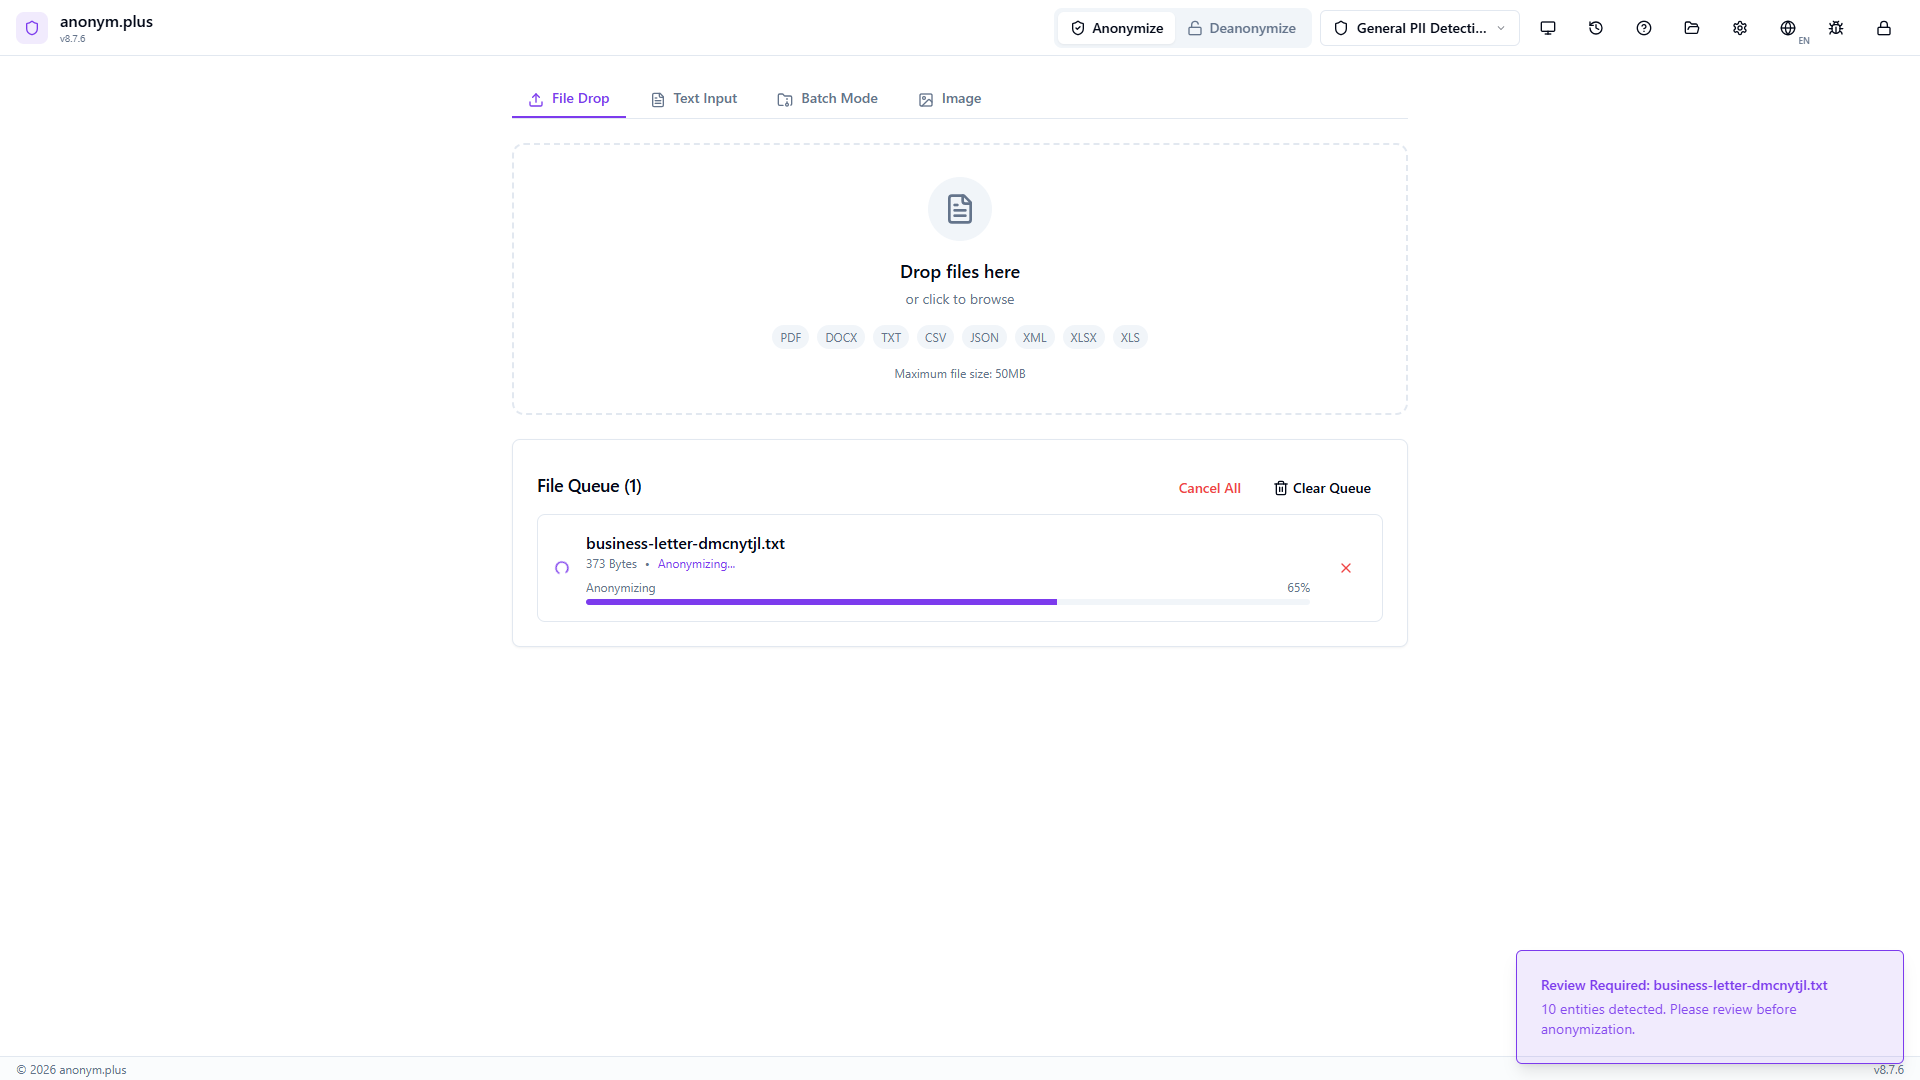
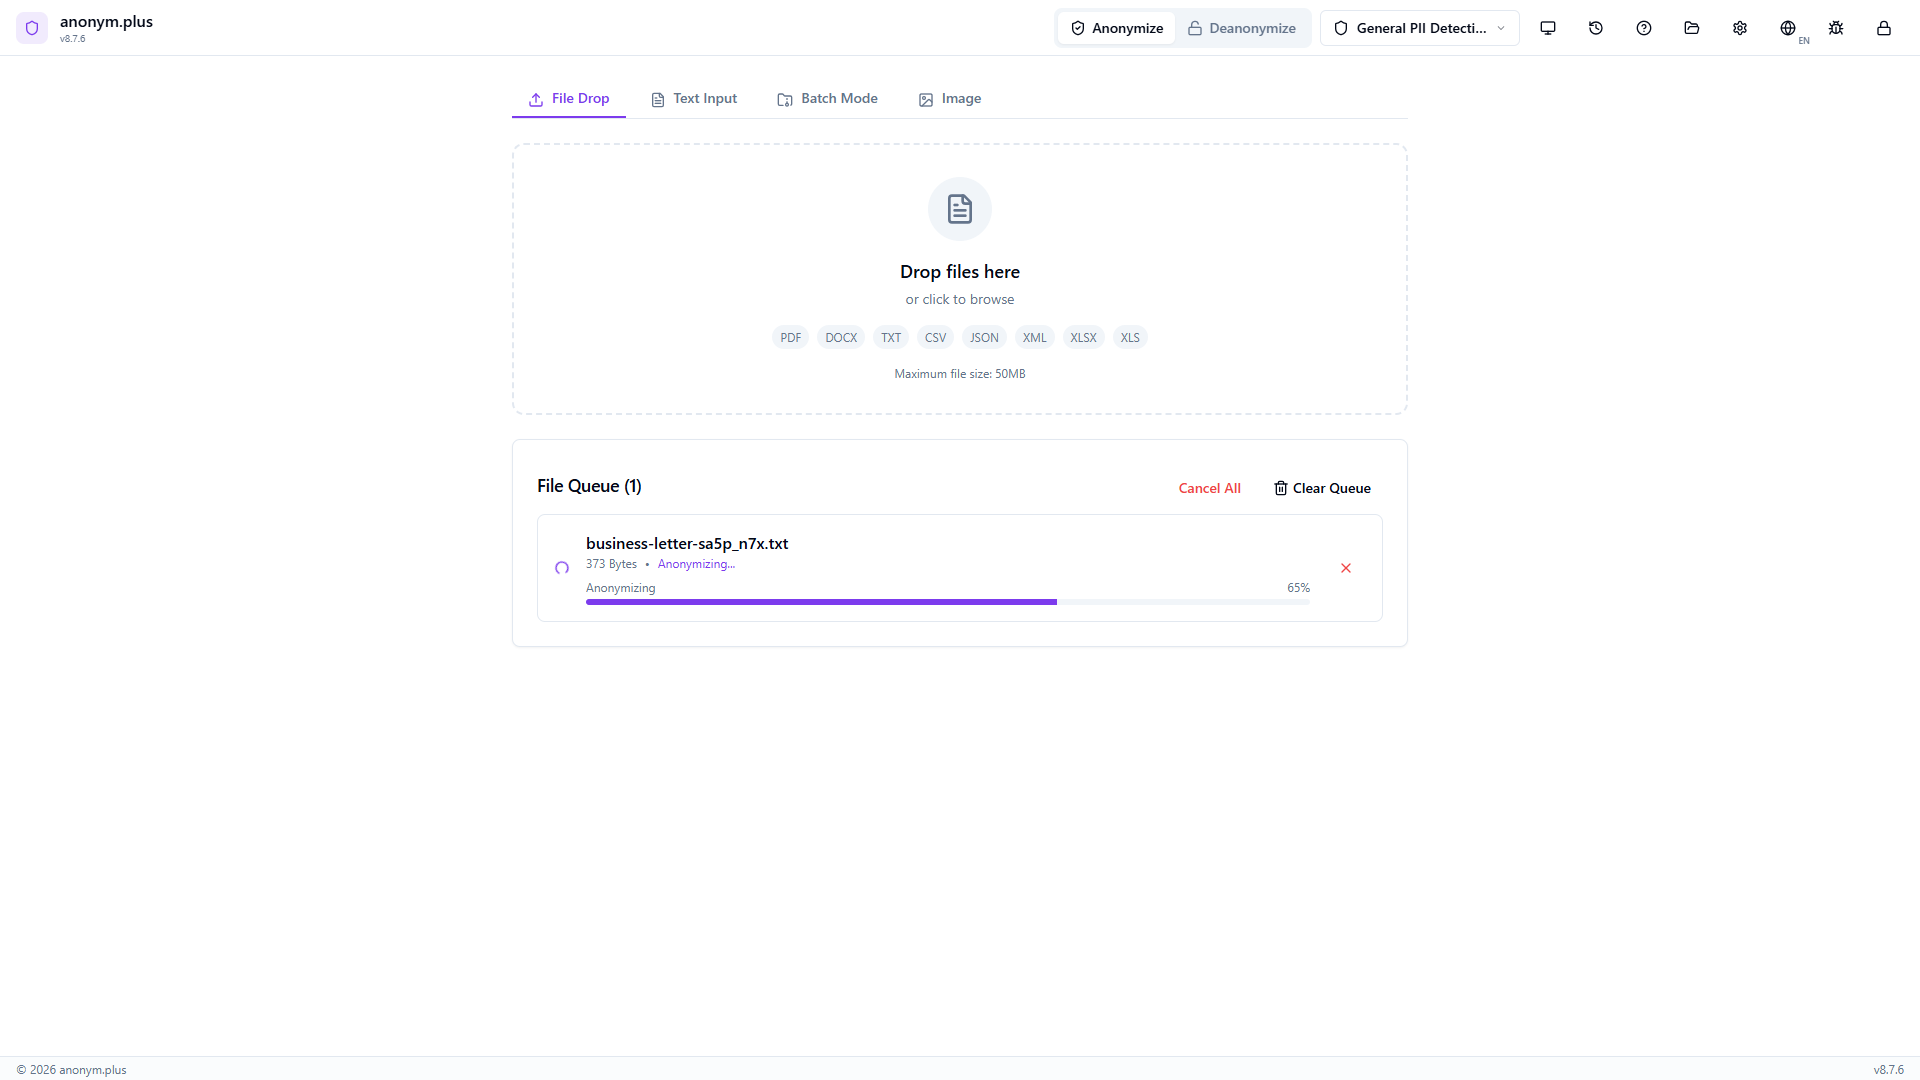
La tarjeta de archivo muestra “Anonymizing...” con una barra de progreso mientras el archivo de salida se reconstruye y guarda.
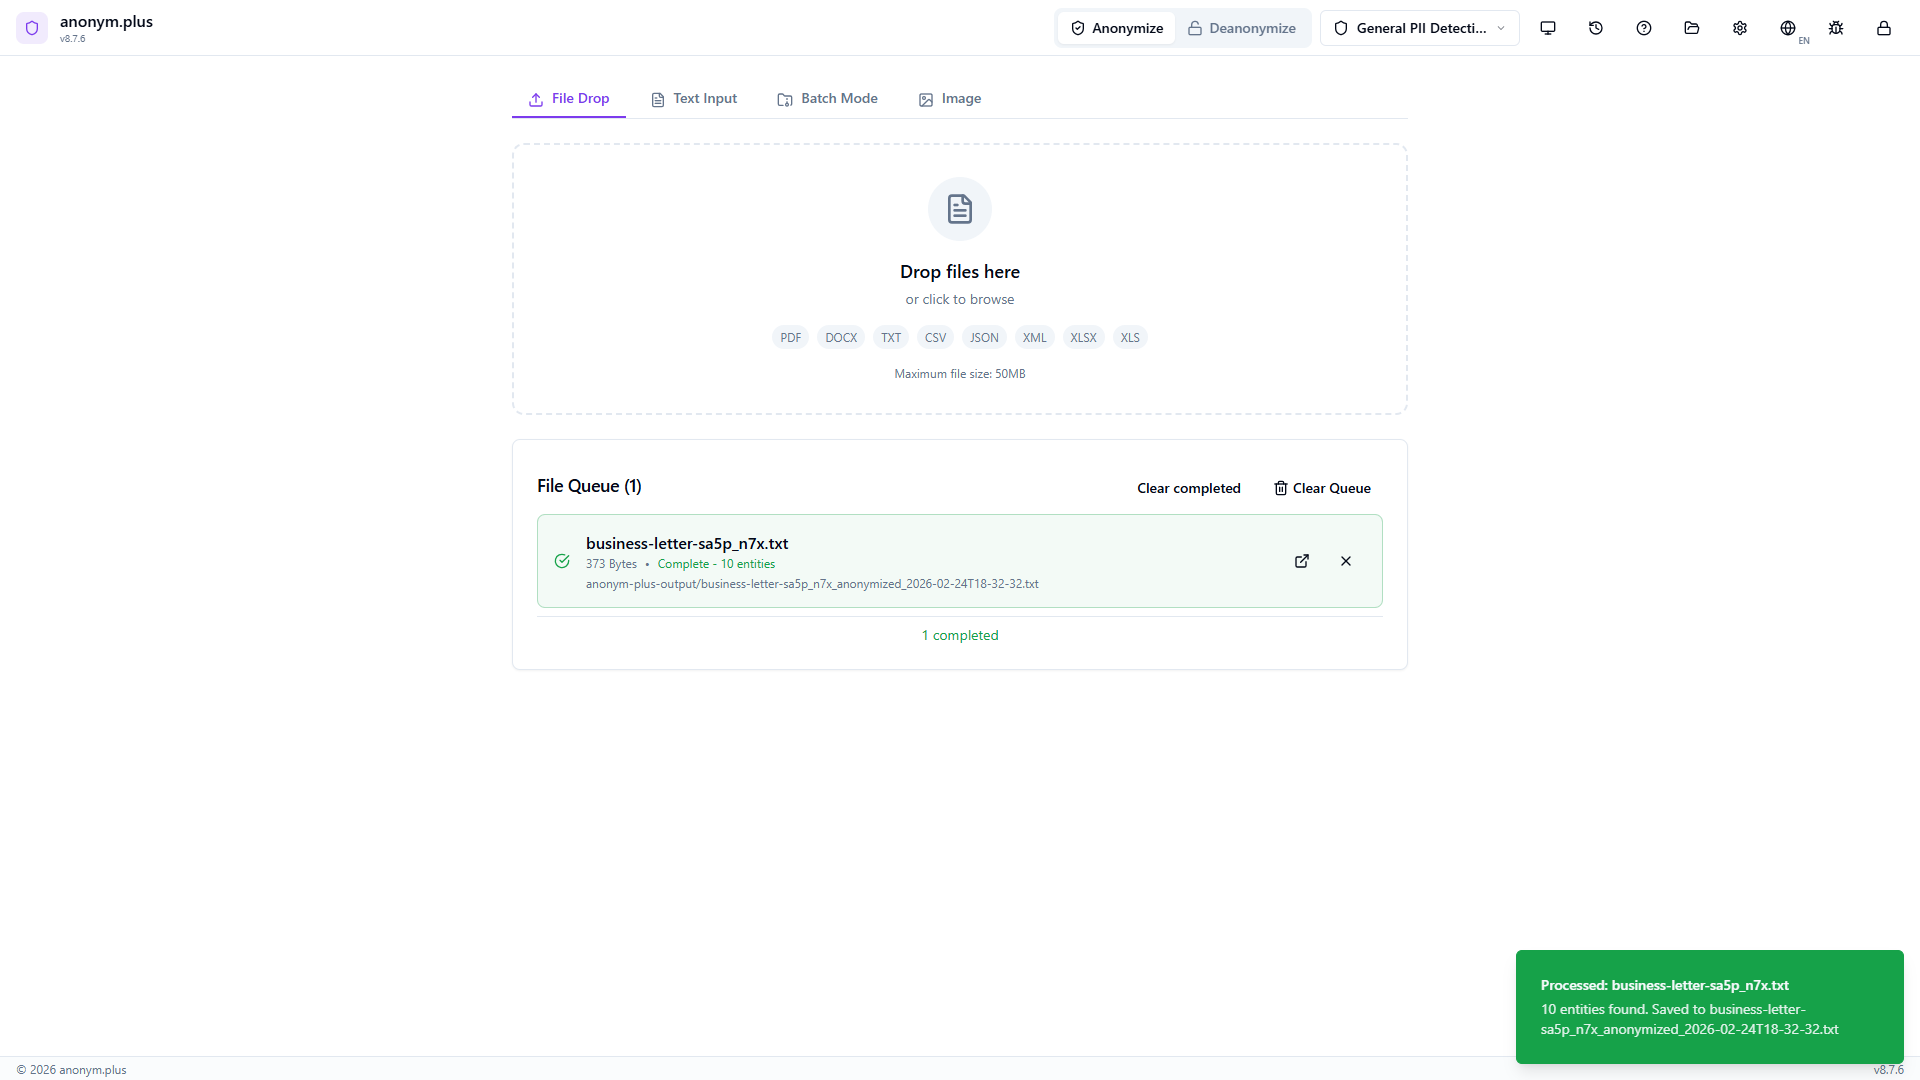
Green “Complete” status with entity count displayed. The anonymized file is saved to the output folder. A green toast notification confirms the output path.

Paso a paso: Anonimización de archivo con Cifrado
Encrypt PII in document files for reversible anonymization — output files contain encrypted tokens that can be decrypted later.
Same dropzone as Replace — supports all document formats up to 50MB.
Drop a text file. It appears in “Ready to Analyze” with preset selected.
Progress bar while text is extracted and PII detected.

Same entity review panel with color-coded badges.
Click “All Encrypt” to switch all operators to encrypt mode. Select “Production Key (256-bit)” for reversible encryption.
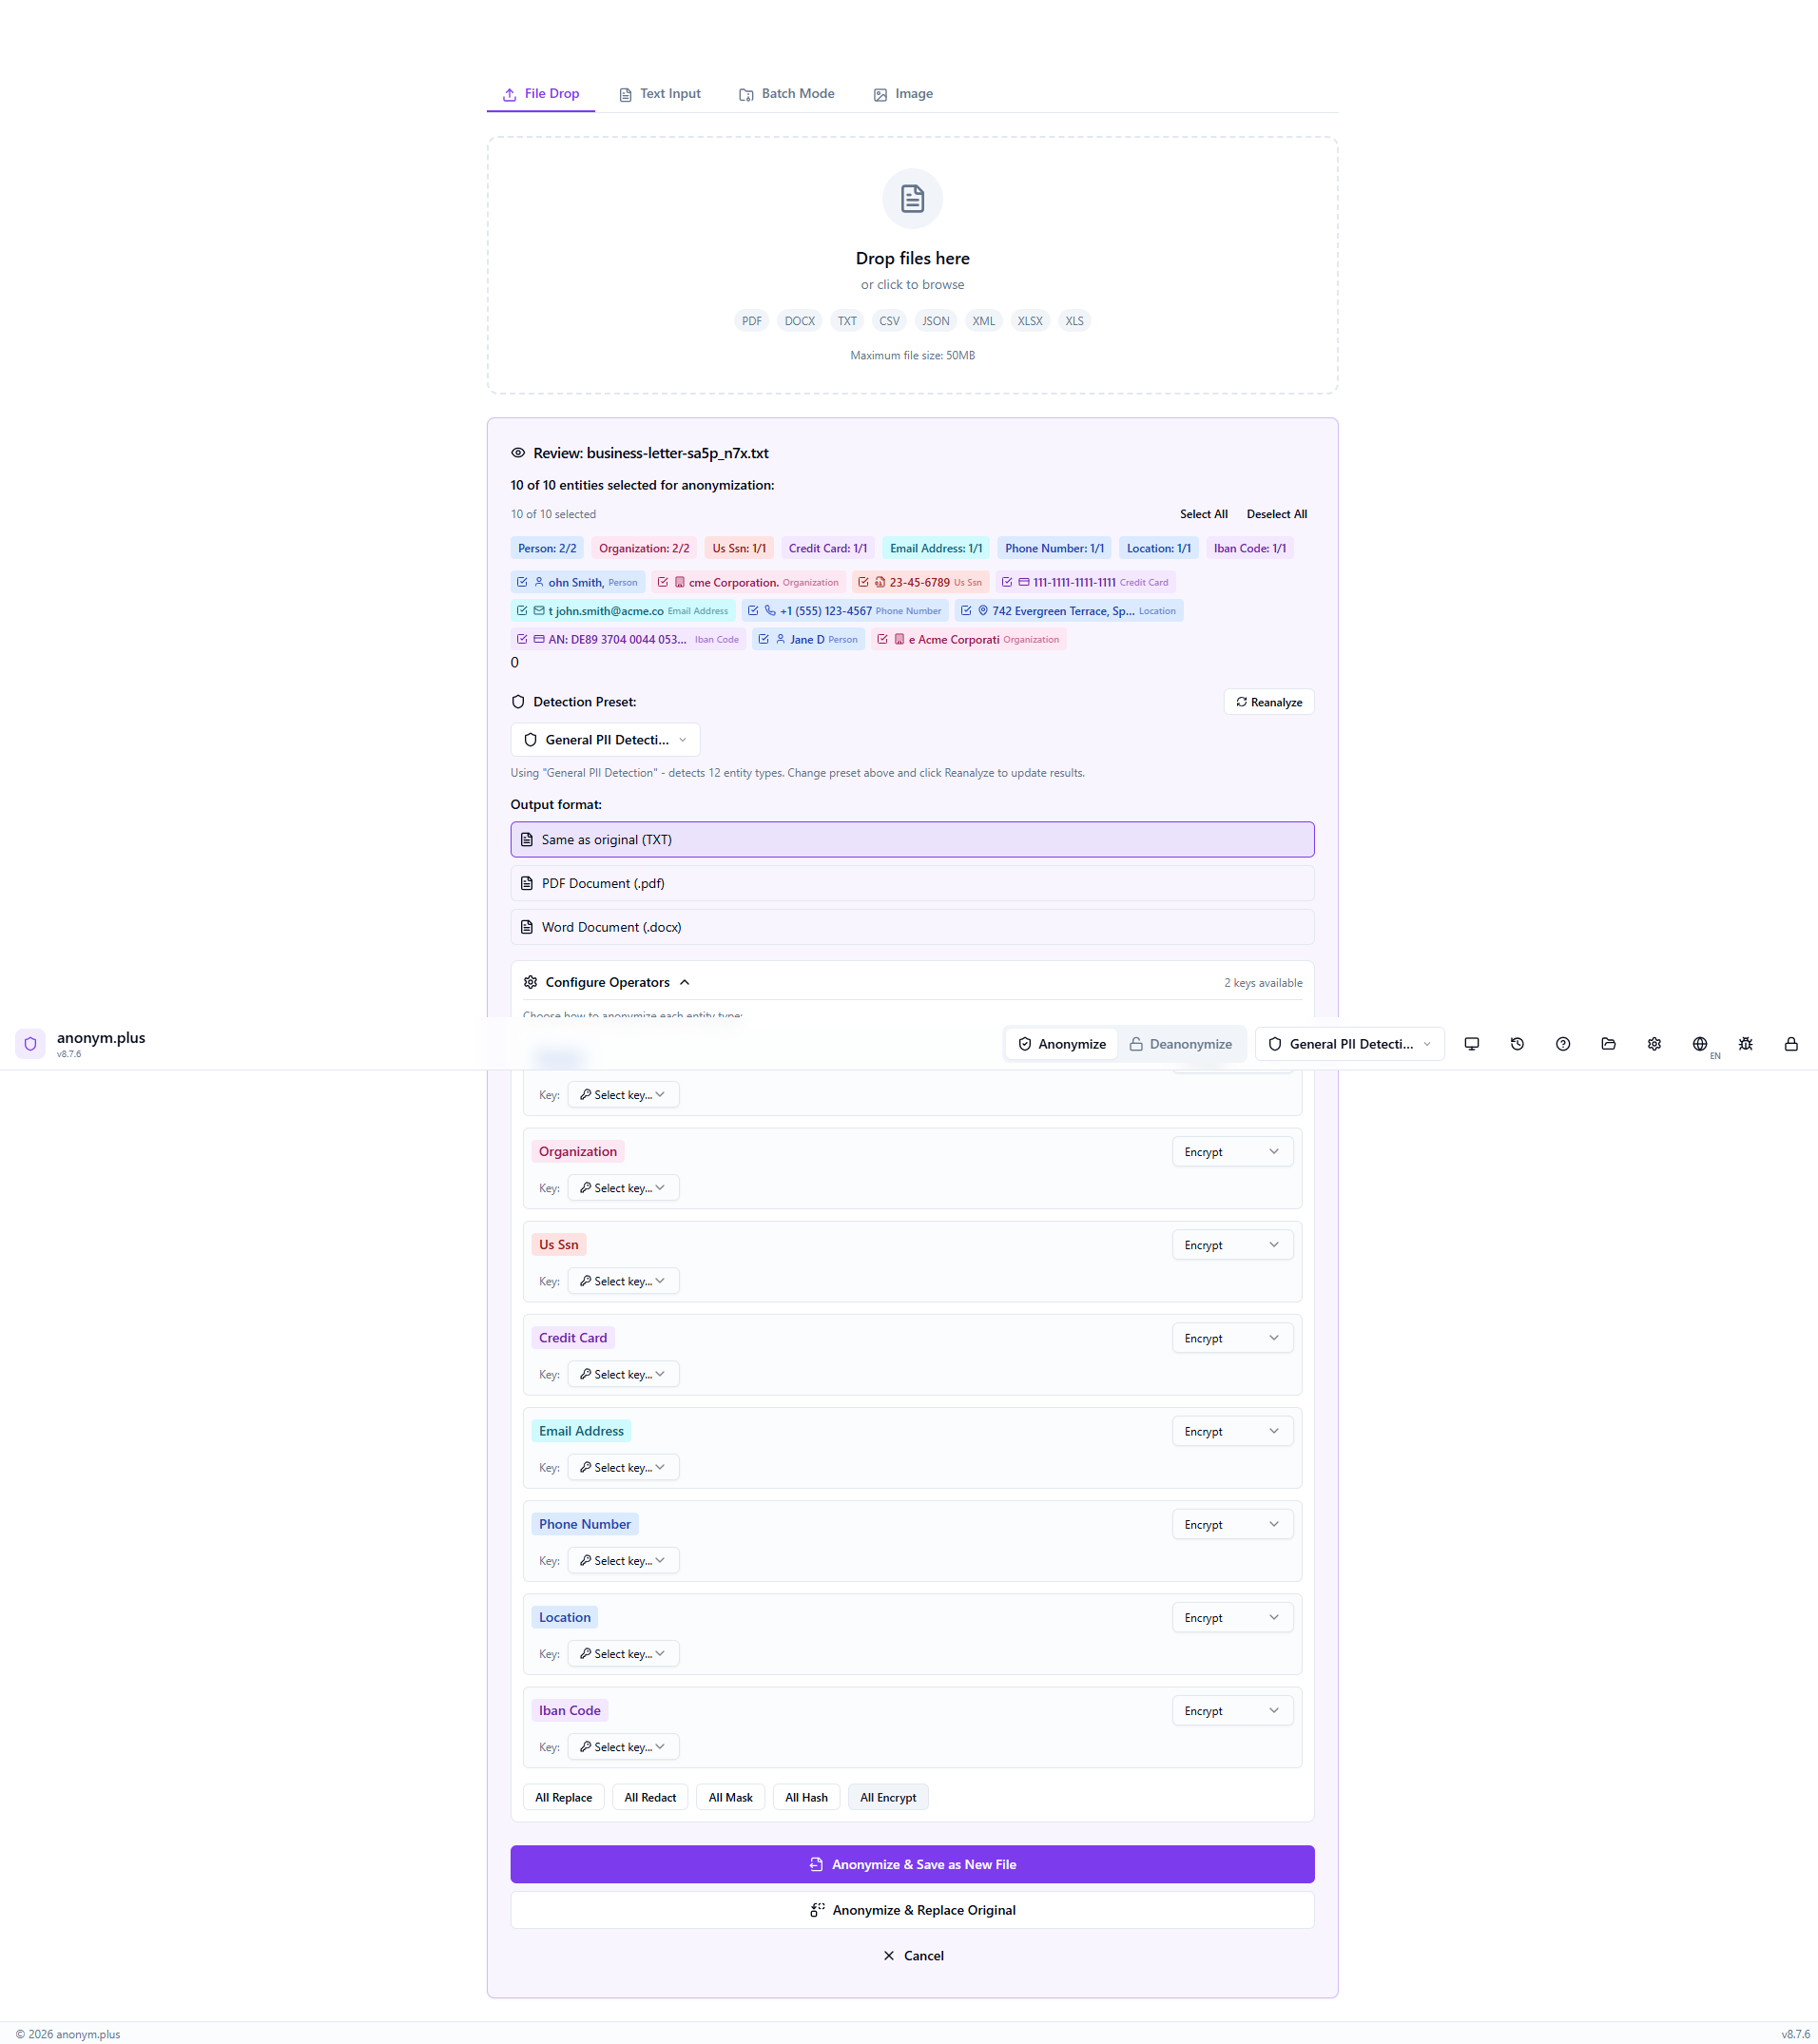
The file is processed with encrypt operators and saved to the output folder.
Output file contains encrypted tokens like <PERSON_ENC:...> that can be decrypted later using the Deanonymize feature.
Formatos soportados
Input
Output
Límites de tamaño de archivo
| Formato | Max Size |
|---|---|
| 50 MB | |
| TXT | 50 MB |
| DOCX | 30 MB |
| CSV | 30 MB |
| JSON | 30 MB |
| XML | 30 MB |
| XLSX | 20 MB or 100,000 rows |
Anonimización de imágenes
Detect and redact personal information directly in images. Uses Tesseract OCR to extract text from images, then applies the same PII detection engine to find and visually redact sensitive data.
Flujo de trabajo
Click the Image tab in the anonymization panel
Drag and drop an image file (PNG, JPG, BMP, or TIFF) or click to browse. Max: 10 MB, 25 megapixels.
Choose a detection preset and the OCR language matching the text in your image
Click 'Analyze' to extract text via OCR and detect PII entities with bounding boxes
Click 'Redact' to generate a new image with PII covered by colored redaction boxes
Descargue la imagen editada como PNG
Paso a paso: Anonimización de imagen
Detect and redact PII in images using OCR text extraction and NER-based entity detection.
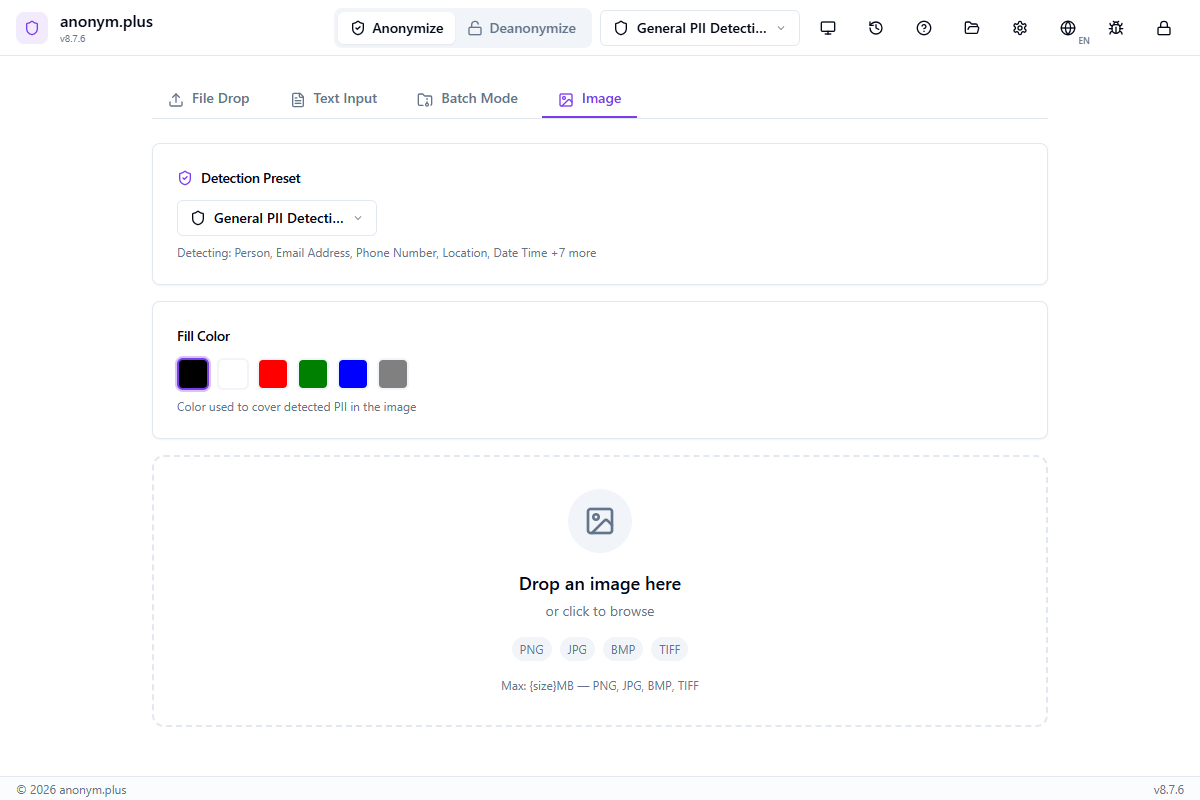
Navigate to the Image tab. The dropzone accepts PNG, JPG, BMP, and TIFF images up to 10MB.
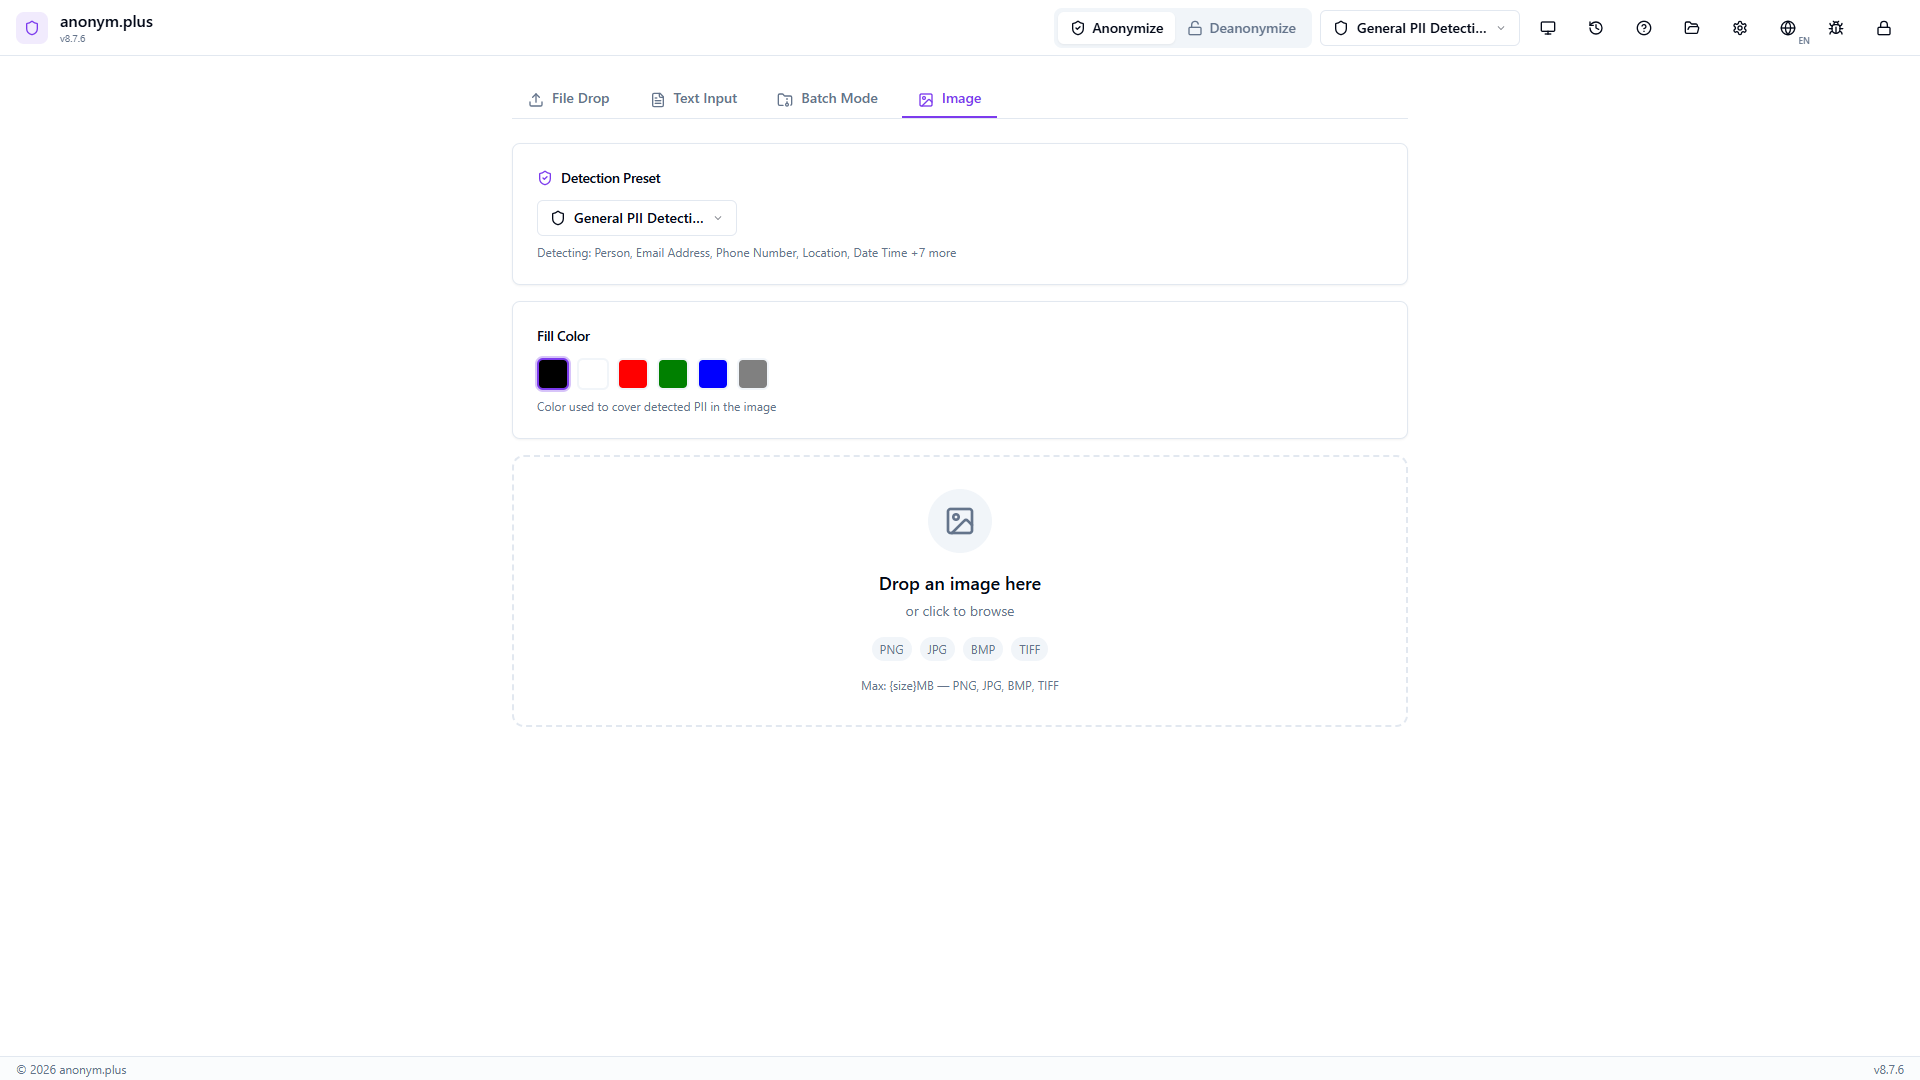
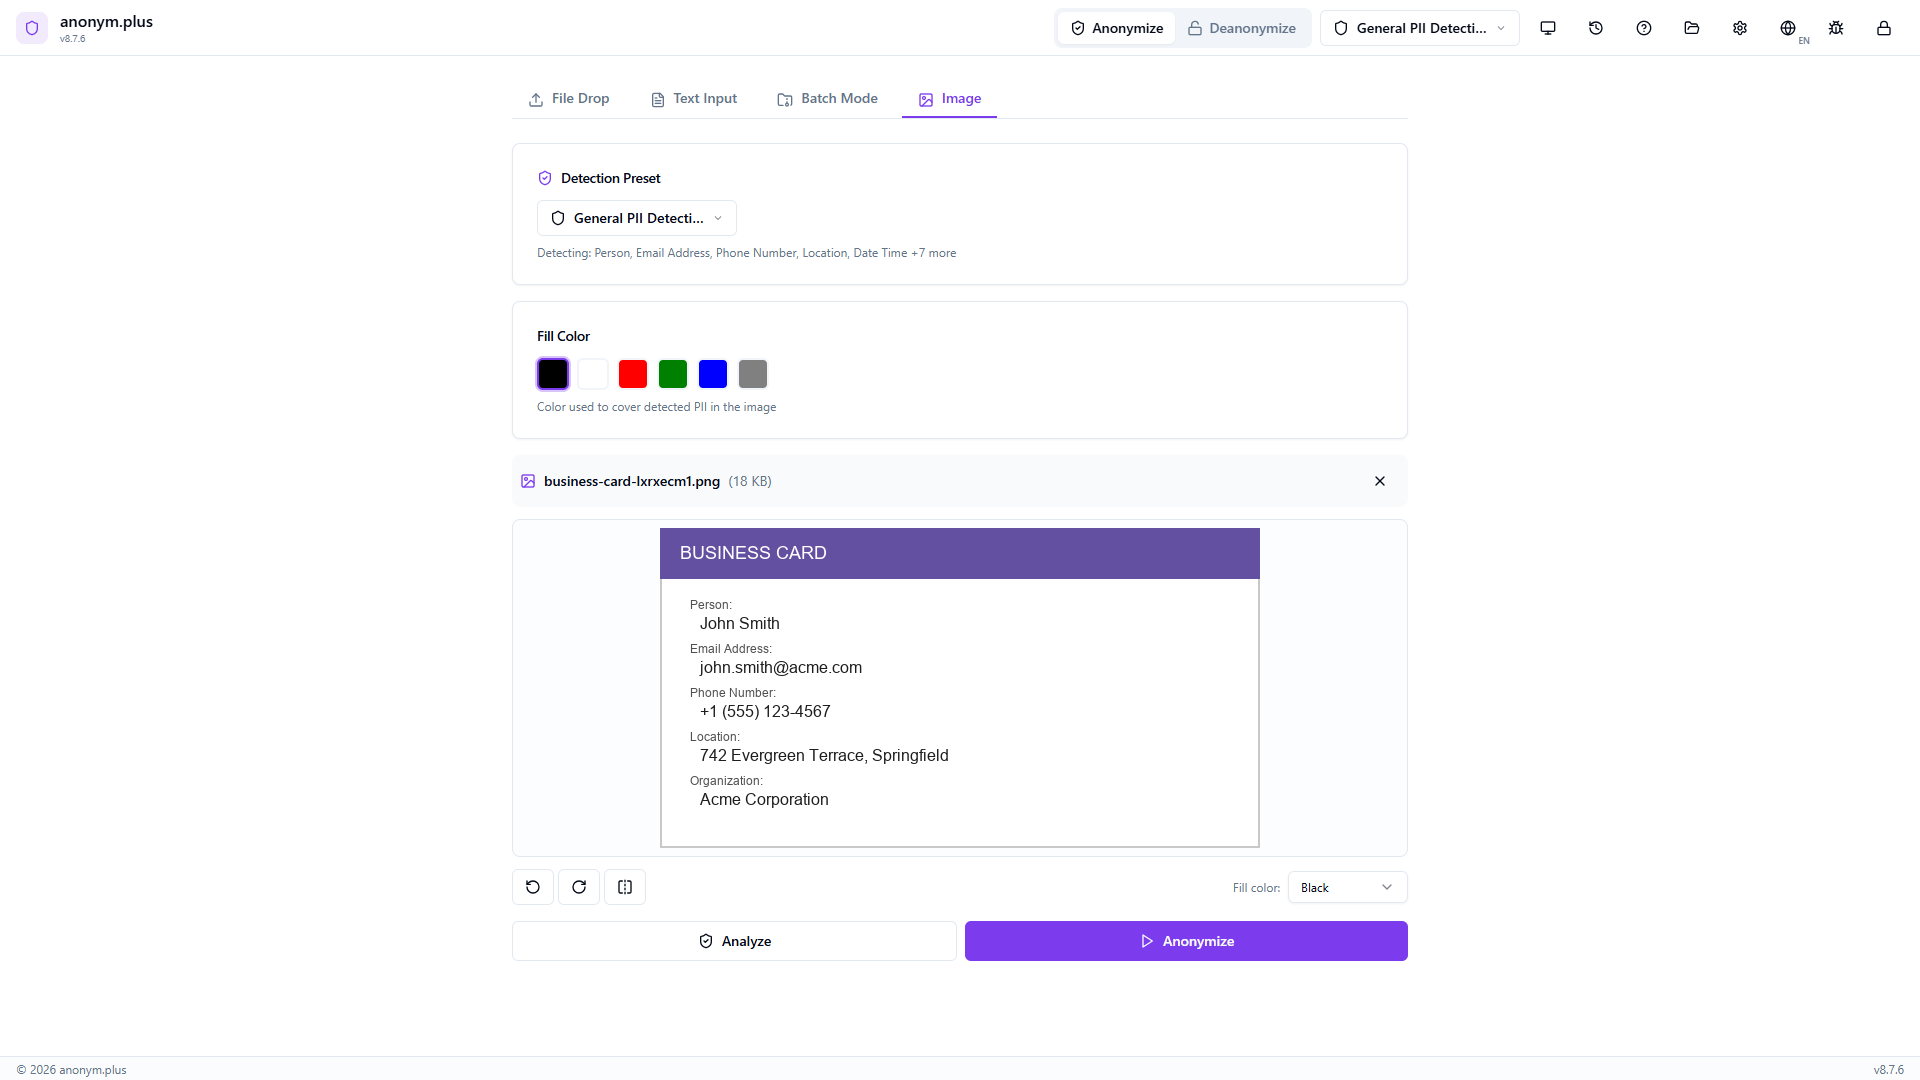
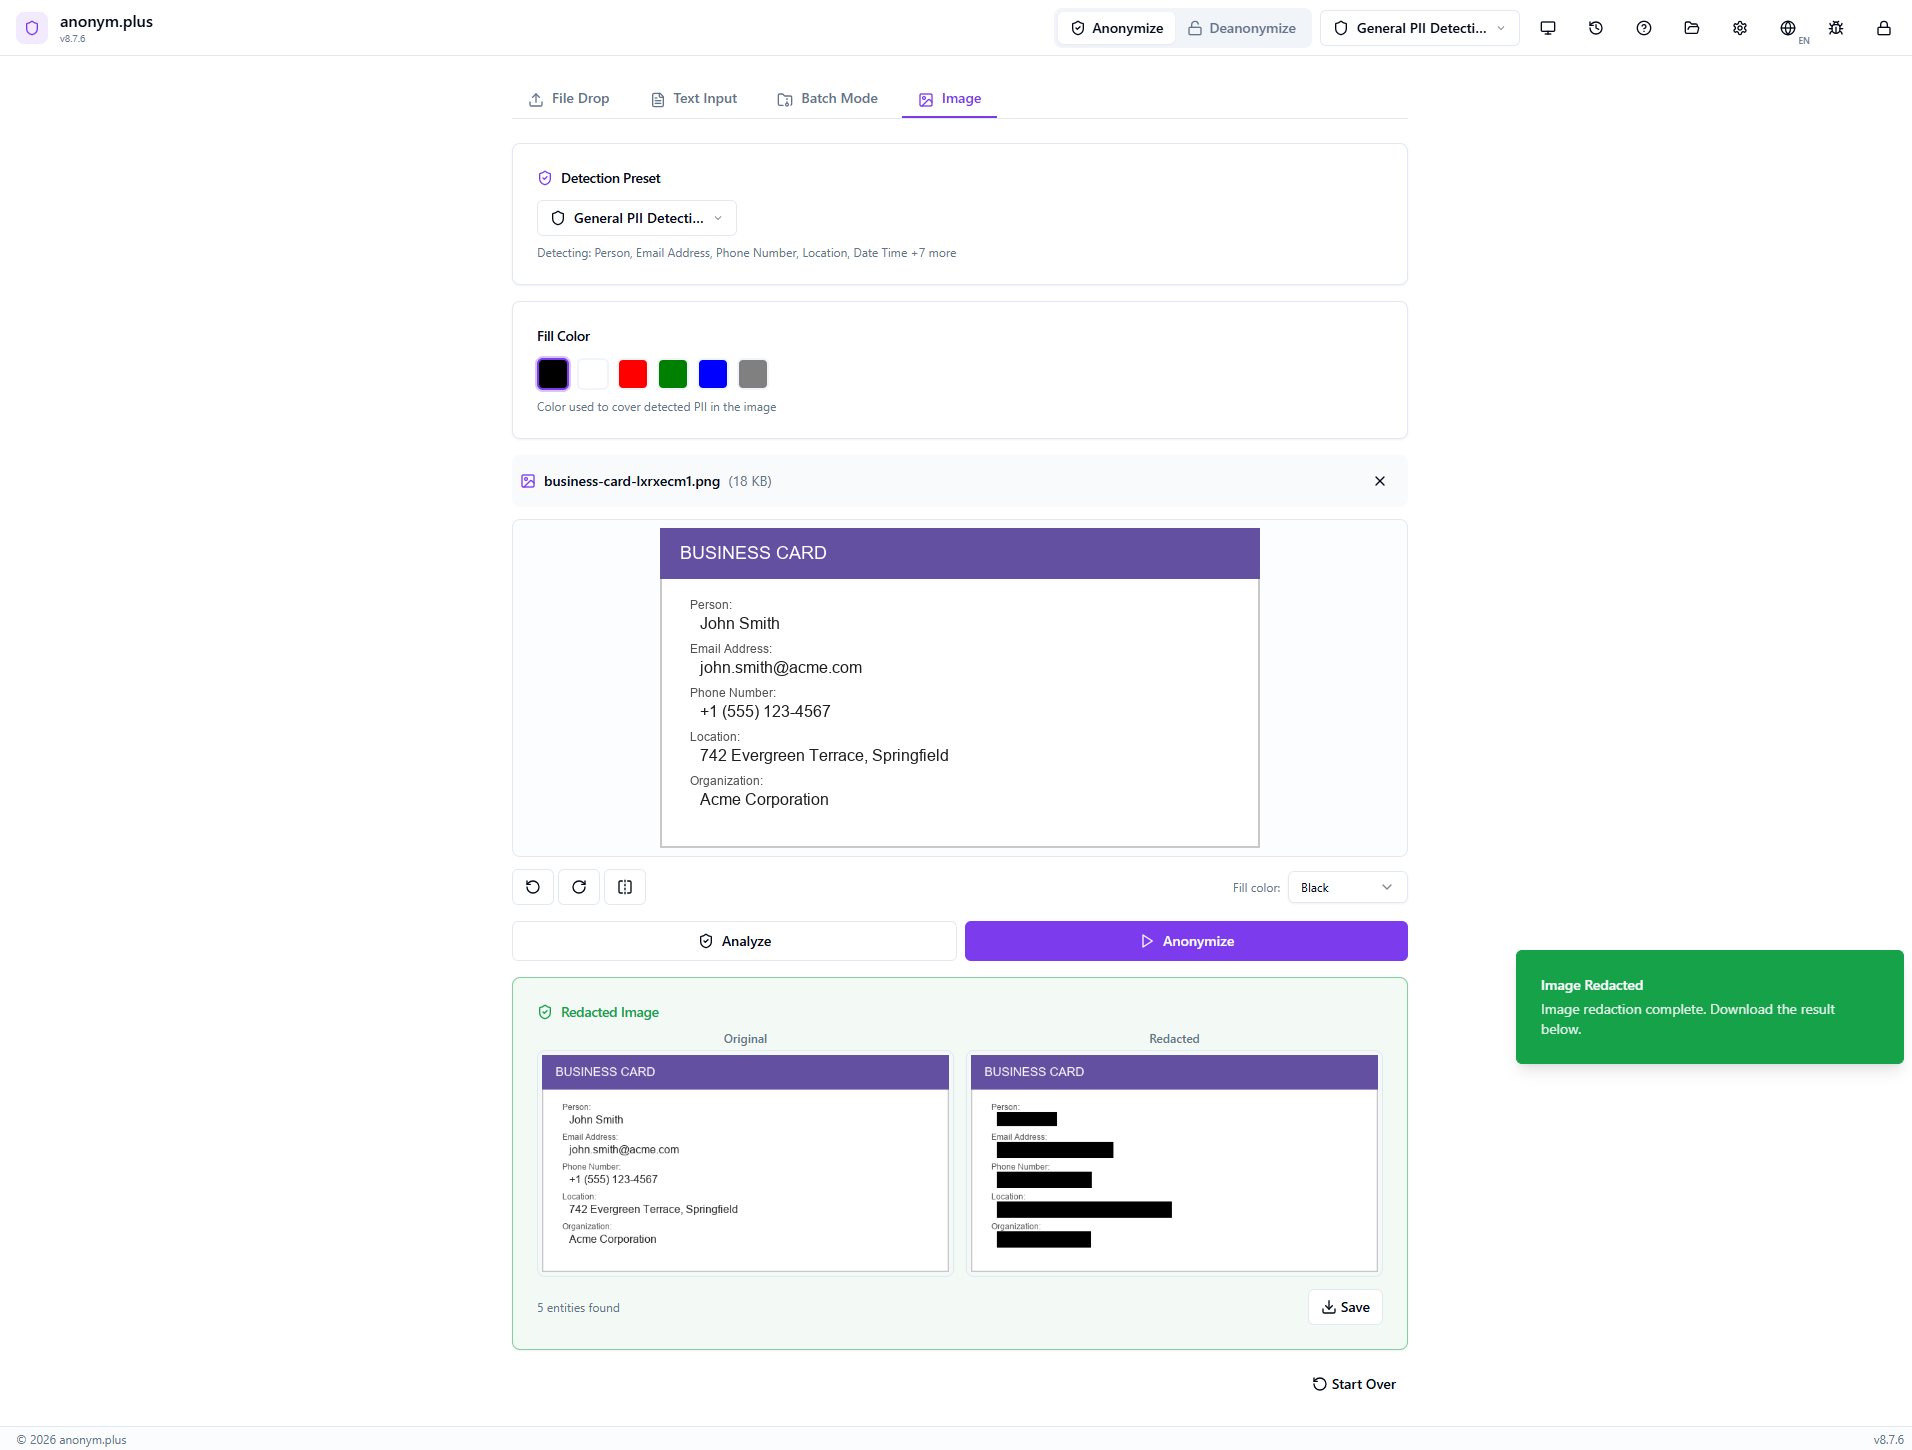
Drop a business card image. The preview shows the card with visible PII. Below: fill color selector (black, red, green, blue, gray), detection preset “General PII Detection”, and transform tools (rotate, flip). Click “Analyze”.
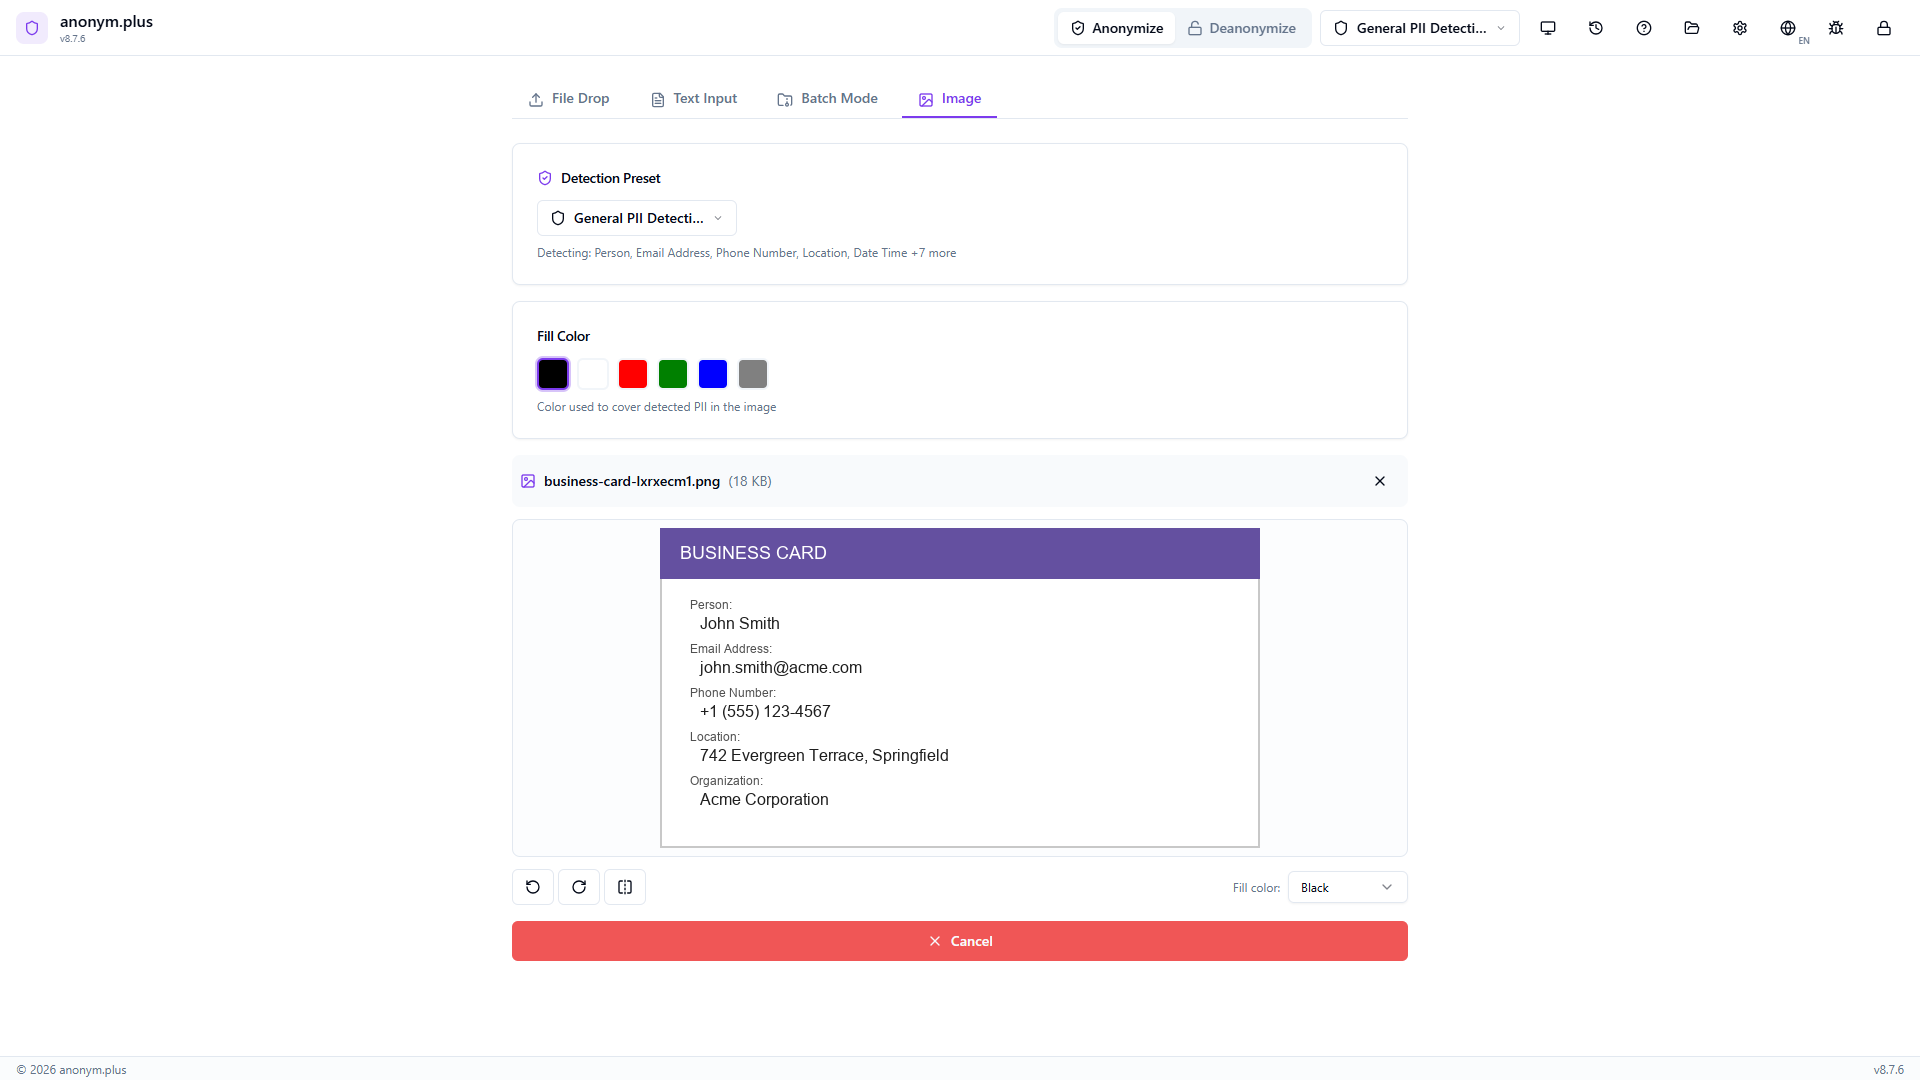
The app runs Tesseract OCR to extract text, then Presidio NER to detect PII entities and their bounding box positions within the image.
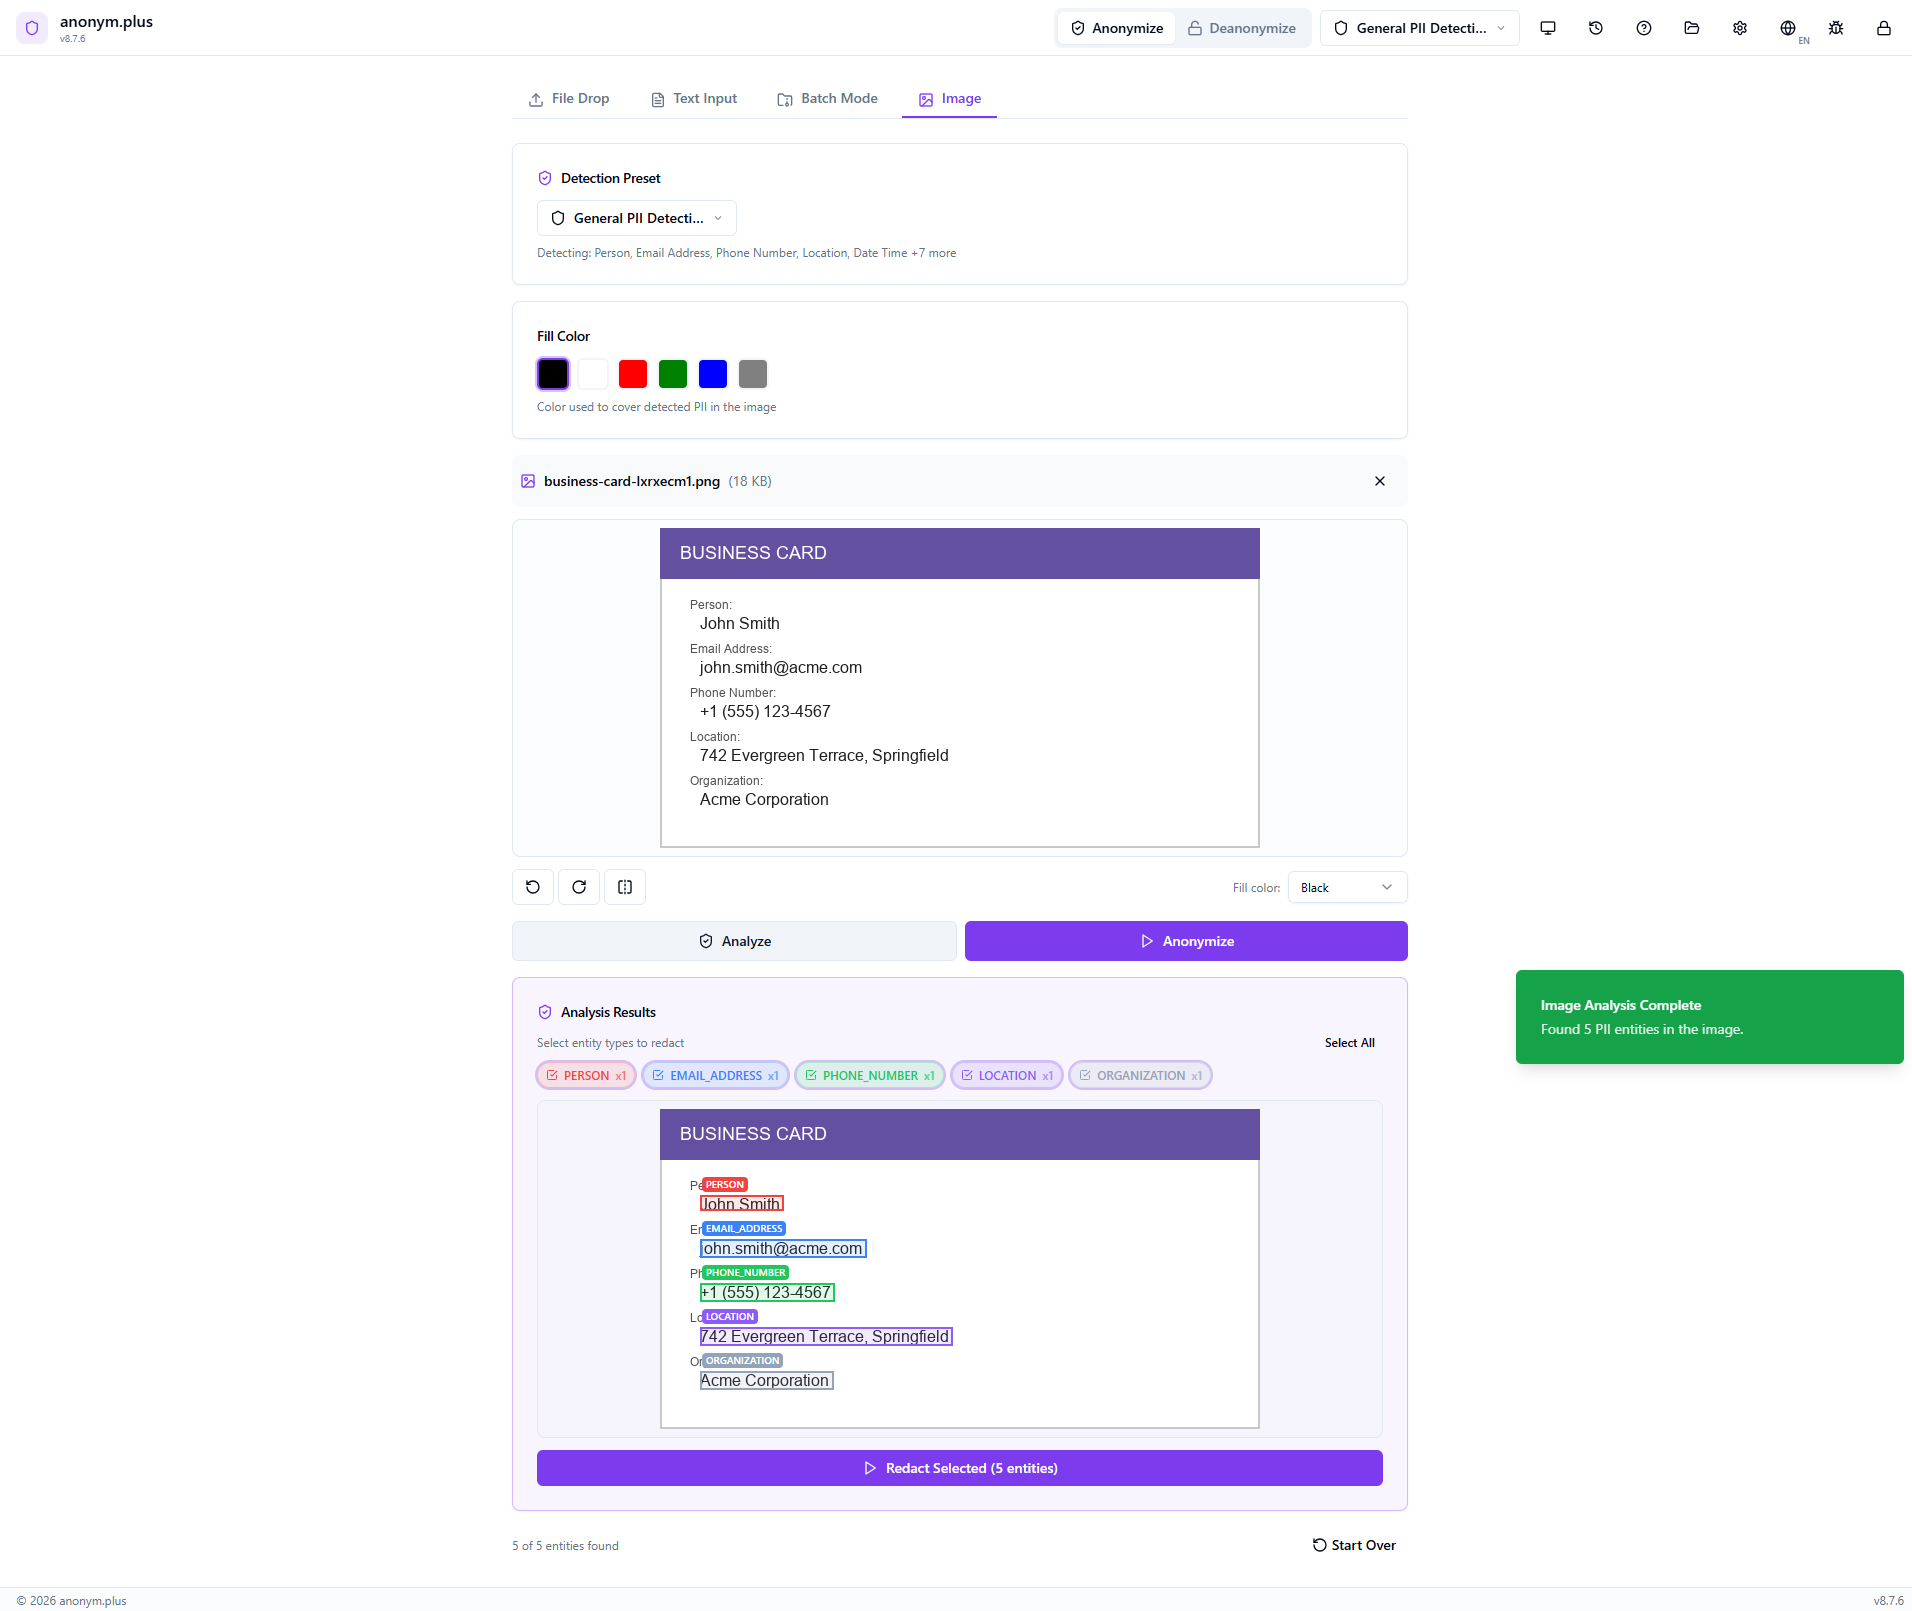
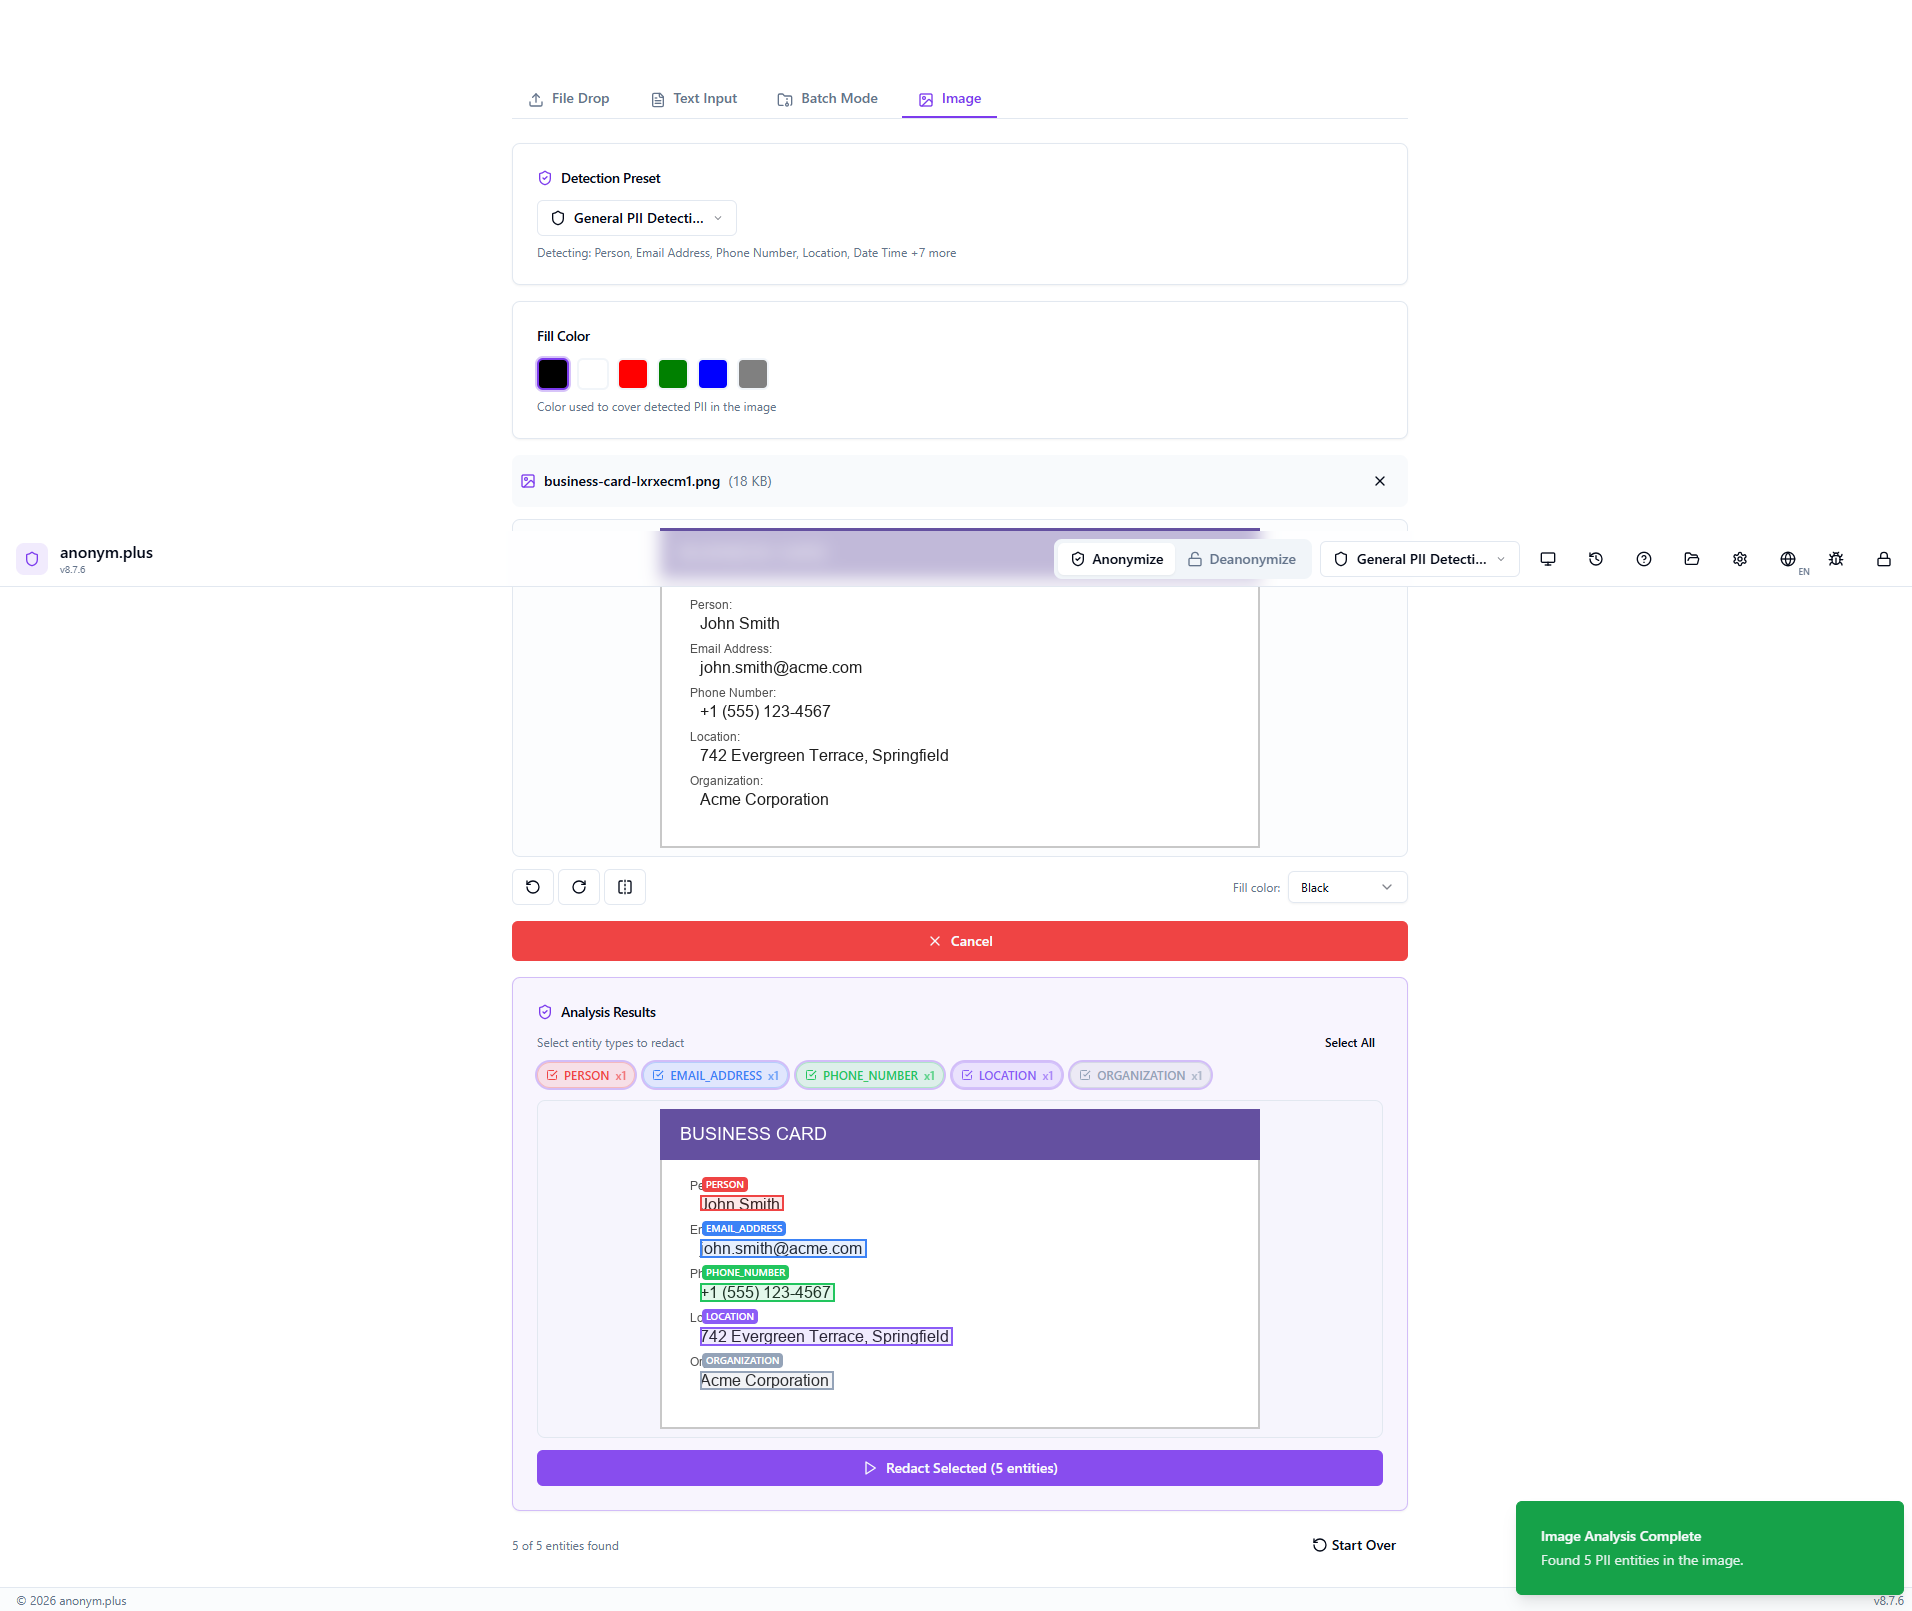
The image shows colored bounding boxes overlaid on each detected PII area. Entity type filter badges (Person, Email Address, Phone Number, Location, Organization) with checkboxes allow selecting which to redact. Click “Redact Selected (5 entities)”.
A loading indicator appears while selected PII regions are covered with black fill rectangles.
Side-by-side view: the Original image (left) with visible PII, and the Redacted image (right) with black bars covering all detected areas. Stats show entity count. Use the Save button to download the redacted image.
Formatos soportados
Idiomas de OCR
38 languages supported including English, German, French, Spanish, Italian, Portuguese, Dutch, Arabic, Chinese, Japanese, Korean, Hindi, Russian, and more. Select the correct language for best OCR accuracy.
Cómo funciona
Limitaciones conocidas
| Issue | Detail |
|---|---|
| Photos of screens | Moiré patterns, glare, and reflections degrade OCR. Use screenshots instead. |
| Handwritten text | Tesseract is optimized for printed/typed text only. |
| Low resolution | Below 150 DPI may have poor accuracy. Use 300+ DPI for scans. |
| Rotated/skewed text | Text at angles >15° may not extract correctly. |
| Complex backgrounds | Watermarks and colored backgrounds can interfere. |
| Very small text | Below ~8pt at the image's effective resolution may not be detected. |
| Multi-column layouts | OCR may mix columns in complex layouts. |
| NER language | Named entity recognition uses the English model. Pattern-based entities (phones, IBANs, emails) work in all languages. |
Consejos
- Use screenshots instead of camera photos of screens for much better results
- Select the correct OCR language matching the text in your image
- Ensure images are well-lit with good contrast between text and background
- For scanned documents, use 300 DPI or higher resolution
- Crop images to focus on the text area for faster processing
- EXIF orientation is applied automatically — no need to manually rotate photos
Procesamiento por lotes
Process multiple documents at once with parallel file handling. Batch mode is available for document anonymization.
Flujo de trabajo
Drag and drop up to 20 files at once onto the dropzone, or click to browse and select multiple files
Choose a detection preset — the same preset applies to all files in the batch
All files are extracted and analyzed in parallel for faster processing
Review detected entities for each file individually — accept, reject, or modify detections
Save all processed files to your output folder
Paso a paso: Procesamiento por lotes con Reemplazo
Process multiple files at once with the Replace operator — all PII is substituted with type labels and saved as a ZIP archive.
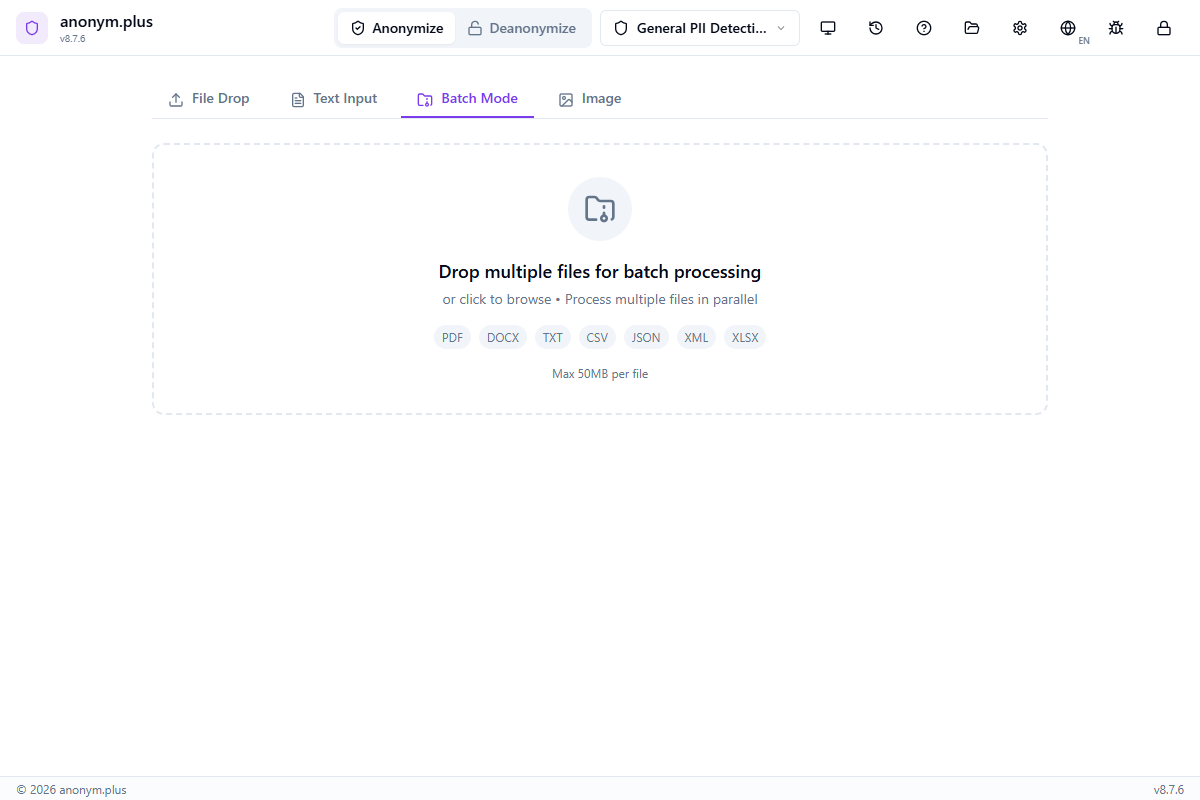
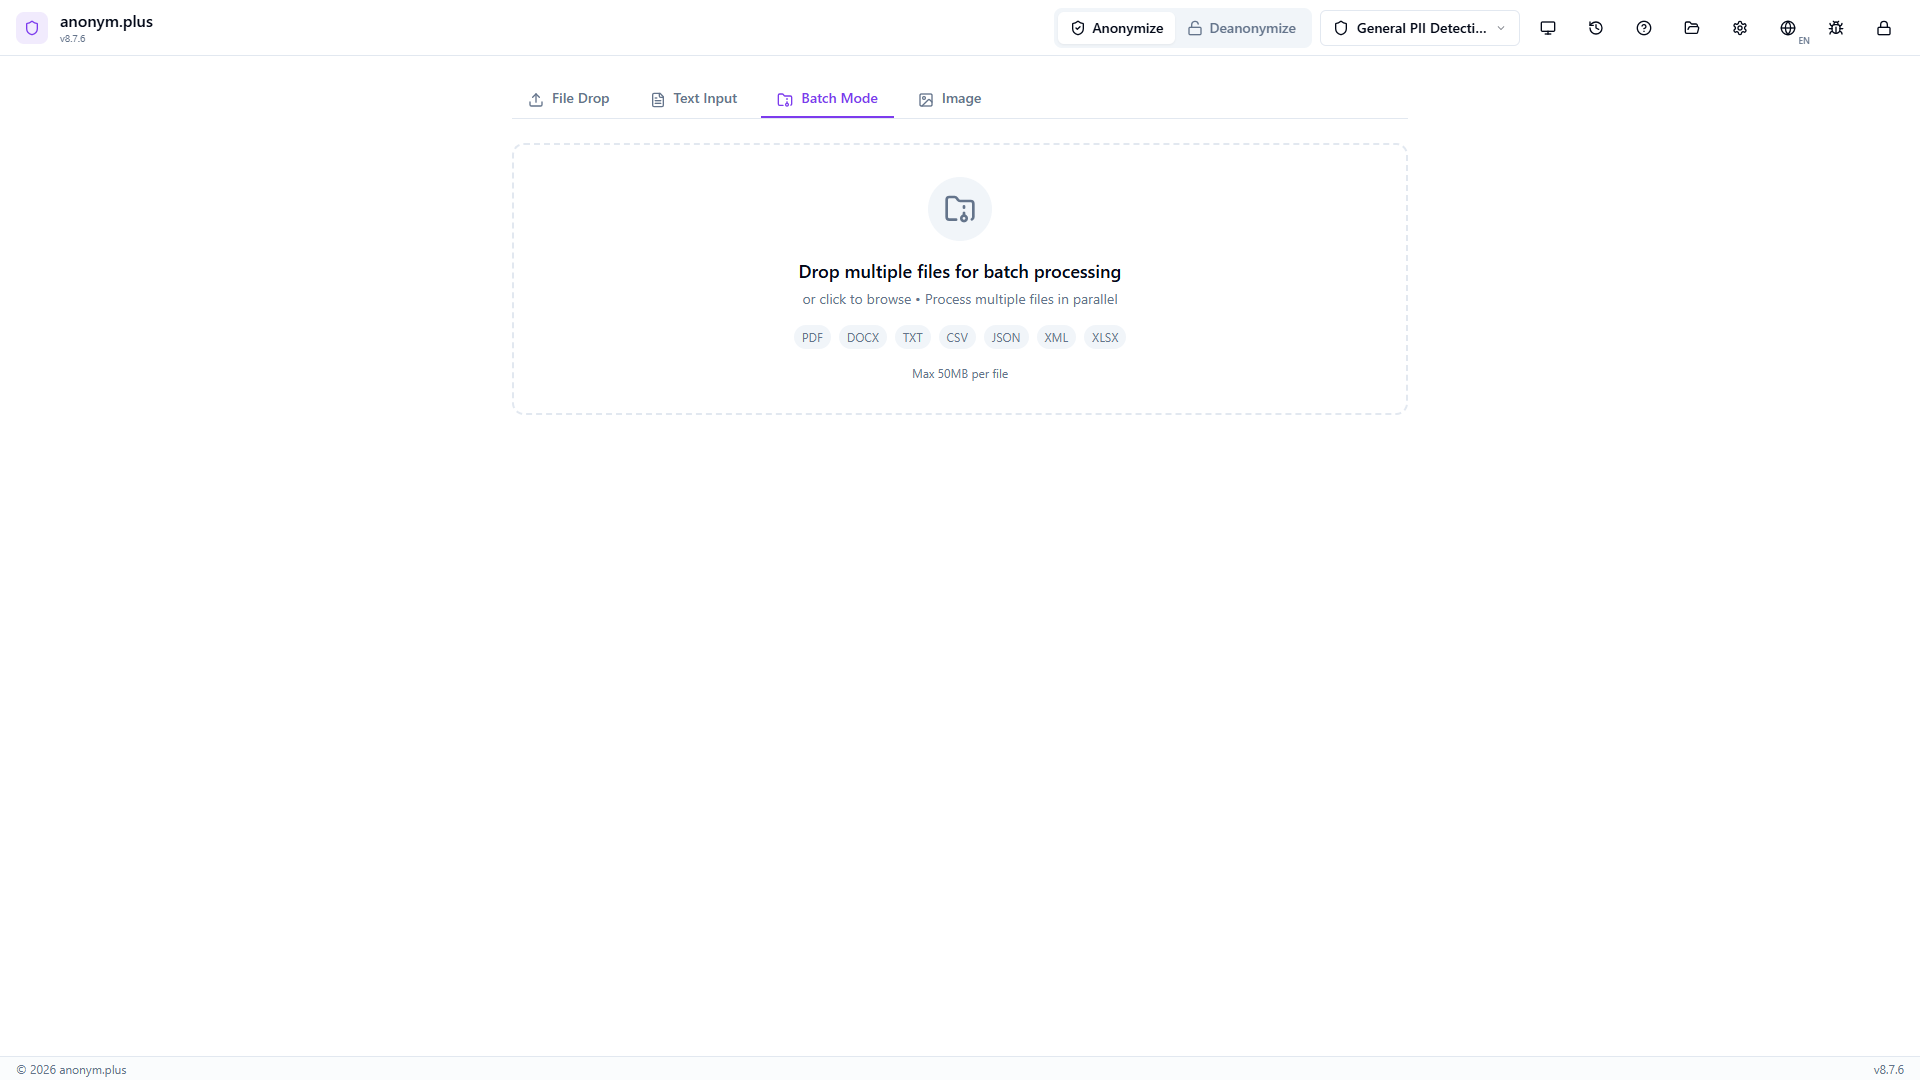
Navigate to the Batch Mode tab. The dropzone accepts multiple files (PDF, DOCX, TXT, CSV, JSON, XML, XLSX) up to 50MB per file.

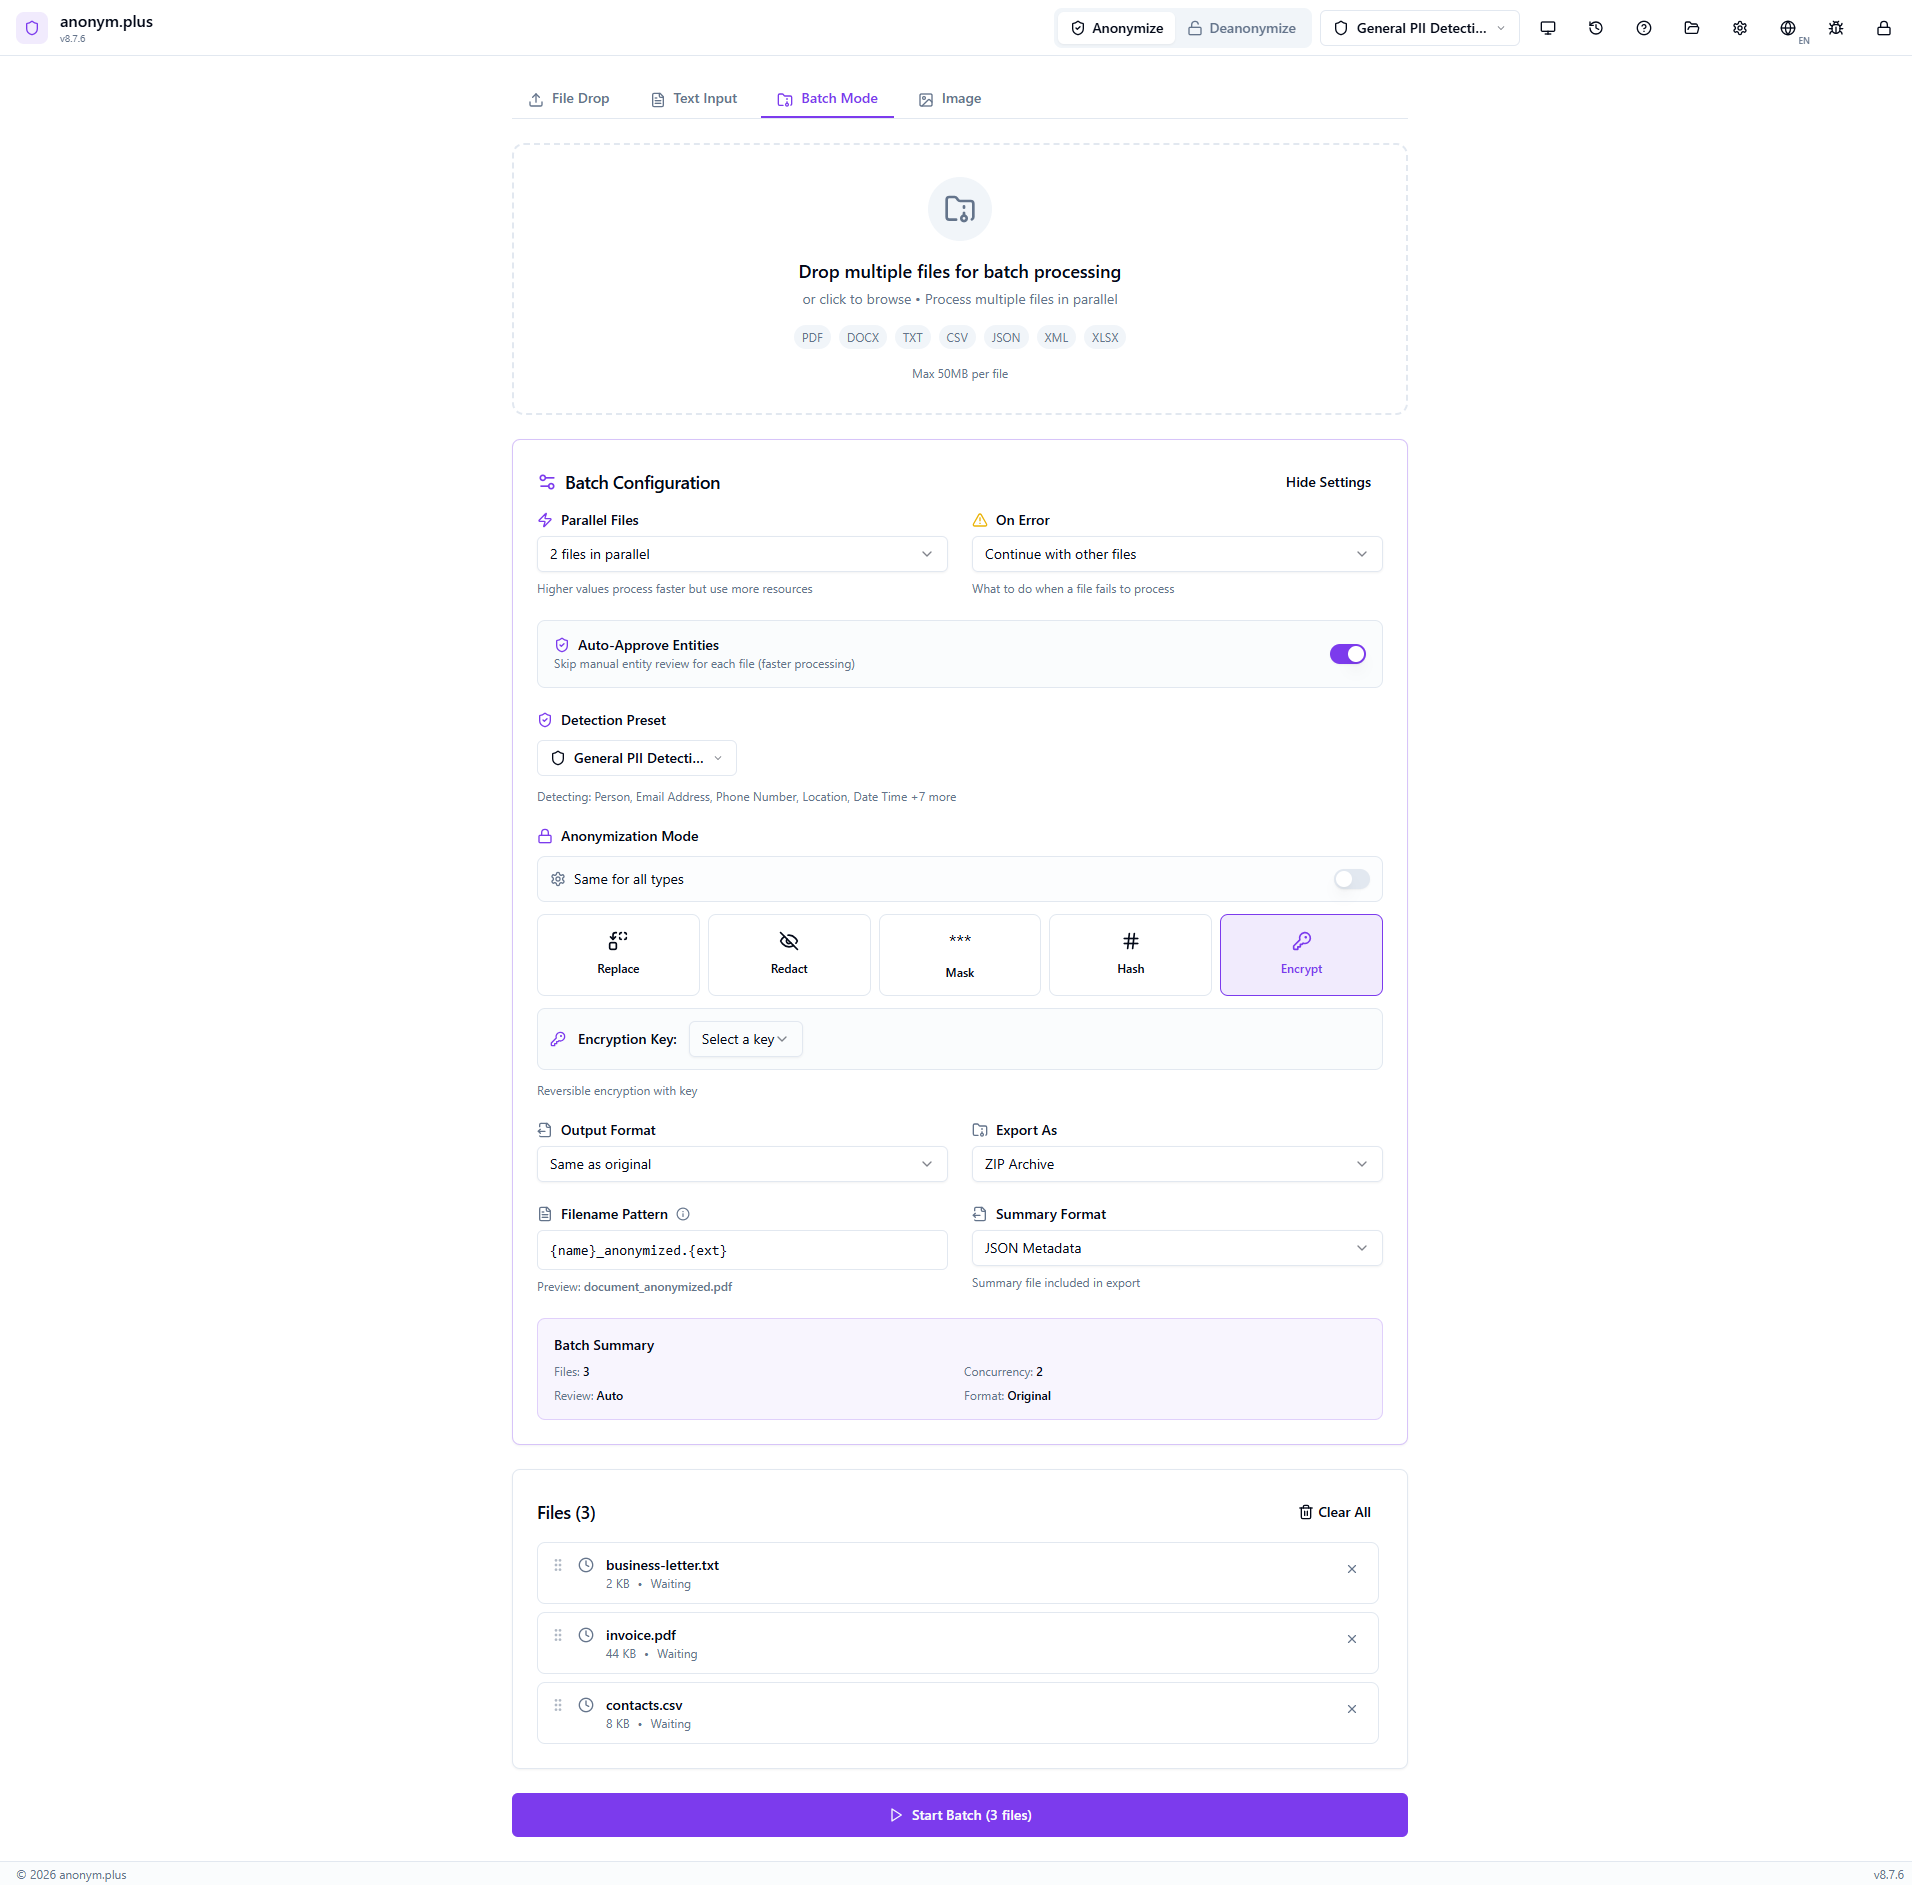
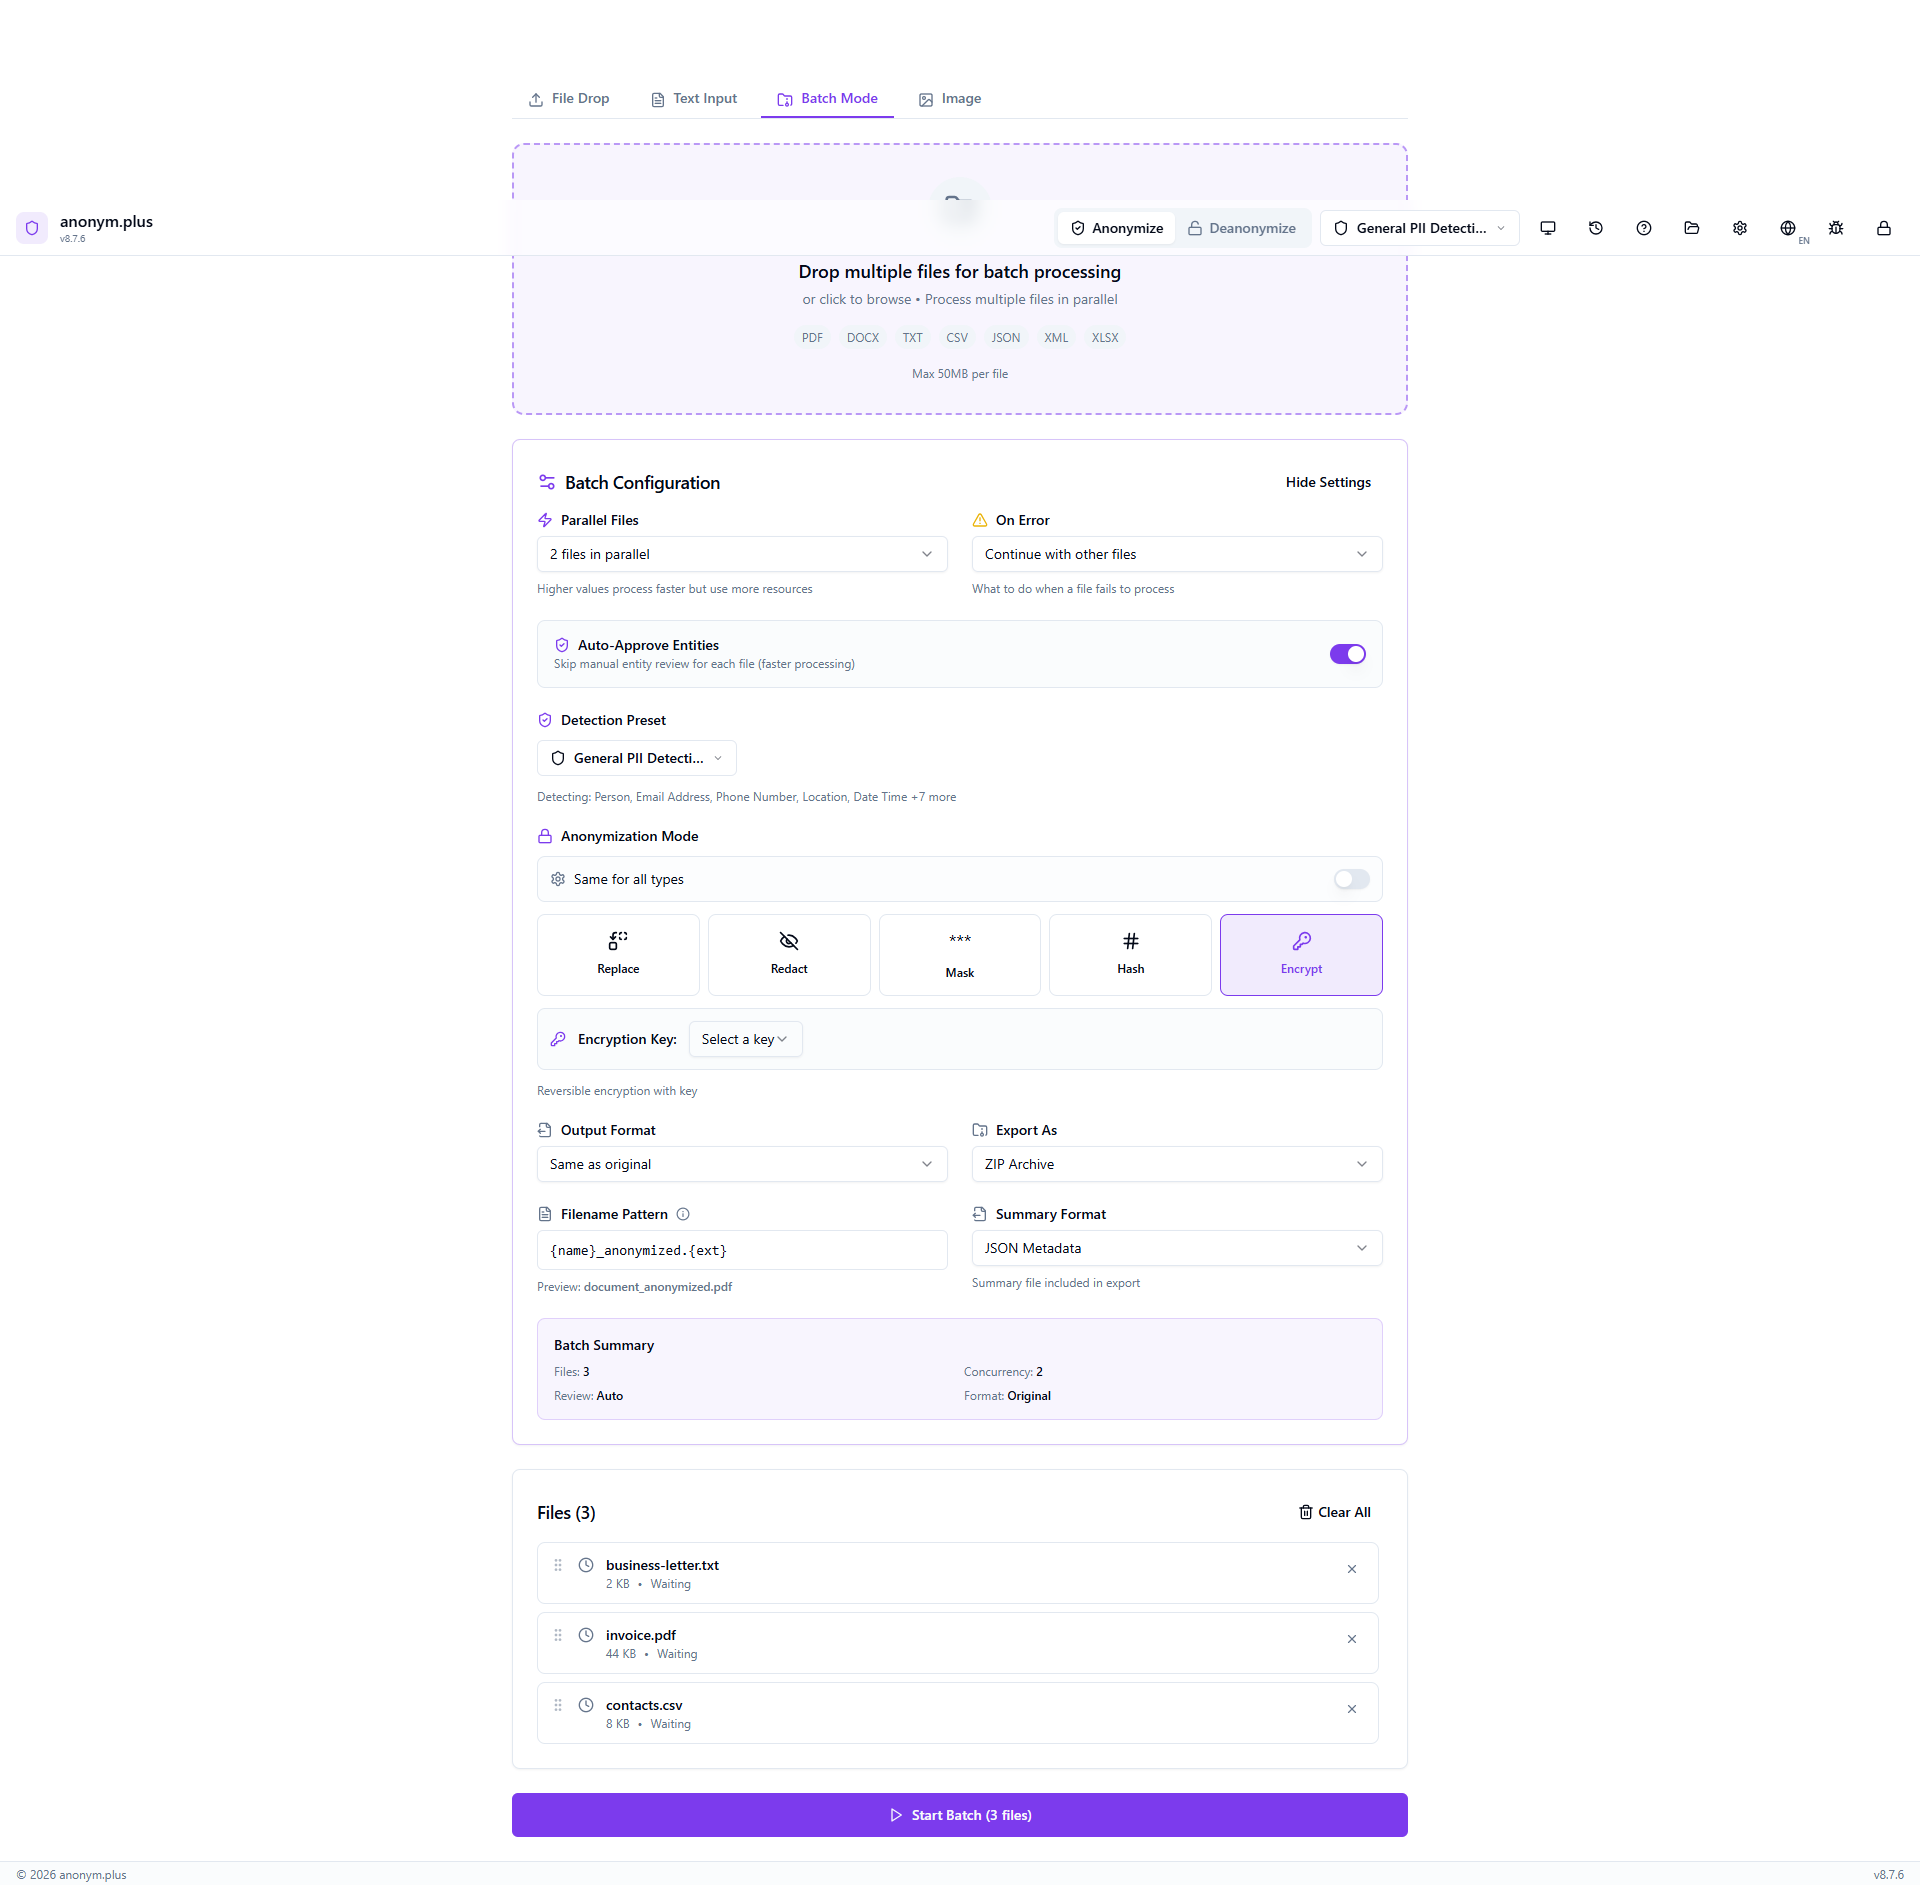
Three files added: business-letter.txt (2 KB), invoice.pdf (44 KB), contacts.csv (8 KB). Each shows in a card with pending status. The Batch Configuration panel shows preset selector, Replace operator mode, concurrency, auto-approve toggle, and export settings.

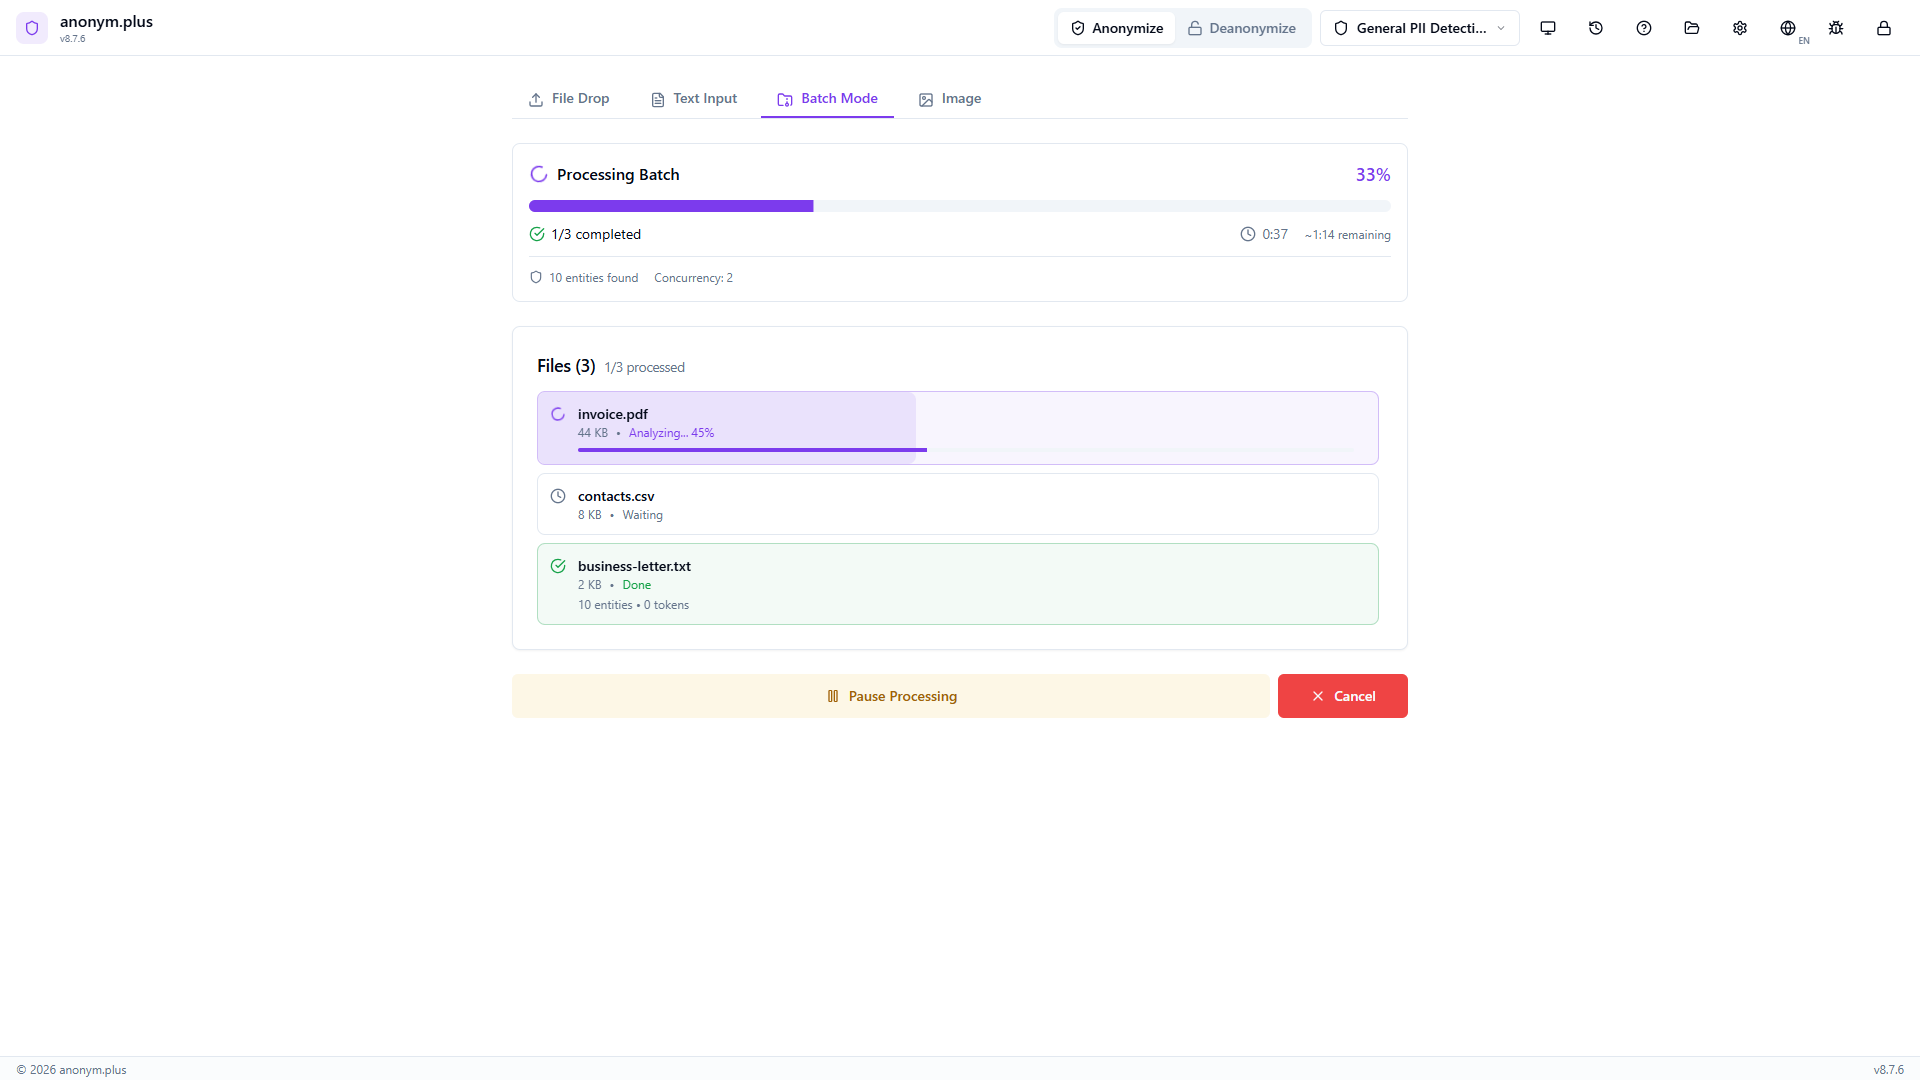
General PII Detection preset, Replace operator, 2 parallel files, Auto-Approve Entities ON (skips manual review for faster processing), Continue on error, output format “Same as original”, export as ZIP Archive, filename pattern {name}_anonymized.{ext}. Click “Start Batch (3 files)”.

Progress bar at 33% — 1/3 completed. Live stats show elapsed time, estimated remaining time, and 10 entities found so far. File statuses: business-letter.txt Done (10 entities), invoice.pdf Analyzing (45%), contacts.csv Waiting. Pause and Cancel buttons available.
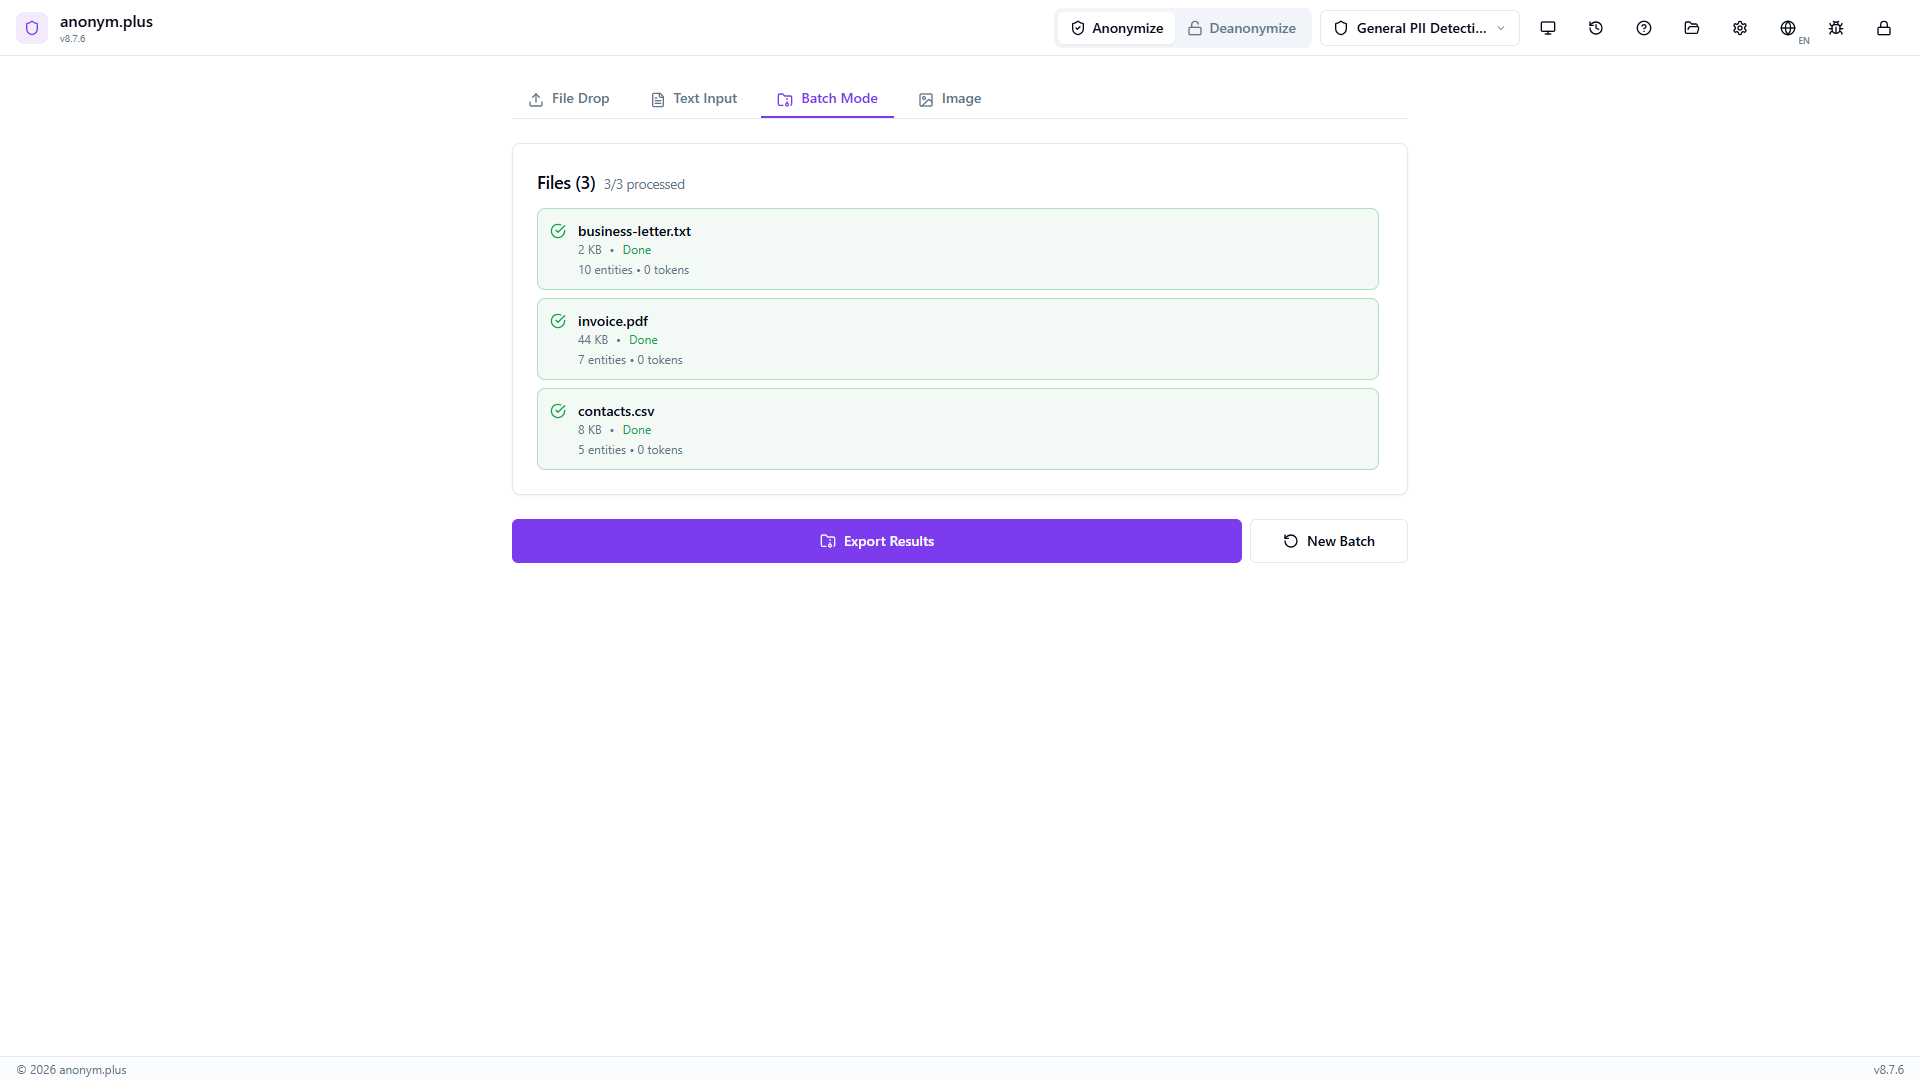
All 3 files show green checkmarks with individual entity counts (10, 7, 5). Total: 22 entities found, 0 errors. Export Results and New Batch buttons ready.

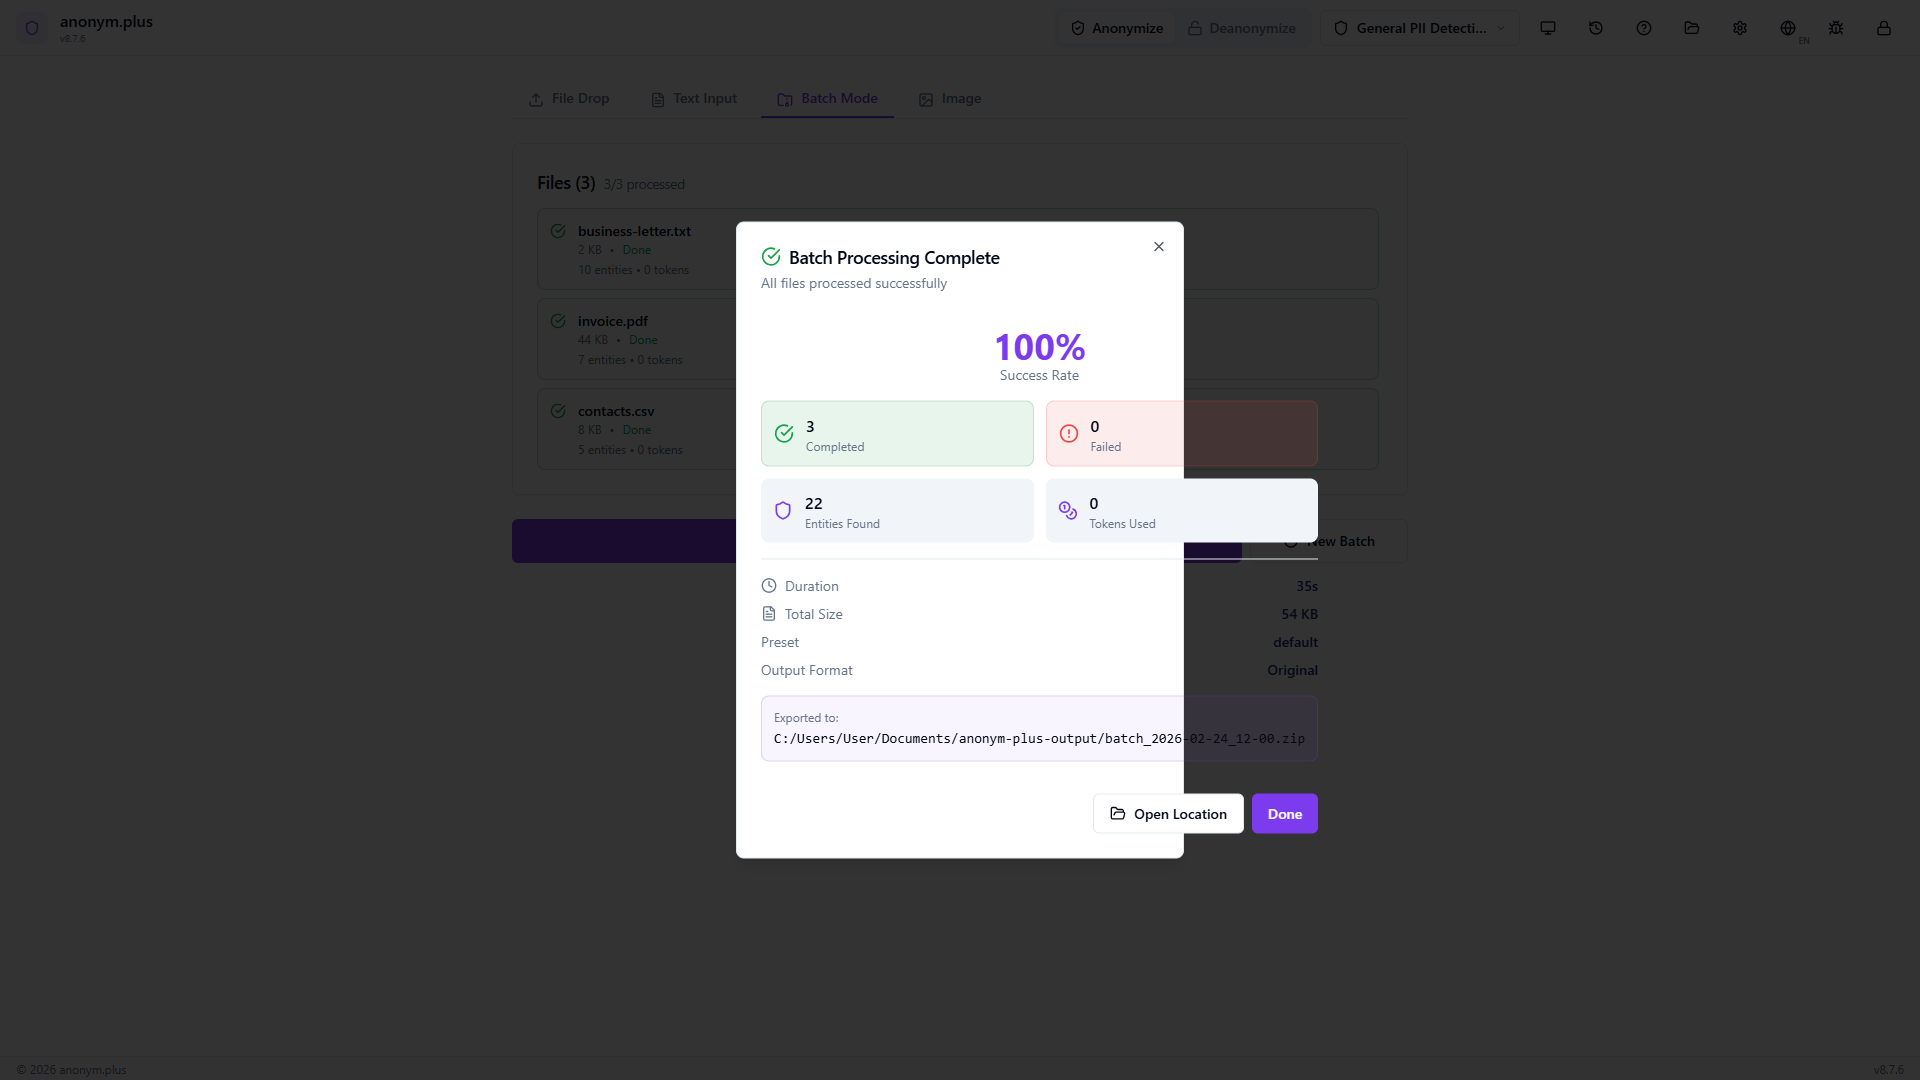
Modal showing 100% success rate, stats grid (3 completed, 0 failed, 22 entities, 0 tokens), preset “default”, output format “Original”. ZIP archive exported with “Open Location” button.

Paso a paso: Procesamiento por lotes con Cifrado
Process multiple files with reversible encryption — output files contain encrypted tokens that can be decrypted later.
Same multi-file dropzone as Replace mode.
Three files added. The operator mode shows Encrypt with encryption key dropdown visible.
Full config: Encrypt operator highlighted, “Encryption Key: Select a key” dropdown, “Reversible encryption with key” hint. Other settings: 2 parallel files, auto-approve ON, ZIP archive export. Click “Start Batch (3 files)”.
Progress bar with mixed file statuses — same layout as Replace but processing with encrypt operators.

All 3 files complete with green checkmarks and entity counts. Output files contain reversible encrypted tokens.
100% success modal with encrypted output in ZIP archive.
Límites
| Parameter | Limit |
|---|---|
| Files per batch | 20 |
| Total batch size | Combined file size limits apply per format (see Document Anonymization) |
| Parallel processing | Files analyzed concurrently for speed |
Seguimiento del progreso
During batch processing, each file shows its own progress indicator with status (queued, extracting, analyzing, complete). Files that fail are flagged individually without stopping the rest of the batch.
Desanonimización (Descifrado)
Restore original PII values from anonymized documents using your encryption keys. Works with any document that was anonymized using the 'encrypt' operator.
Modos de entrada
Drop an anonymized document (PDF, DOCX, TXT, CSV, JSON, XML, XLSX). Text is extracted and automatically matched against your history to load the correct encryption keys.
Pegar anonymized text directly. The app automatically searches your history for matching encrypted chunks and loads the correct keys — even if the surrounding text was edited.
Select a previous anonymization entry. All entity positions and key mappings are loaded instantly.
Paso a paso: Desanonimizar del historial
Restore original PII from a previously encrypted anonymization by selecting it from your processing history.
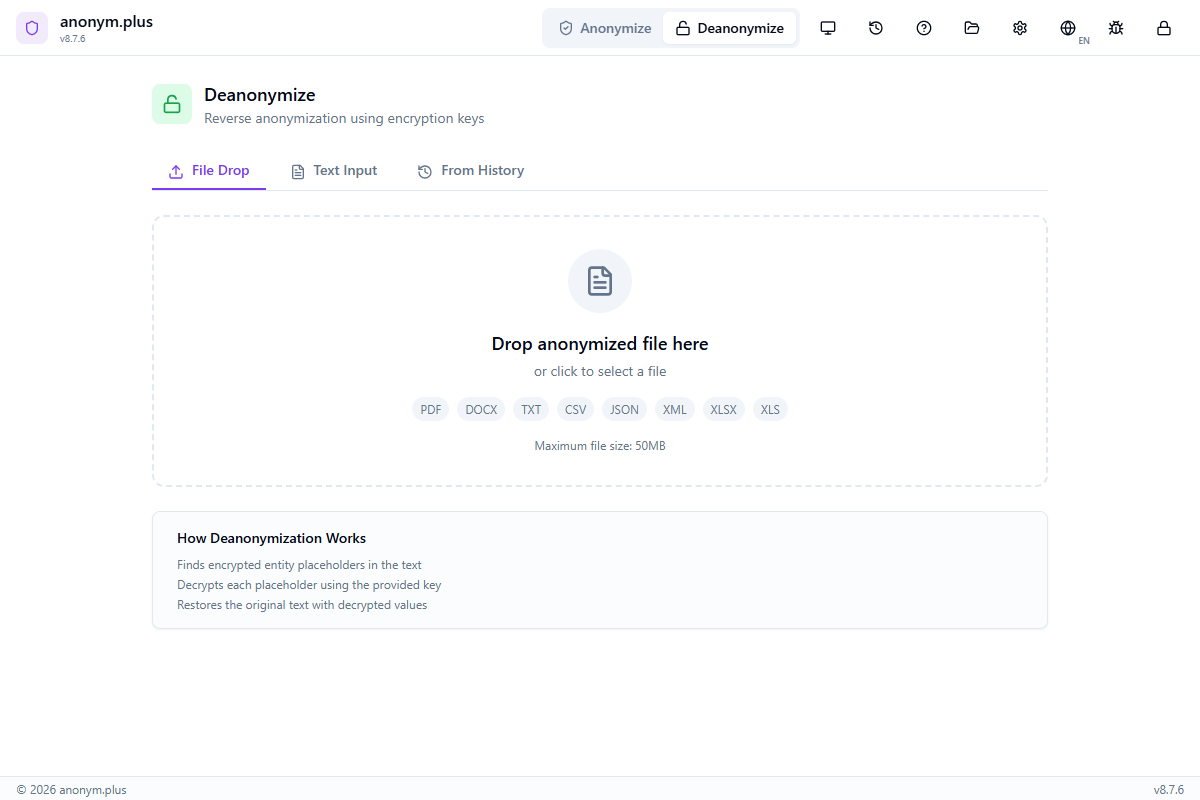
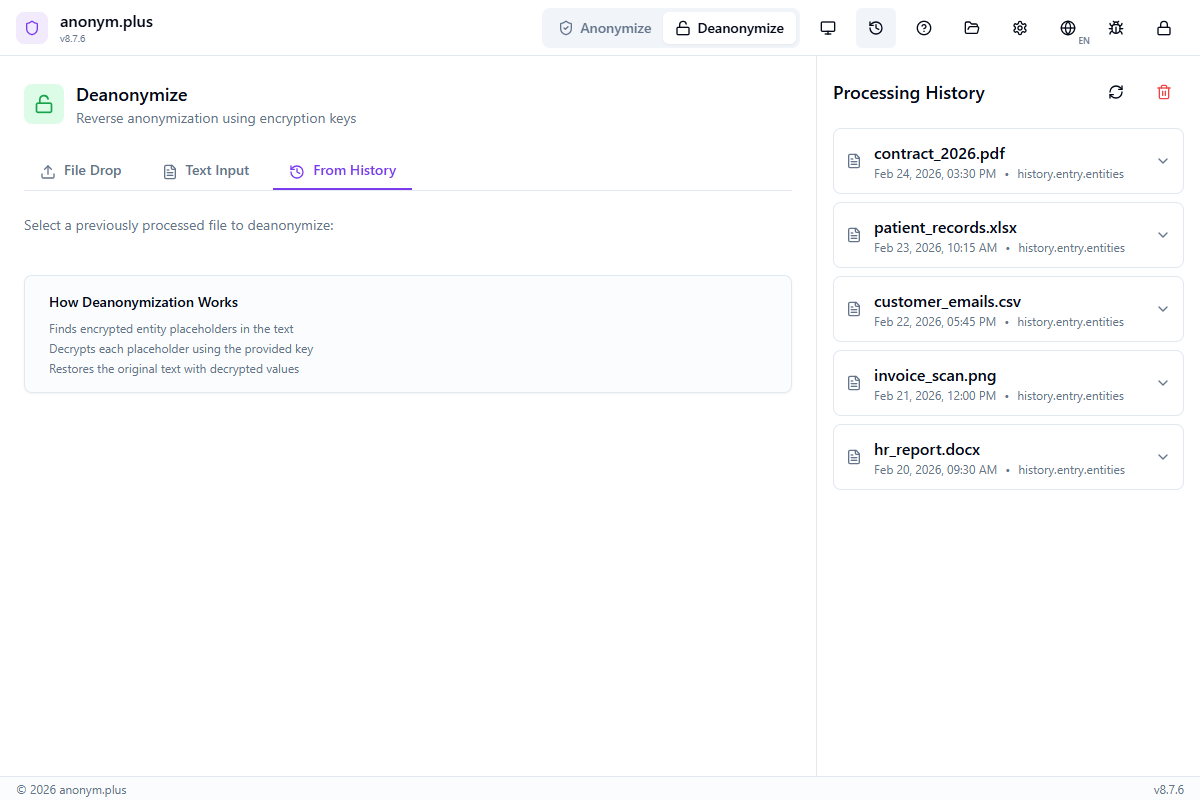
Click “Deanonymize” in the header bar. The panel shows three tabs: File Drop, Text Input, and From History. The File Drop tab is active by default with a dropzone for anonymized files. “How Deanonymization Works” info box explains the process.
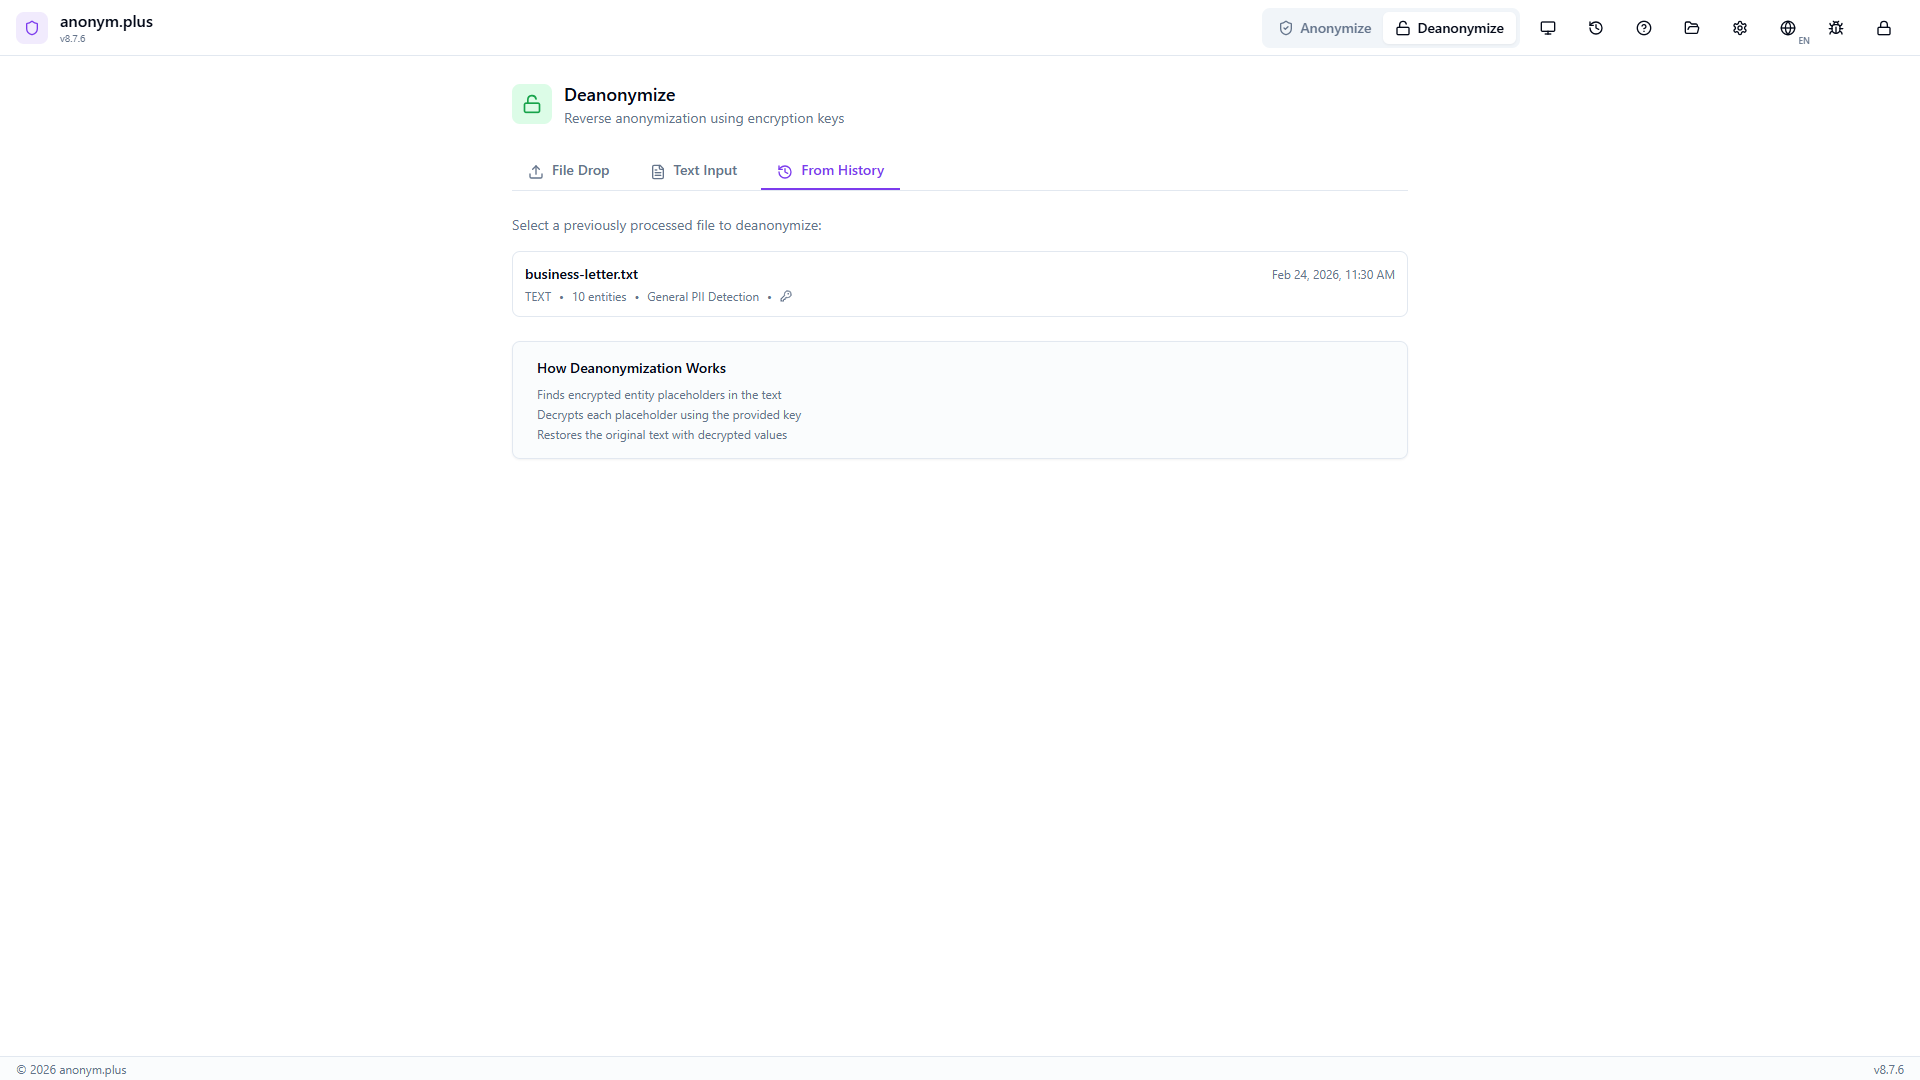
Switch to the “From History” tab. Previously anonymized files are listed with metadata: filename (business-letter.txt), format (TEXT), entity count (10), preset (General PII Detection), and a key icon indicating encryption was used. Click to select.
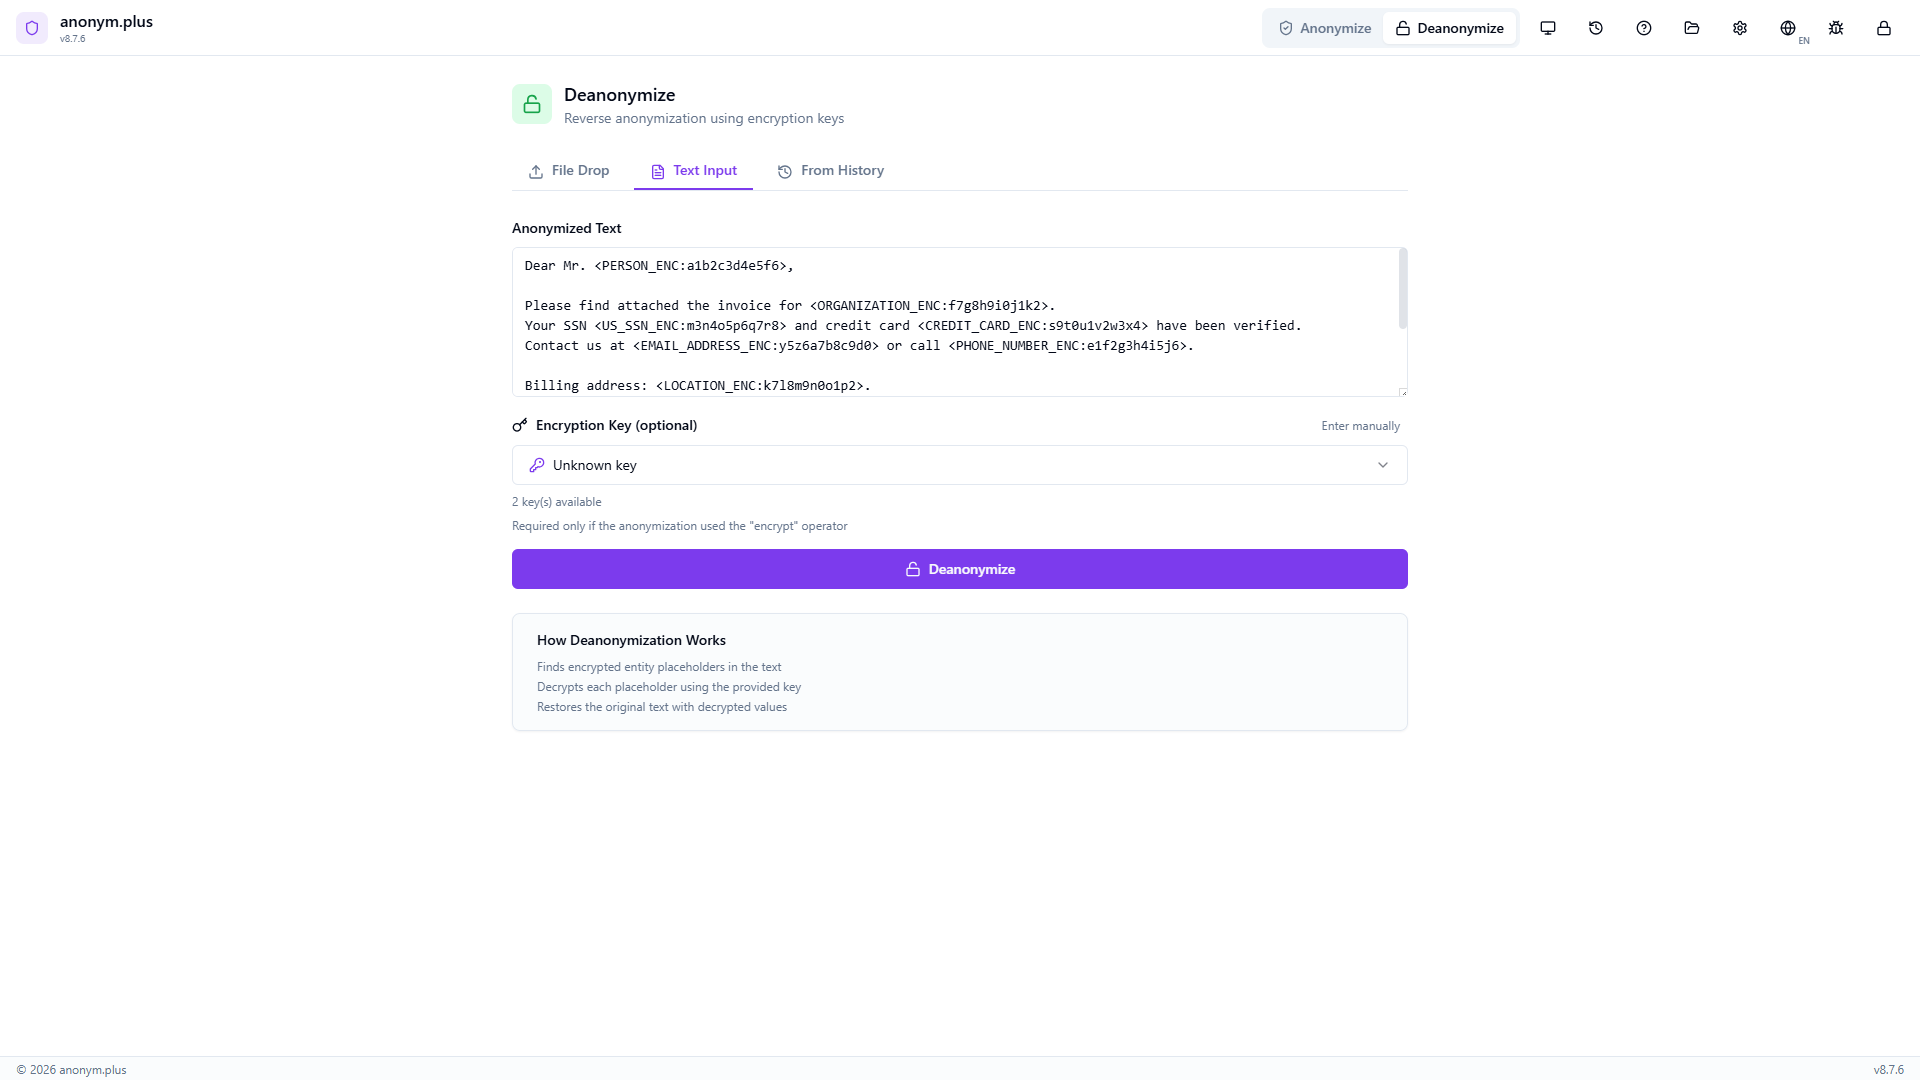
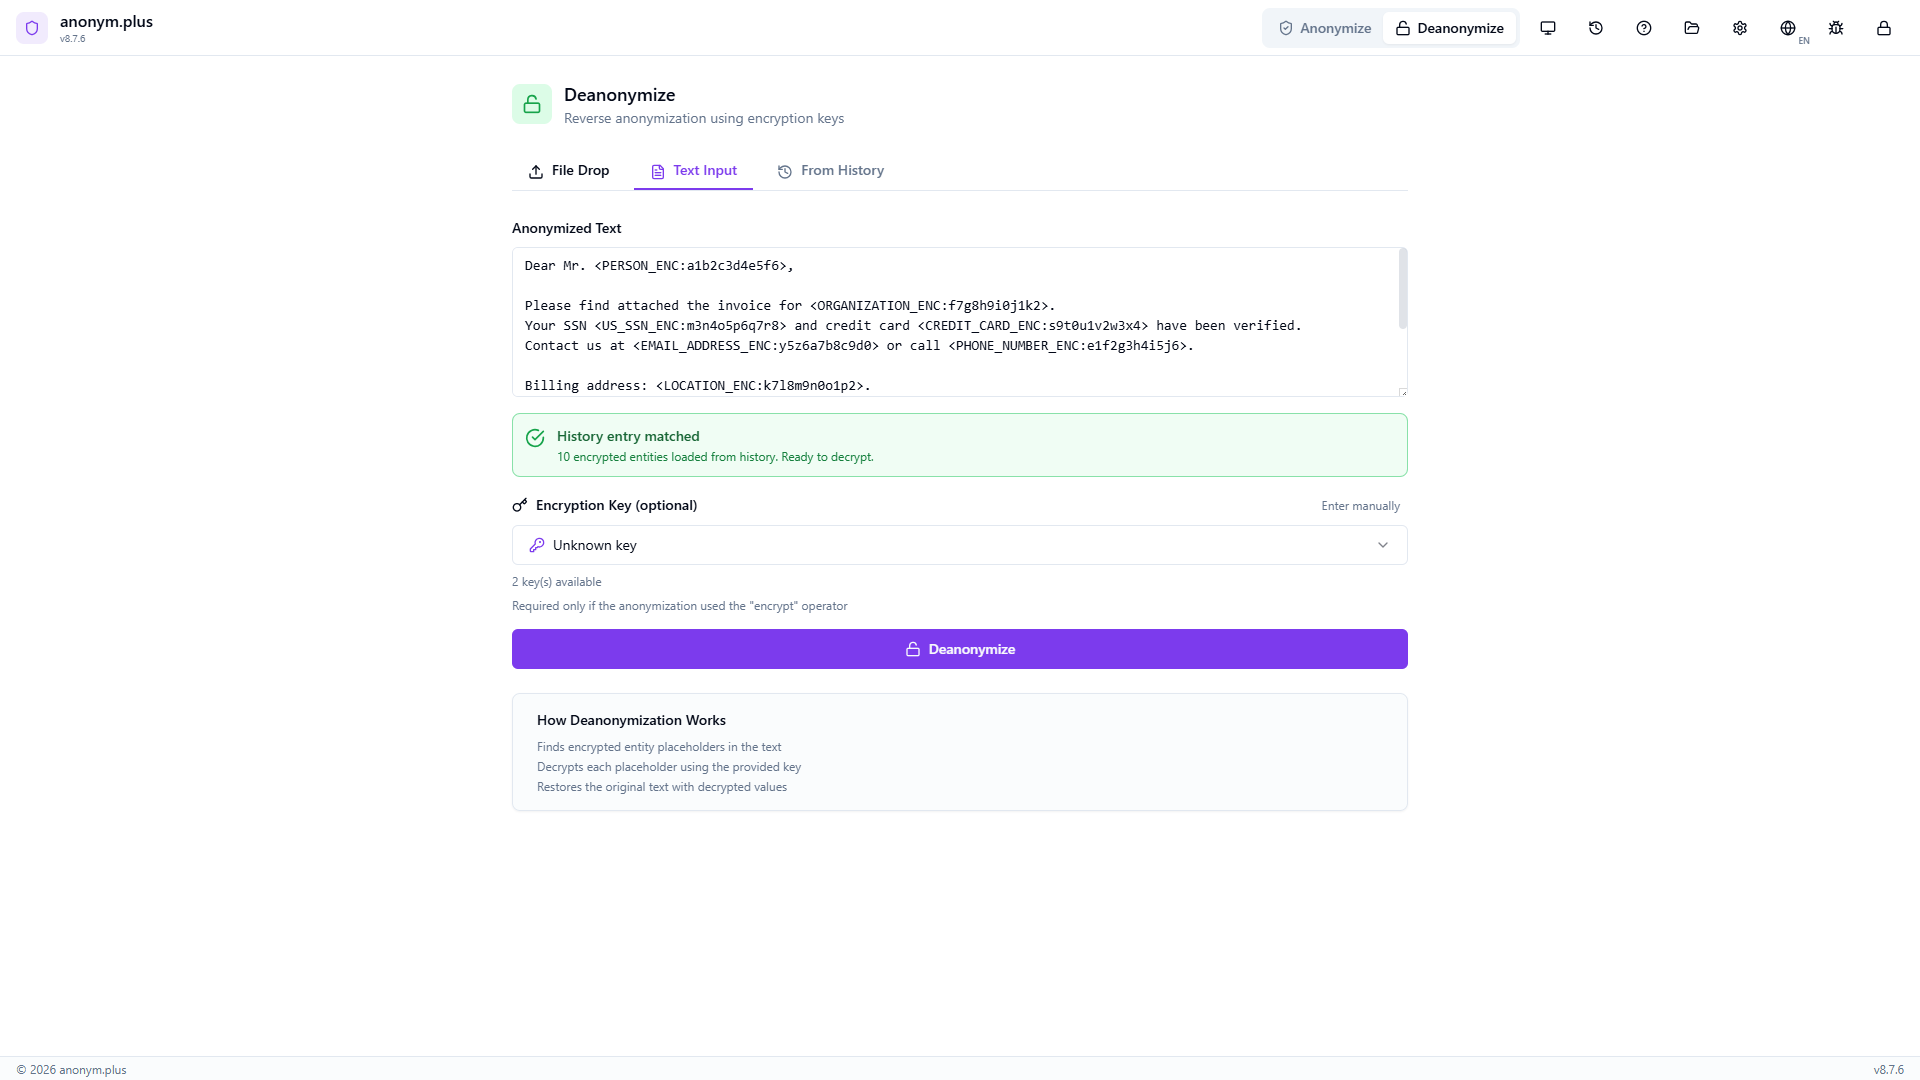
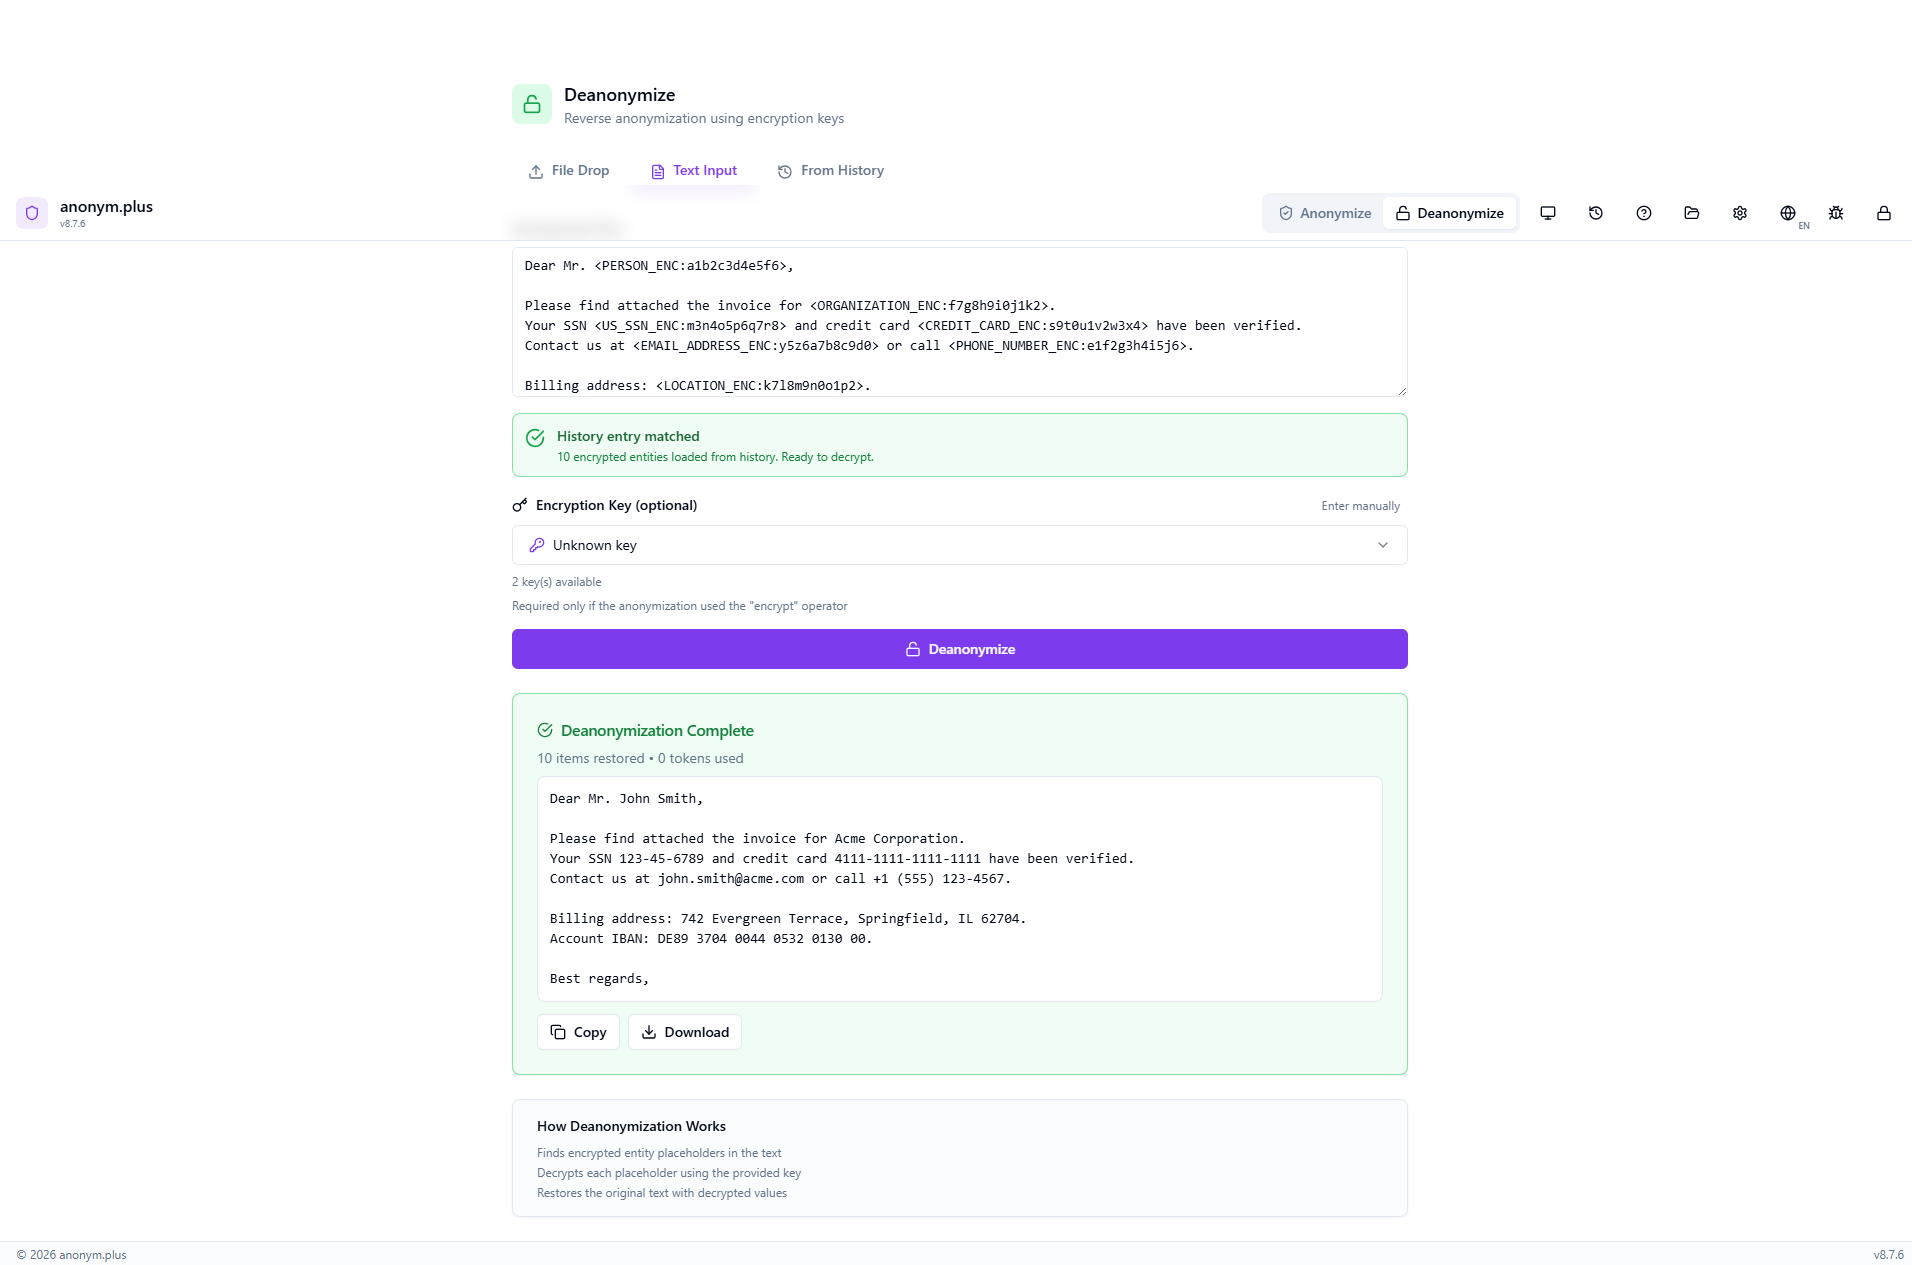
The encrypted text is pre-loaded in the Text Input tab with tokens like <PERSON_ENC:a1b2c3d4e5f6> and <ORGANIZATION_ENC:f7g8h9i0j1k2>. The encryption key selector shows 2 keys available. A green “History entry matched” banner confirms 10 encrypted entities loaded.
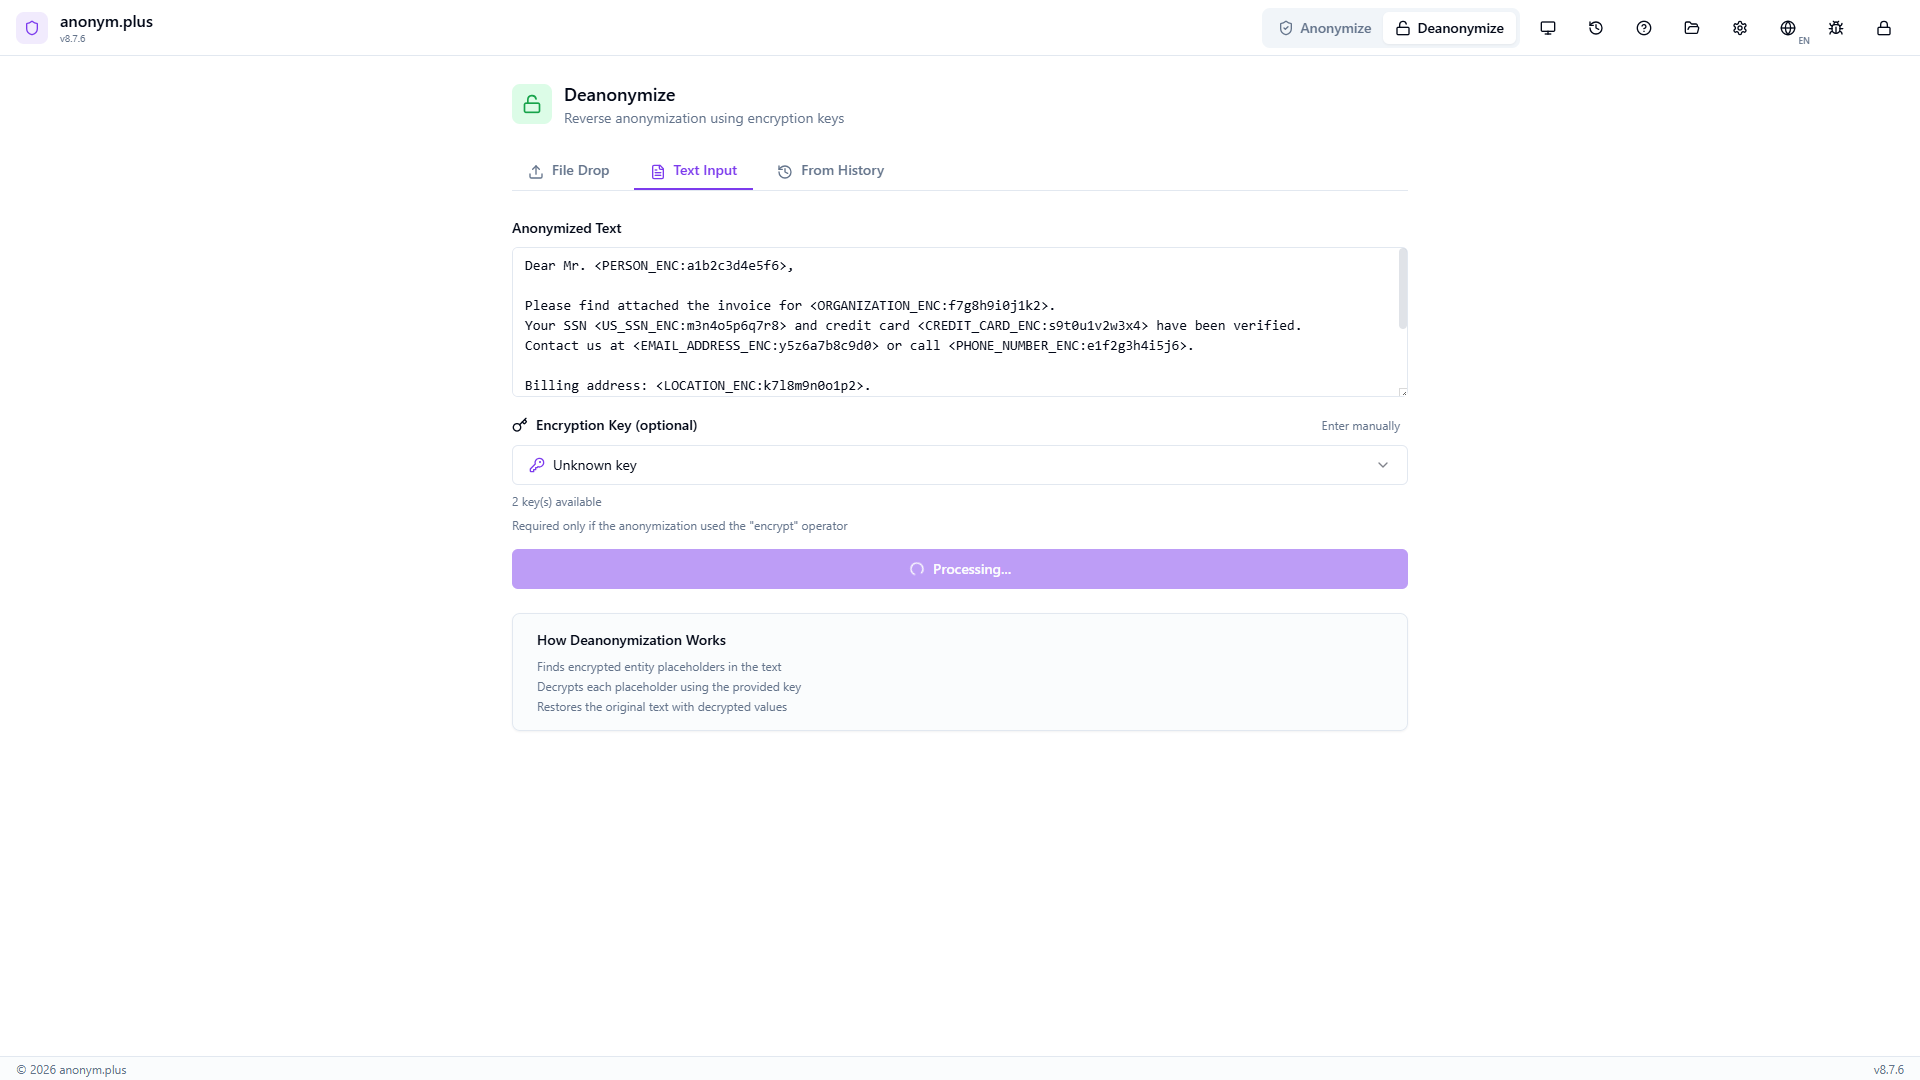
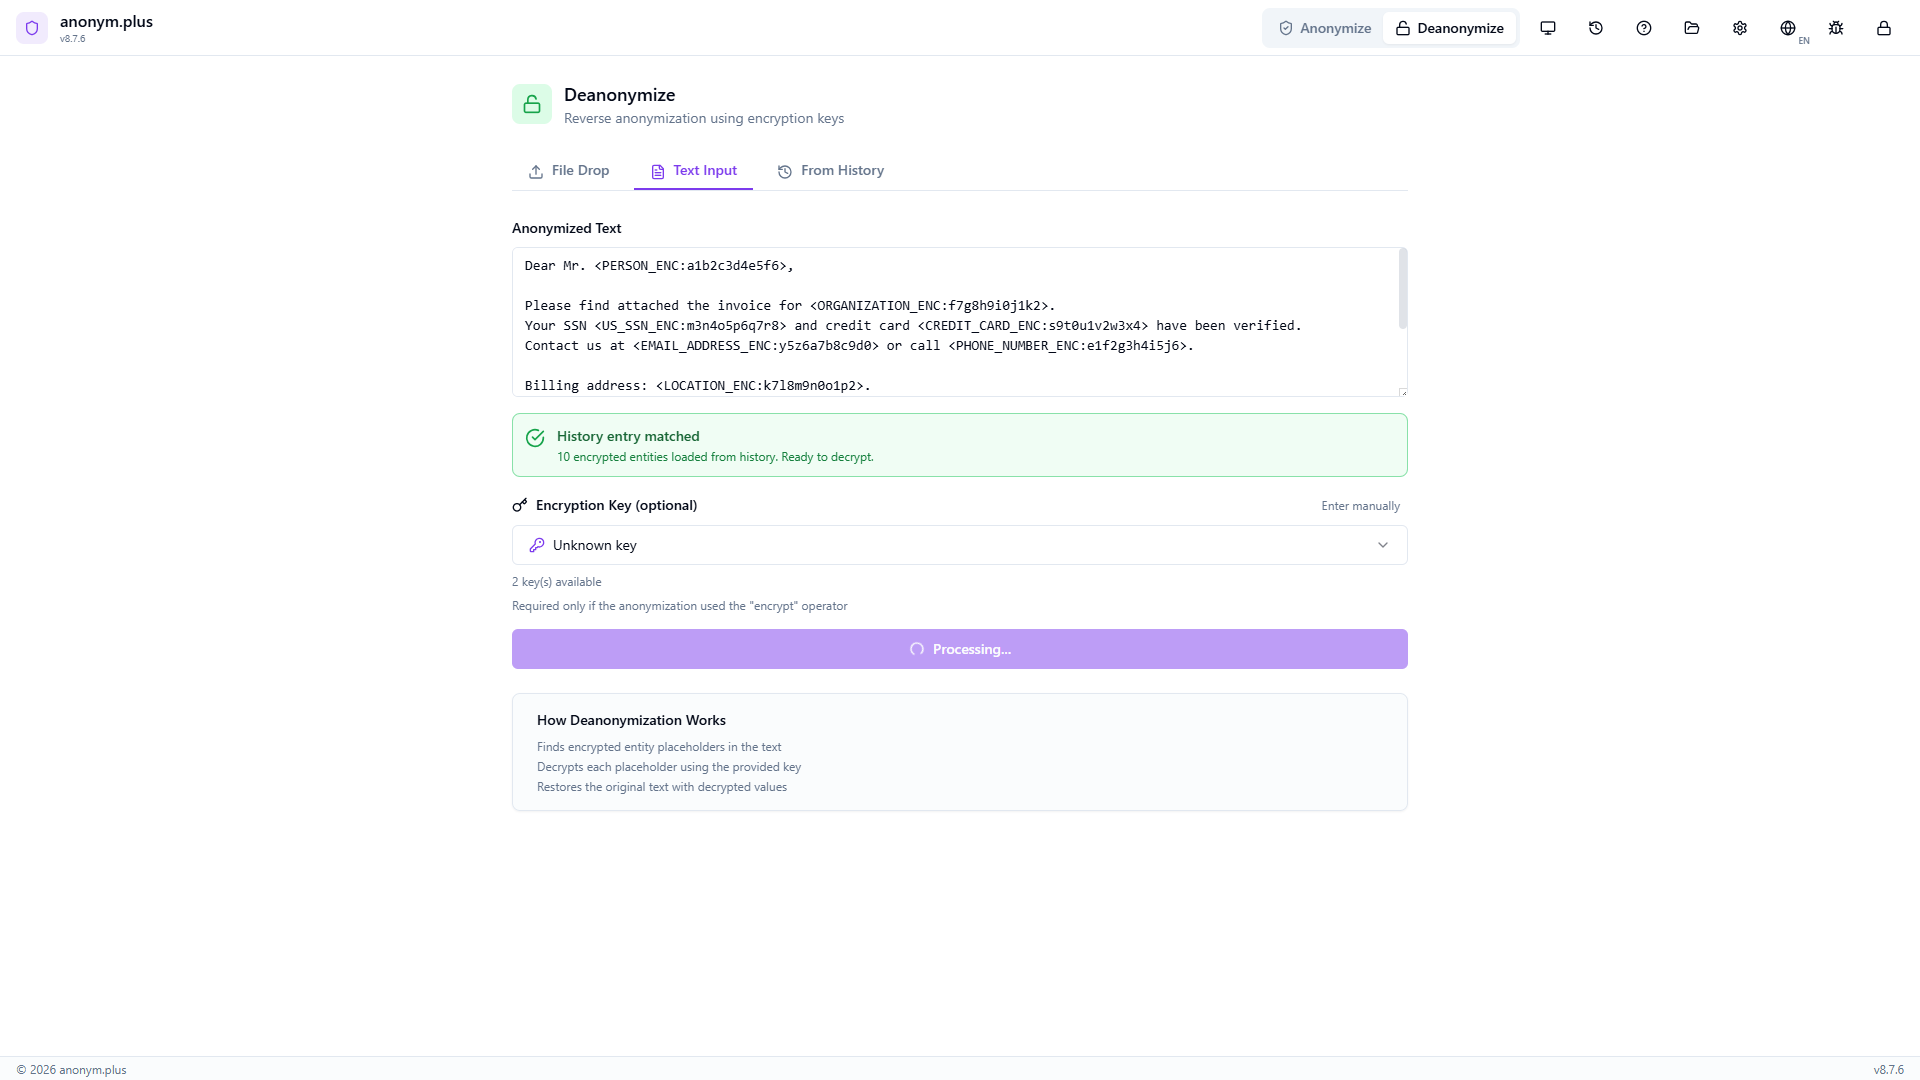
Click “Deanonymize” to process each encrypted token. A loading state appears during decryption.
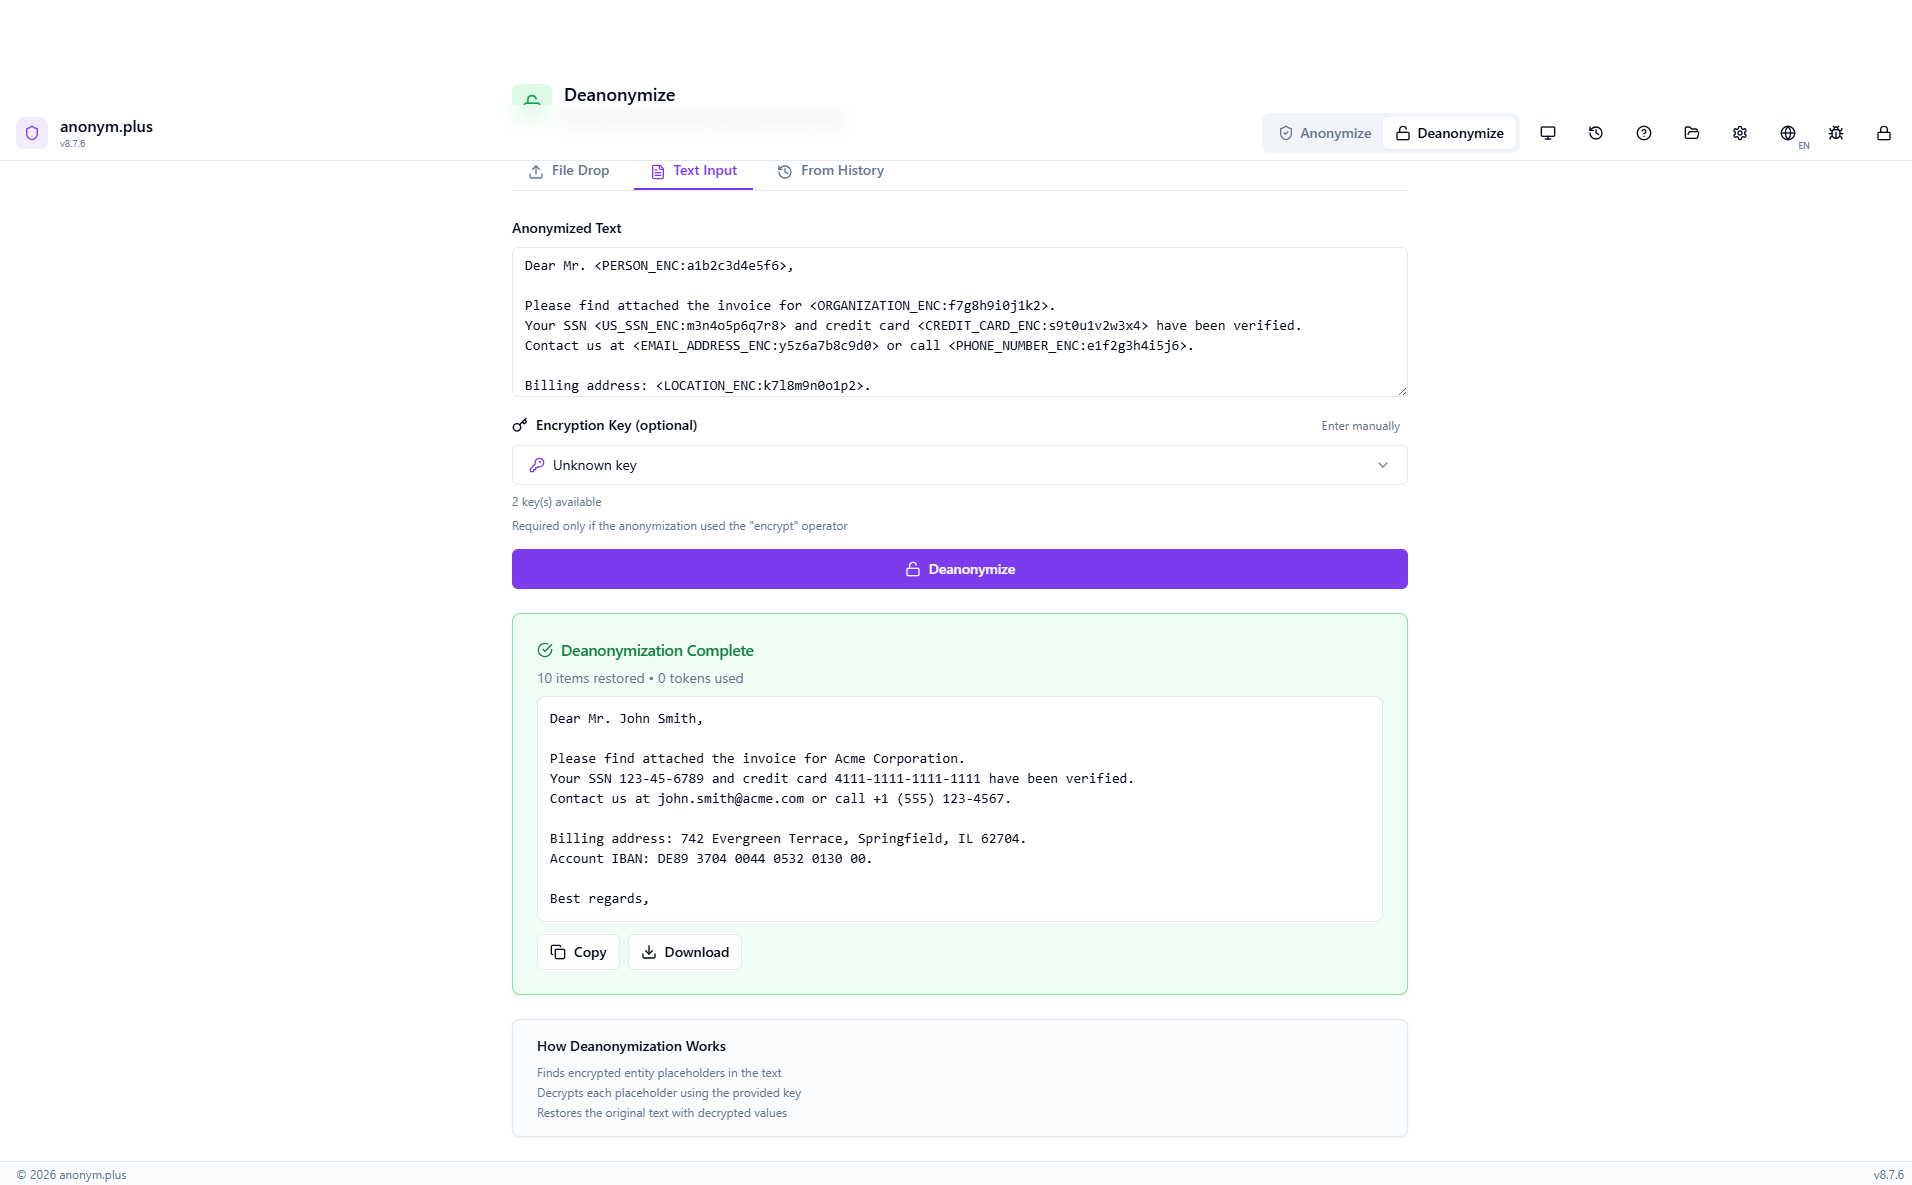
“Deanonymization Complete” la tarjeta muestra “10 items restored, 0 tokens used”. El texto completamente descifrado muestra todos los PII originales: John Smith, Acme Corporation, 123-45-6789, 4111-1111-1111-1111, john.smith@acme.com, +1 (555) 123-4567, 742 Evergreen Terrace Springfield IL 62704, and IBAN DE89 3704 0044 0532 0130 00. Botones de Copiar y Descargar disponibles.
Paso a paso: Desanonimizar mediante arrastrar archivo
Drop an encrypted file to automatically extract text, match against your history, and decrypt all PII.
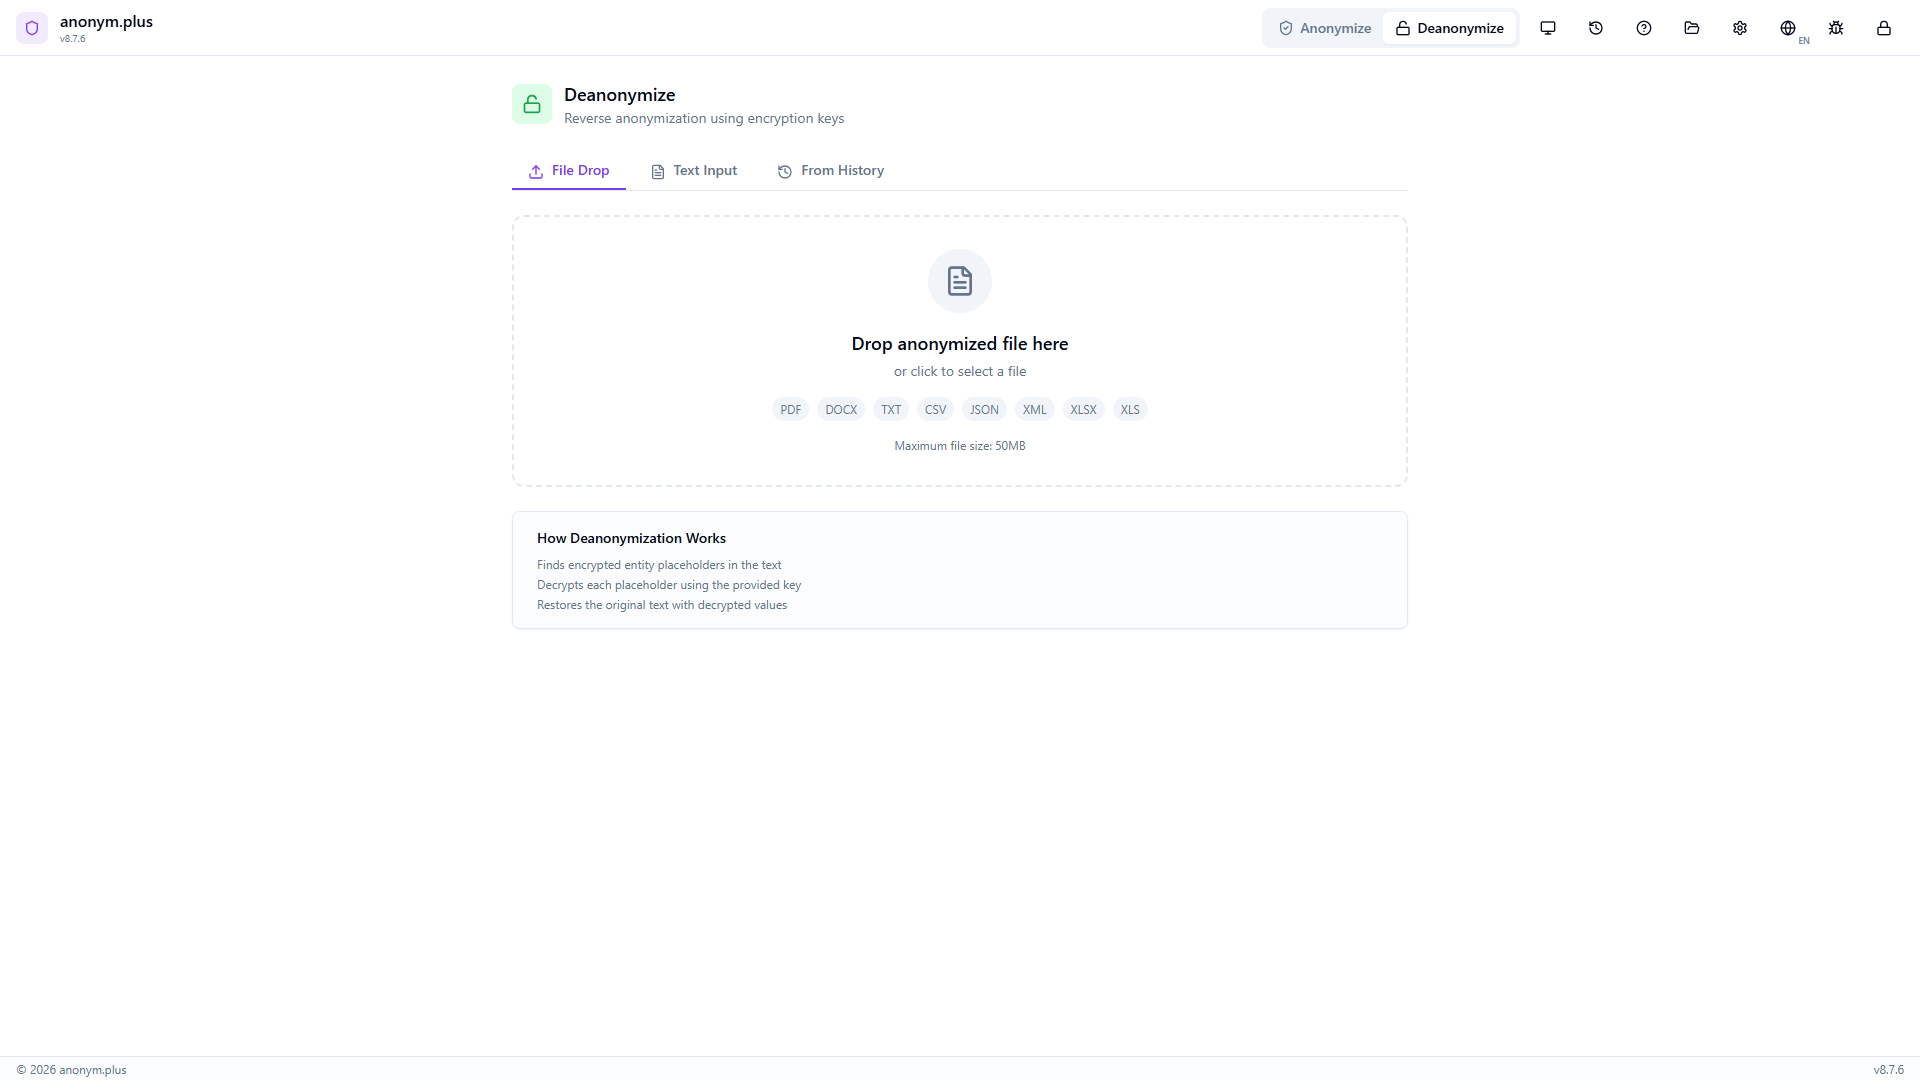
The Deanonymize panel shows the File Drop tab with a dropzone accepting anonymized documents (PDF, DOCX, TXT, CSV, JSON, XML, XLSX, XLS up to 50MB). “How Deanonymization Works” info box visible below.

Drop business-letter_anonymized.txt. The encrypted text is extracted and displayed in the text area with tokens like <PERSON_ENC:a1b2c3d4e5f6> visible. The encryption key selector shows 2 keys available.
The app automatically searches your processing history and finds a matching entry. A green “History entry matched” banner appears: “10 encrypted entities loaded from history. Ready to decrypt.” The correct encryption key metadata is loaded.

The encryption key is confirmed. The matched history indicator is visible. The “Deanonymize” button is ready.

Click “Deanonymize” to decrypt all encrypted tokens using the matched encryption key.
Desanonimización de archivo completa — todos los valores PII originales restaurados incluyendo nombres, SSN, tarjeta de crédito, correo electrónico, teléfono, dirección e IBAN. Botones de Copiar y Descargar disponibles.
Cómo desanonimizar
- Switch to 'Deanonymize' mode using the toggle in the header
- Drop a file, paste text, or select from history — keys load automatically
- If auto-match fails, manually select the encryption key
- Click 'Deanonymize' to restore original values
- Copiar or download the restored text
Encrypt → Share → Edit → Decrypt
You can encrypt a document, share it with collaborators, receive it back with edits, and still decrypt the PII:
Preajustes de detección
Pre-configured entity detection profiles for different use cases. 121 built-in presets across 7 categories.
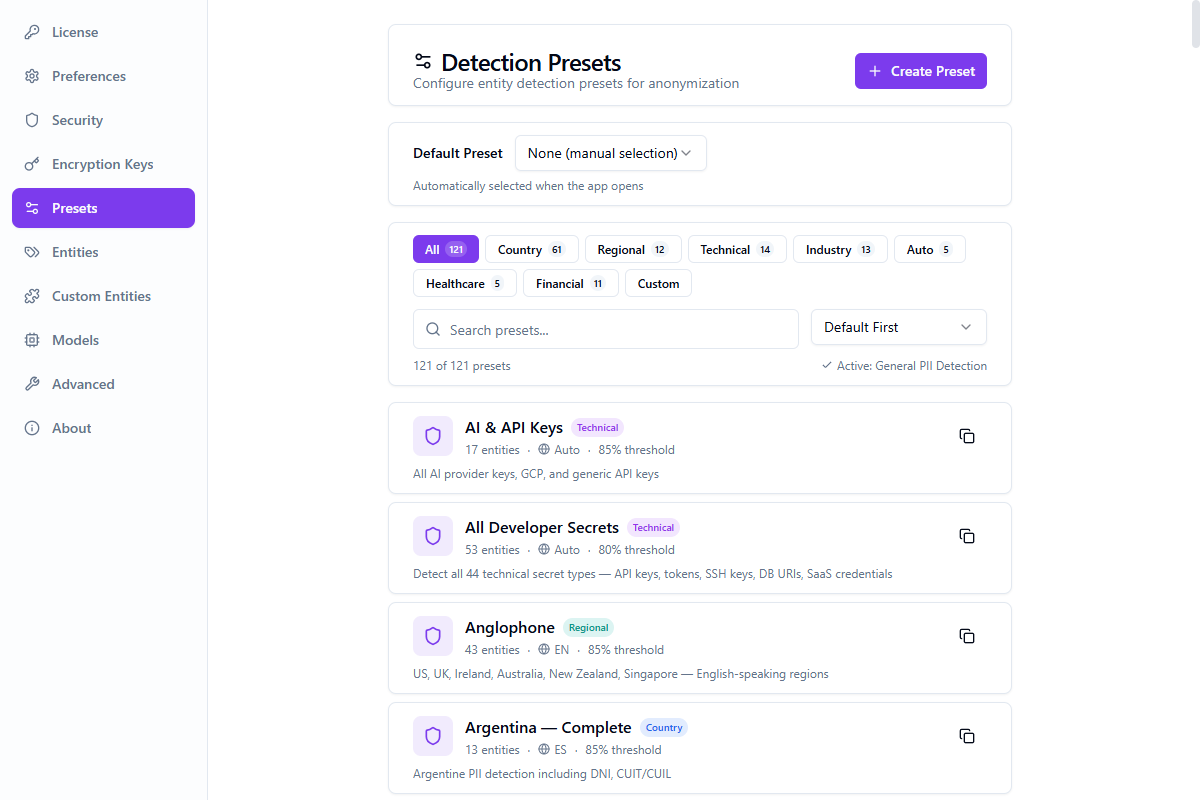
| Preset | Descripción | Threshold | Entity Types |
|---|---|---|---|
| General PII Detection | Comprehensive detection for common PII types | 0.85 | 10 |
| GDPR Compliance | European data protection requirements | 0.90 | 10 |
| HIPAA Medical | US healthcare PHI protection | 0.90 | 9 |
| Financial Services | Banking and financial data | 0.95 | 10 |
| Development & Testing | Lightweight preset for dev environments | 0.70 | 5 |
| Multi-Language European | Multi-language support for EU markets | 0.85 | 9 |
Preajustes personalizados
Create your own presets in Settings → Presets. Select entity types, set operators, and configure confidence thresholds. Custom presets are stored in your vault.
Entidades personalizadas
Define your own PII entity types using regular expression patterns. Custom entities are detected alongside built-in types during anonymization.

Crear una entidad personalizada
Navigate to the Custom Entities tab in Settings
Click "Add Custom Entity" and provide a name and regex pattern
Use the inline pattern tester to verify matches with real-time highlighting
Save the entity — it's now available in all presets and analyses
Pattern Guidelines
- Use standard JavaScript regex syntax (no delimiters needed)
- Patterns are validated for ReDoS safety — catastrophic backtracking patterns are rejected
- Test with real sample data using the inline tester before saving
- Use named groups
(?<value>...)to capture only the relevant part of a match
Import & Export
Custom entity definitions can be exported as JSON and imported on another machine or shared with team members. This makes it easy to standardize detection rules across an organization.
Límites
| Parameter | Limit |
|---|---|
| Maximum custom entities | 50 |
| Pattern length | 500 characters |
| ReDoS protection | Enabled — unsafe patterns are rejected |
Claves de cifrado
Manage encryption keys for reversible anonymization.
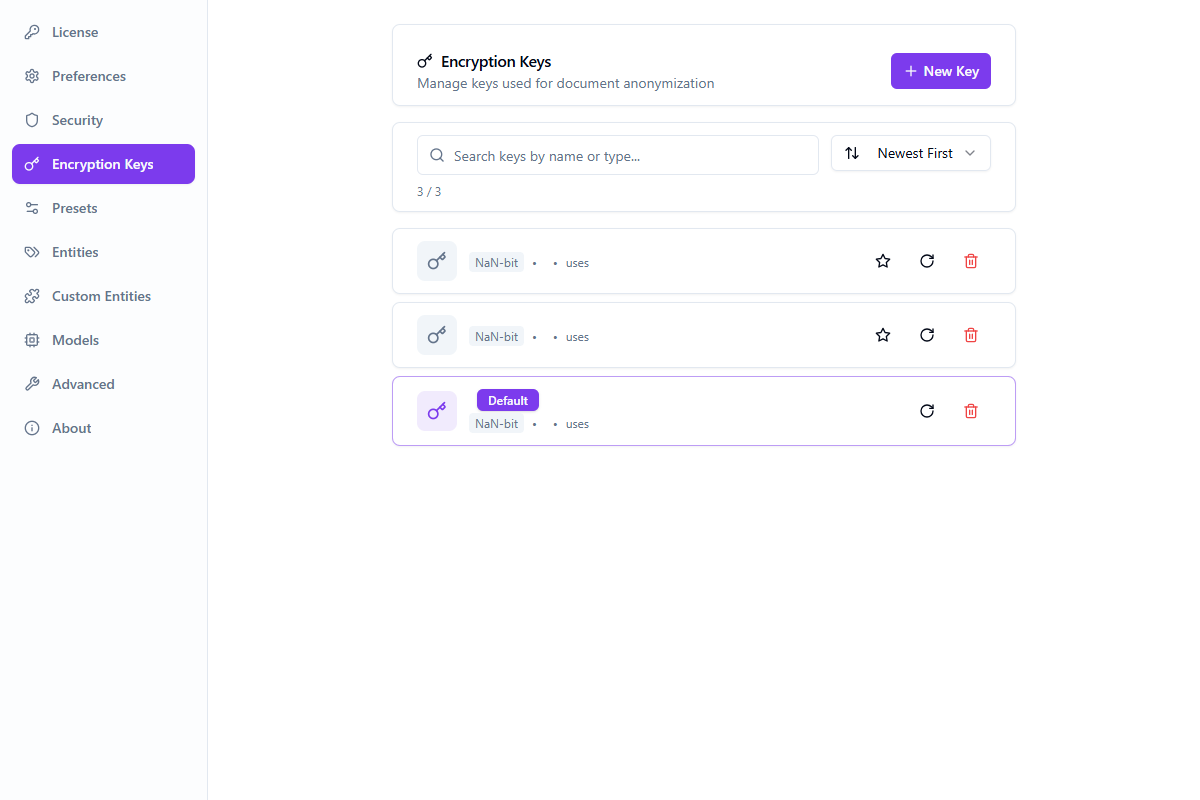
- Create and store encryption keys securely in your vault
- Apply encryption to specific entity types
- Keys are stored locally — only you can decrypt
- Sync keys across devices via your account
How to Use
Historial de procesamiento
View and manage your anonymization history.
- View all processed files with timestamps
- See entity counts and tokens used
- Copiar original or anonymized text
- Use history entries for deanonymization
- History stored locally in encrypted vault
Configuración
Cuenta
- Sign in with browser or ZK authentication
- View license plan and activation status
- Sync presets and encryption keys
- Sign out
Preferences
- Language selection (48 languages)
- Theme (Light / Dark / System)
- Output folder configuration
- Auto-update settings
Seguridad
- Change or set PIN (4–8 digits)
- View recovery phrase
- Vault lock settings
- Reset vault
Claves de cifrado
- Create and manage encryption keys
- Set default key and entity type binding
- Rotate key values (one-time display)
- Keys stored locally in encrypted vault — values never leave your machine
Presets
- 121 built-in presets across 7 categories
- Create custom presets with entity selection
- Configure per-entity-type operators
- Set default preset for auto-selection
- Duplicate built-in presets as custom
Entities
- Enable/disable 200+ PII entity types globally
- Search and filter by entity group
- Per-group and global Enable All / Disable All
Entidades personalizadas
- Define custom PII types with regex patterns
- Inline pattern tester with real-time highlighting
- Import/export custom entity definitions
- Max 50 custom entities, ReDoS-safe validation
Models
- Download additional language models for PII detection
- 23 spaCy-based languages available
- Check for model updates
- Delete unused models to save disk space
Advanced
- Embedded debug log viewer with cross-window log broadcasting
- Log level configuration
- Data management: export, import, delete, move vault data
About
- App version and build info
- Engine status (PII detection engine)
- Download and install updates
- Links to documentation and support
Atajos de teclado
| Shortcut | Action |
|---|---|
| F1 | Open help panel |
| Ctrl + , | Open settings |
| Ctrl + O | Open file |
| Ctrl + H | Toggle history panel |
| Ctrl + Shift + D | Toggle debug log window |
| Escape | Close panels |
Seguridad
Vault Encryption
Your sensitive data is protected with military-grade encryption.
- AES-256-GCM encryption for all stored data
- Argon2id key derivation (64 MB memory, 3 iterations)
- BIP39 24-word recovery phrase
- PIN-based quick unlock for daily use
- Sensitive data zeroized from memory when locked
How Your Data is Processed
What We Never Store
Solución de problemas
| Issue | Solution |
|---|---|
| App shows white screen | Try restarting the app. If persists, reset vault in Settings > Security. |
| Forgot PIN | Use your 24-word recovery phrase to reset the vault. |
| Lost recovery phrase | If vault is unlocked, view it in Settings > Security. Otherwise, data cannot be recovered. |
| Files not processing | Check file size limits. Ensure the correct file format is used. |
| Sign in with Browser not working | Ensure your default browser allows the anonym-plus:// protocol. |
| Presets not loading | Check internet connection. App will use offline fallback presets. |
| Image analysis returns no entities | Verify the correct OCR language is selected. Ensure clear, readable text at 300+ DPI. Use screenshots instead of photos of screens. |
| Image redaction misses some text | OCR may struggle with handwritten text, very small fonts, skewed text, or complex backgrounds. Straighten the image and increase contrast. |
| Image upload fails | Check: supported format (PNG, JPG, BMP, TIFF), under 10 MB, under 25 megapixels. |
| 'No anonymized entities found' | The text doesn't contain entity markers. Auto-match against history or select from the 'From History' tab. |
| 'Decryption failed' | Ensure you're using the same encryption key from anonymization. Verify in Settings → Encryption Keys. |
| PII detection engine not running | Check engine status in Settings → About. Click restart. Check debug log (Ctrl+Shift+D). |
| Custom entities not detected | Ensure the entity is enabled in Settings → Custom Entities and the regex pattern matches. |
Mensajes de error
| Message | Meaning |
|---|---|
No text content found | The file appears to be empty or contains only images. |
Analysis failed | Ensure the PII detection engine is running. Check Settings → About. |
Extraction data not found | The file needs to be re-analyzed. |
Image too large | Exceeds 10 MB size or 25 megapixel limit. Resize before uploading. |
No text detected in image | OCR could not extract text. Ensure readable printed text with sufficient contrast. |
No anonymized entities found | Text doesn't contain entity placeholders or encrypted chunks. Select from History tab. |
Decryption failed | Encryption key mismatch. Verify the correct key in the dropdown. |
Encryption keys not found | Keys need re-importing. Go to Settings → Encryption Keys. |
Frequently Asked Questions
Jump to: Seguridad · Anonymization · Desanonimización · Claves de cifrado · Batch · Presets · Entidades personalizadas · Images · Models · History · Licensing · Updates · Solución de problemas
Soporte
Need help? Reach out through any of these channels:
- Documentation — this page
- Contact Support — submit a support request
- In-app bug reporting — use the bug icon in the app header to report issues with diagnostic information